Quote from: jbrock27 on November 23, 2014, 06:43:30 PM
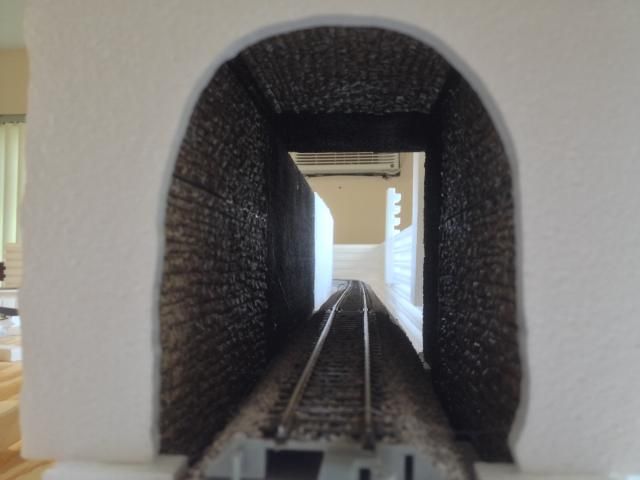
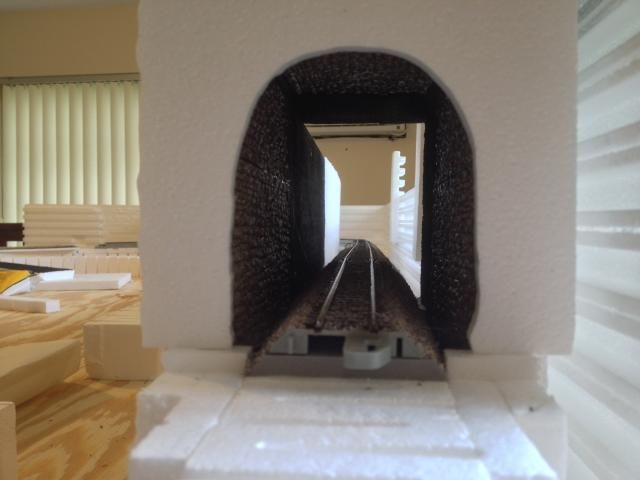
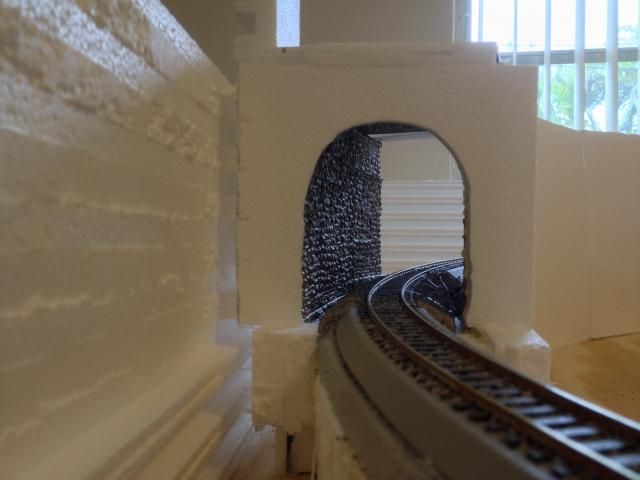
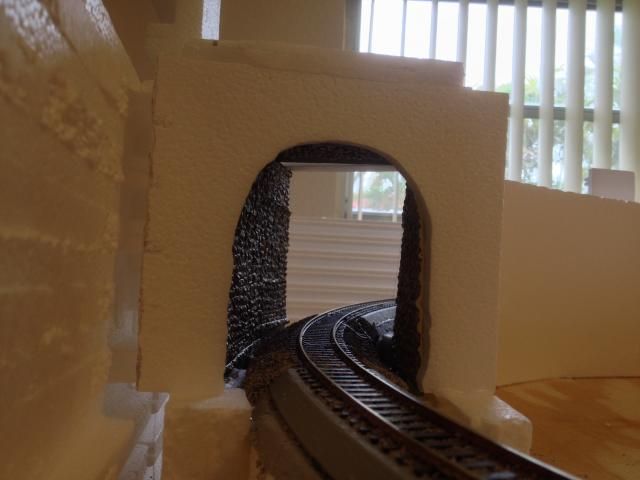
That was a great idea on the tunnel. I love the look!
A Happy Thanksgiving to you and yours as well
Thank you and,
thank you
Please read the Forum Code of Conduct >>Click Here <<
This section allows you to view all posts made by this member. Note that you can only see posts made in areas you currently have access to.
Quote from: jbrock27 on November 23, 2014, 06:43:30 PM
That was a great idea on the tunnel. I love the look!
A Happy Thanksgiving to you and yours as well


Quote from: Nappen on November 22, 2014, 01:44:32 PM
Hi all,
First, I am a complete novice with trains, but my daughter has the Bachmann Alaska Rail set, a bunch of other track and cars, and a second set (rail chief that was 20 bucks because the locomotive was missing but all else was there).
When she sets up a large tracks, it seems that the power lessens far away from the power source. Is there a way to boost the power from the standard power supplies that come with the sets? I figure hooking two up would not be wise.
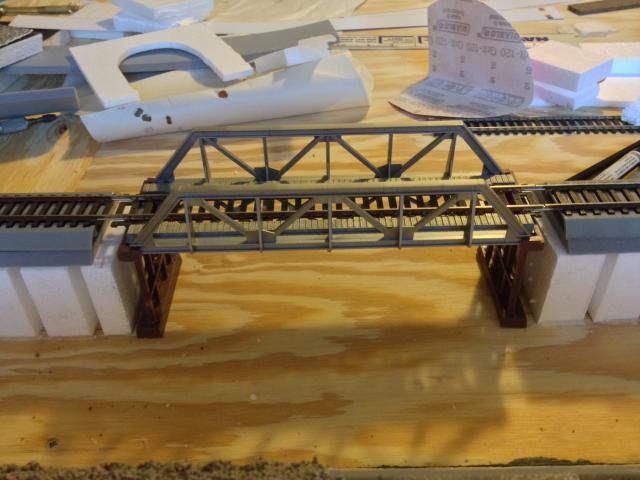
Quote from: jbrock27 on November 21, 2014, 10:08:29 AM
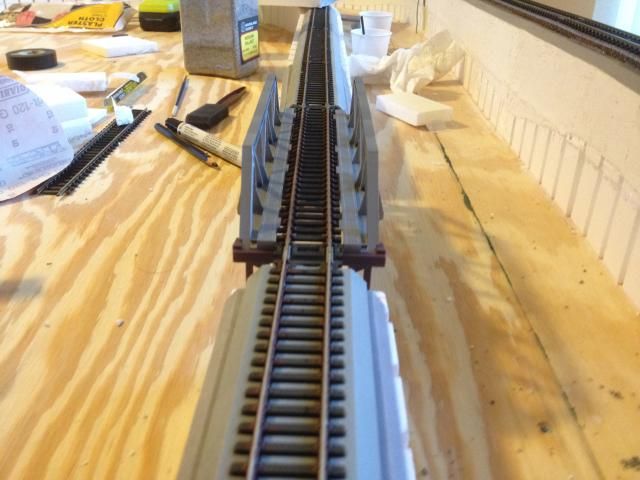
Nice retro bridge and trestle there! Who made that one: AHM
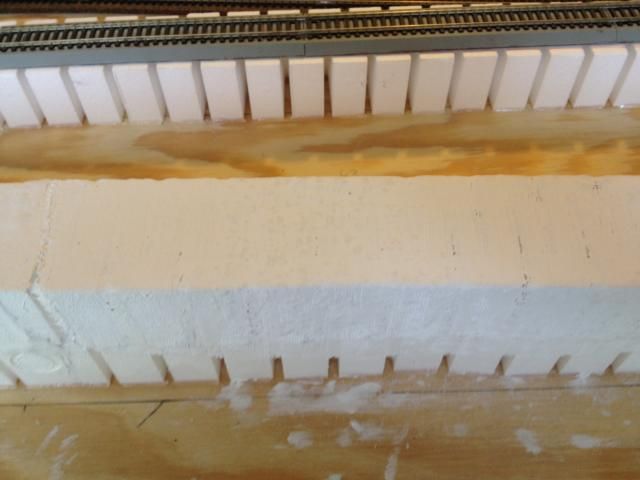
Before I glue assembled ours together (AHM and 2 actually) I spray painted the trestles of the bridge section flat black and then after assembly, I painted the walkways on either side of the track platform, wood color. Makes a difference. Before switching to Atlas grey stone block piers, I spray painted the wood looking piers a brown (Rustoelum primer).
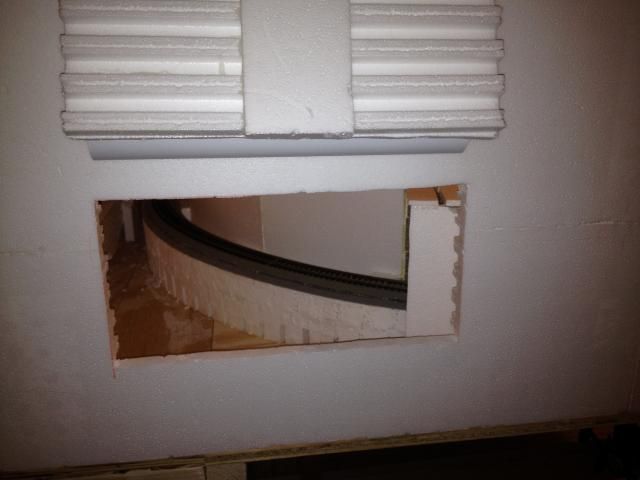
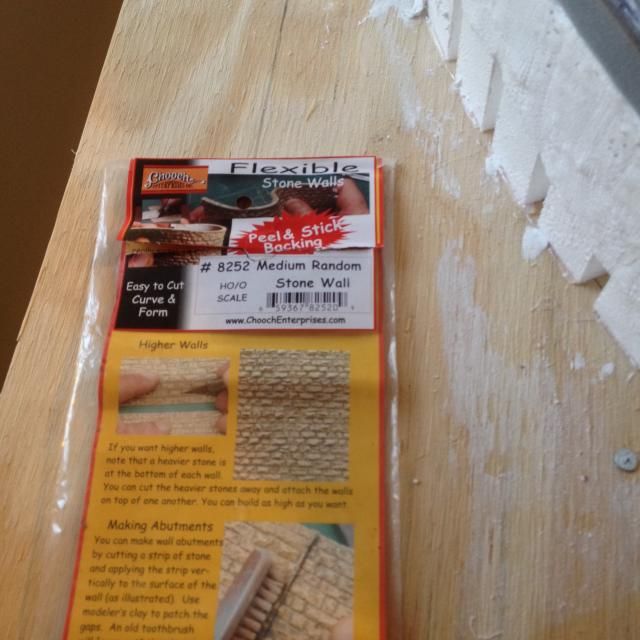
Quote from: Joe323 on November 21, 2014, 08:38:54 AM
Hmm never thought of using the Chooch flexible walls as a tunnel liner.
Quote from: wiley209 on November 21, 2014, 12:25:55 AM
Nice retro bridge and trestle there! Who made that one: AHM, Life-Like, Model Power, TYCO or Walthers?
I'm also working on an E-Z Track layout for the local hobby shop's museum.

Quote from: jonathan on November 16, 2014, 08:15:59 AM
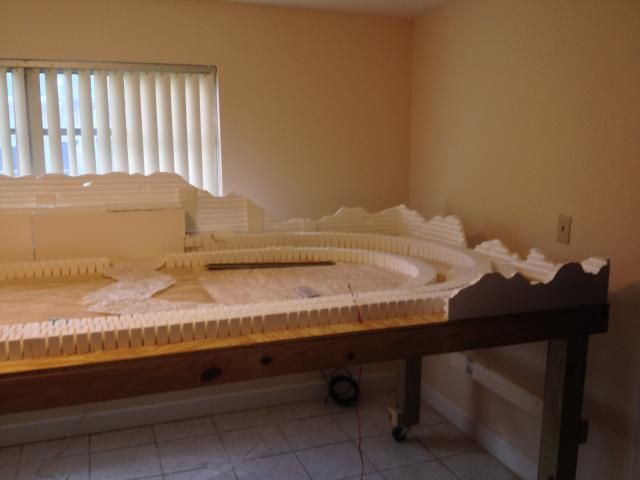
I am really enjoying your work as the layout progresses. Sharing your work with photos is makes all the difference. Thanks for letting us watch your layout grow.
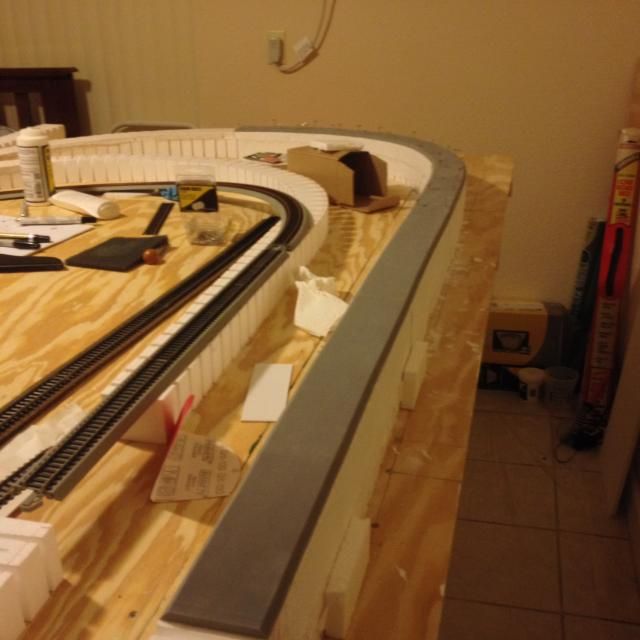
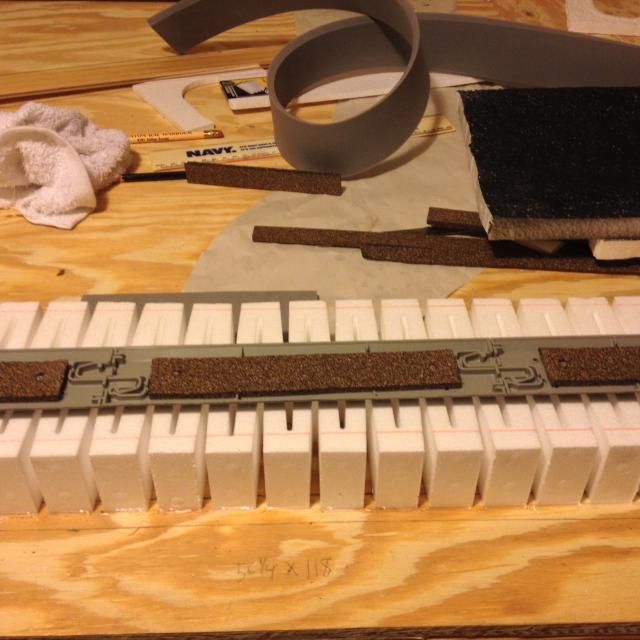
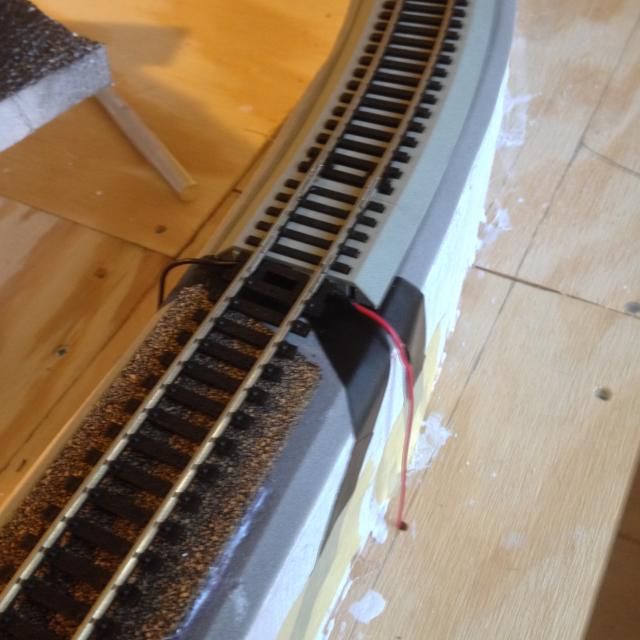
I like your weather stripping under the EZtrack. Looking forward to watching a train run across the rails.
Regards,
Jonathan
so a mix of old and new will be used for my layout.
Quote from: Trainman203 on November 12, 2014, 09:06:10 PM
Ok I got the picture in a photobucket account. I can't figure out how to get it into a post now.
Quote from: Doneldon on November 11, 2014, 04:57:22 AM
Saved-
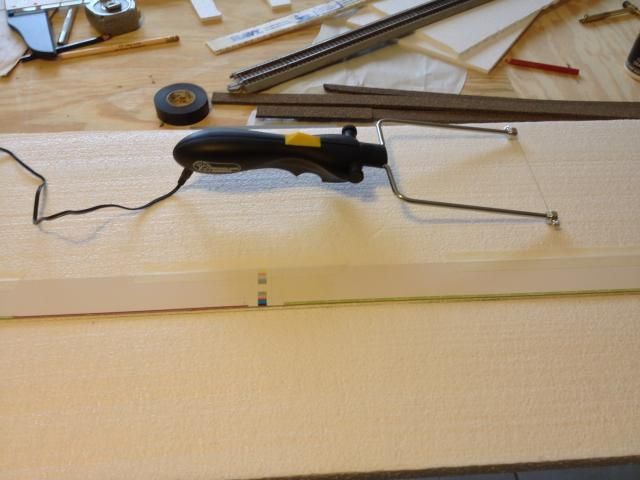
You can cut plastics with your Dremel if you lower the RPMs. At full speed your abrasive or saw creates high heat which has the potential to distort the things you are working on, including the parts you want to retain. So ... turn the RPMs way down. You'll give up a little speed of cutting, sanding and drilling, but your work will be more accurate and less likely to degrade your final product. Many Dremels have this ability on board. If yours don't, you can get a rheostat into which you plug your tool to get the same control.
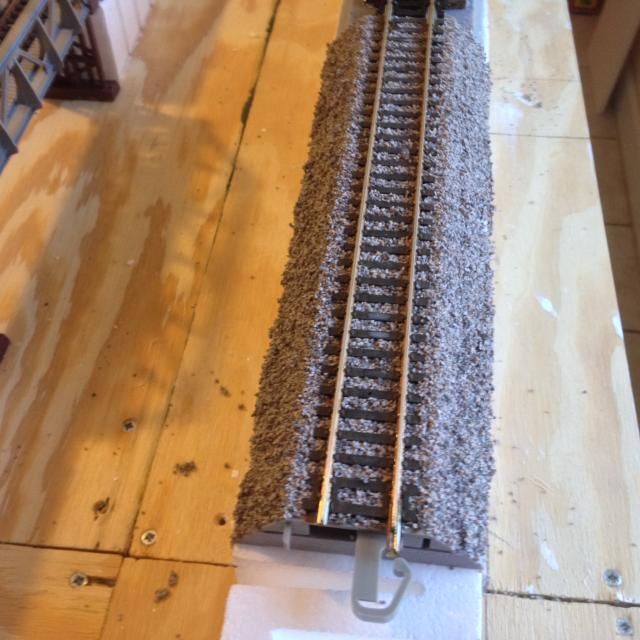
Be careful with that fine gray ballast around the moving parts of your turnouts. My friends use almost powdered ballast, not just small ballast. They are mainly concerned with color matching but aren't worried about texture.
-- D
i'll post pics of the final results when i do it.
Quote from: jbrock27 on November 10, 2014, 07:01:50 PM
Yes Doc, thank you I realize the difference.
As you put it in the context you did, I now understand why you said what you did.
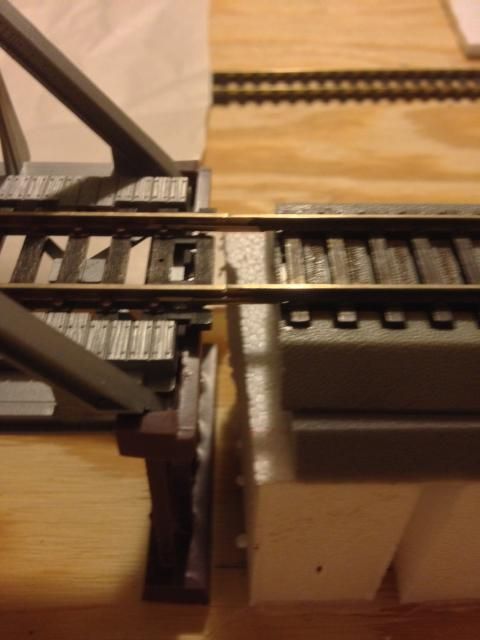
Instead of calling roadbed track an improvement over traditional sectional track though, I would instead agree it provides a different option. As you point out, it stays together better than the job rail joiners do alone on traditional sectional track (which can be solved by soldering the rail joiners together and this also helps keep sections in line-I like to join 3 sections together by soldering them and this makes it easier to work with.) This makes roadbed attached track ideal for setting up and taking apart layouts that are temporary, where traditional sectional track is not meant for that.
Saves And A Beauty, I love my Dremel tool too! Just be careful to wear eye protection when using it-I have had bits of brass and plastic get flung all over the place.

Quote from: Doneldon on November 10, 2014, 03:31:50 AM
Saved-
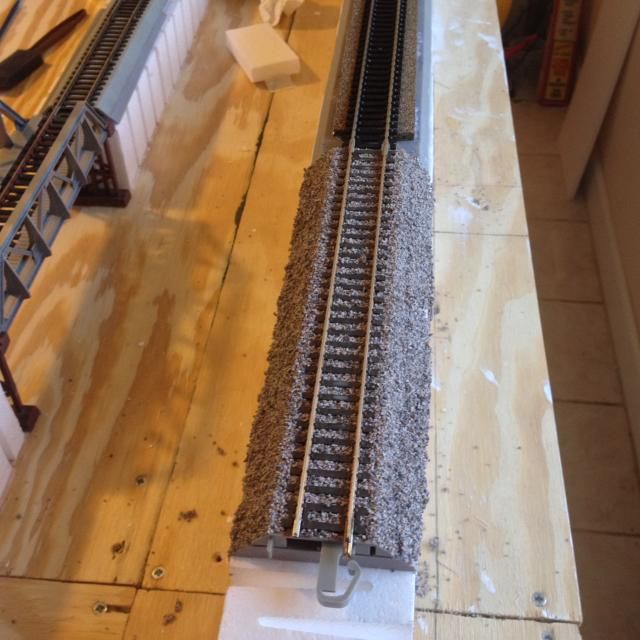
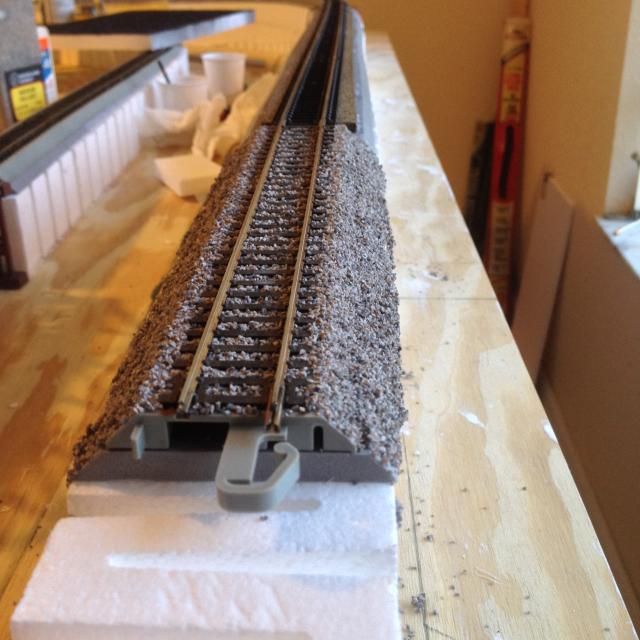
Thank you for the excellent, illustrative photos of your layout's progress. I must say, your sweeping curves and elevation changes are rhythmic and lovely to look at. Why, they're almost to graceful to cover up with track and scenery! You did just a great job with the WS materials.
As regards cutting roadbed attached track, I've used a cut-off wheel in a Dremel tool. I carefully measure first and then cut the roadbed and the rails to the exact length I need. The Dremel makes roadbed joints just about invisible if done slowly and carefully, but that doesn't matter if ballast is applied. Although I no longer use roadbed attached track, I think it is an enormous improvement over yesterday's sectional track.
I have friends who crush some of their ballast nearly to powder for the tight clearance areas around turnouts. They use gray paint and sprinkle on the powder to ensure they have a color match without fouling the points or operating rod.
-- D
Quote from: jbrock27 on November 09, 2014, 09:17:15 PM
Jesus Saves, And A Beauty!, never inferred you or anyone had any problems with their EZ track, just pointing out how it is easier to cut non roadbed track with Xuron cutters. To me, that makes for an advantage for the use of sectional track or flex track, w/o roadbed. Not everyone has a band-saw at their disposal.
Nice work, lookin good. The time and planning you are putting in shows.