Sorry guys, not much to report as far as progress over the last month, tender body still in two pieces. Been busy with the usual spring house/yard work and whatnot. Though I was able to order a decoder last week and it came in the mail today. Going to try and get it installed this week and send this thing on its maiden trip around the layout. Will see if I can't get some video to show this thing in action soon.
- Welcome to Bachmann Online Forum.
News:
Please read the Forum Code of Conduct >>Click Here <<
This section allows you to view all posts made by this member. Note that you can only see posts made in areas you currently have access to.
#32
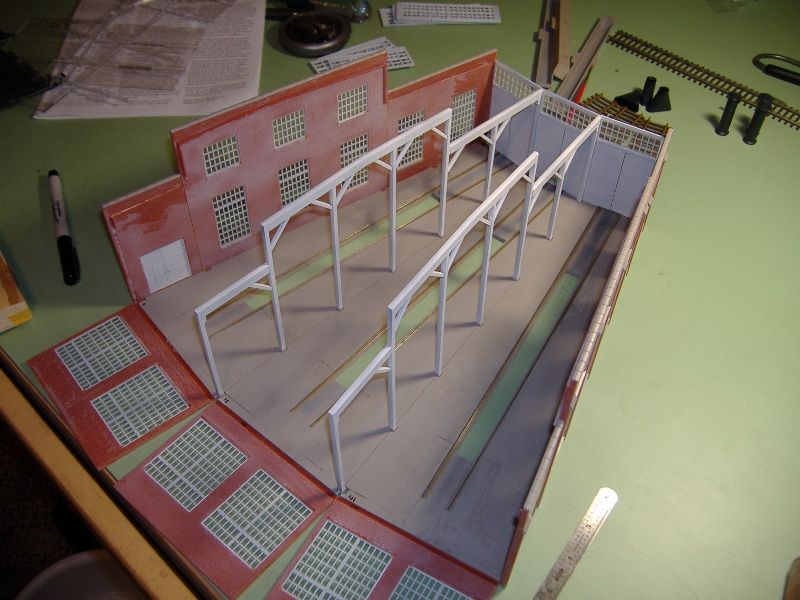
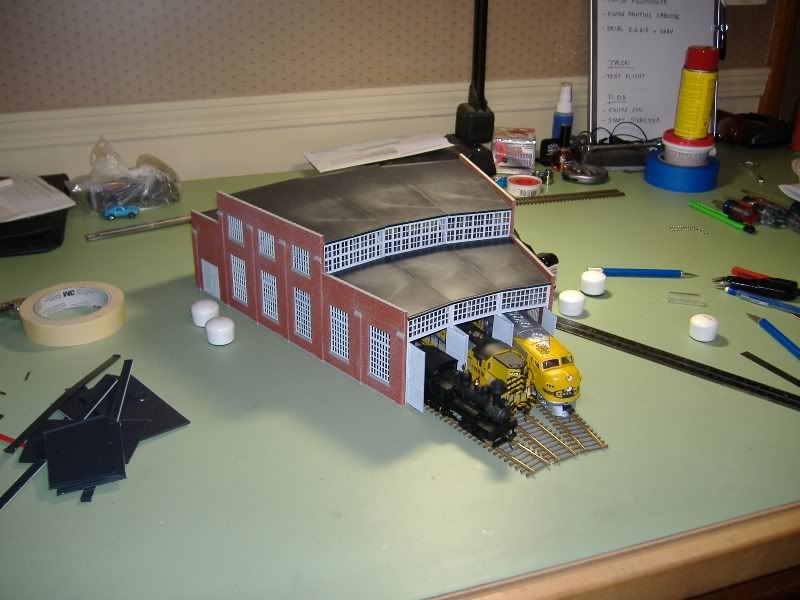
HO / Re: Roundhouse Kitbash Project
June 03, 2013, 04:36:48 PM
What are you doing wasting all that perfectly good peanut butter on backfilling your foundation? Does the creamy or crunchy work better? 
Looks good.
Looks good.
#33
HO / Re: Roundhouse Kitbash Project
May 31, 2013, 04:15:39 PM
Looks good Jonathan. Similar to the mods I did to shrink my Walthers roundhouse.
#34
HO / Re: Thomas1911's Shay Project
May 01, 2013, 01:46:31 PM
Good point, D. It's all just ideas floating around in my head at this point still.
#35
HO / Re: Thomas1911's Shay Project
April 30, 2013, 01:45:33 AMQuote from: WoundedBear on April 29, 2013, 12:45:30 PM
Looking good man.
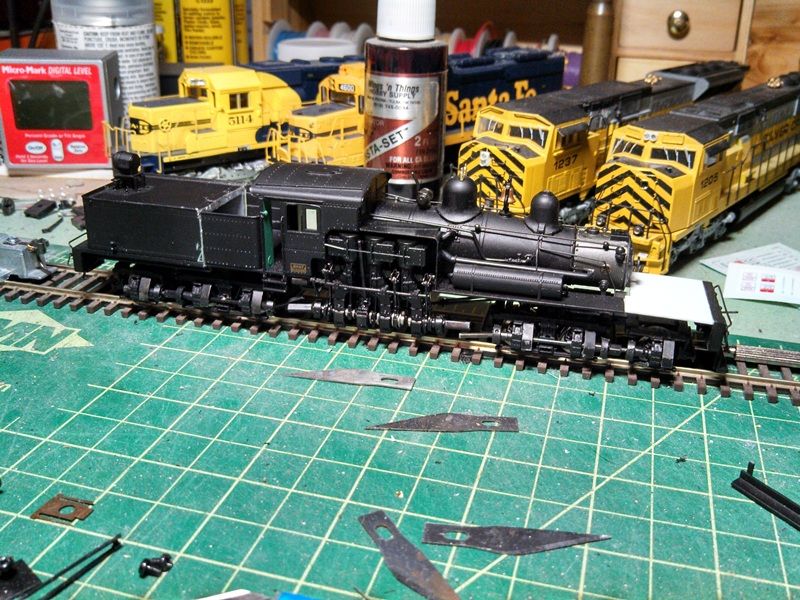
I would try to laminate some styrene to the sides to get the width corrected, then redo the rivets. Looks like that Micro-Mark order may come sooner than later, huh? I think this would look better than the putty route.....but you decide. So far your choices have led you in the right direction.
Sid
That's an idea, Sid. The coal bunker is only .014" wider (.007" per side) than the water tank. I think the thinnest styrene sheet I've seen available is .010", might be a little difficult to work that down evenly. I was thinking after I joined the halves together, I would use some glazing putty or body filler to build up a gentle transition at the joint and sand it smooth. Definitely going to need to place that Micro-mark order soon.
Quote from: BaltoOhioRRfan on April 29, 2013, 04:23:01 PM
Been keeping a close eye on this built. Looks good.'
You gonna put toolboxes on the front deck?
Yup. Planning to do a toolbox or two and probably some loose tools (axes, saws, shovels, etc.) and some coils of chokers. Have to wait and see exactly what there is room for.
#36
HO / Re: Thomas1911's Shay Project
April 29, 2013, 12:40:05 PM
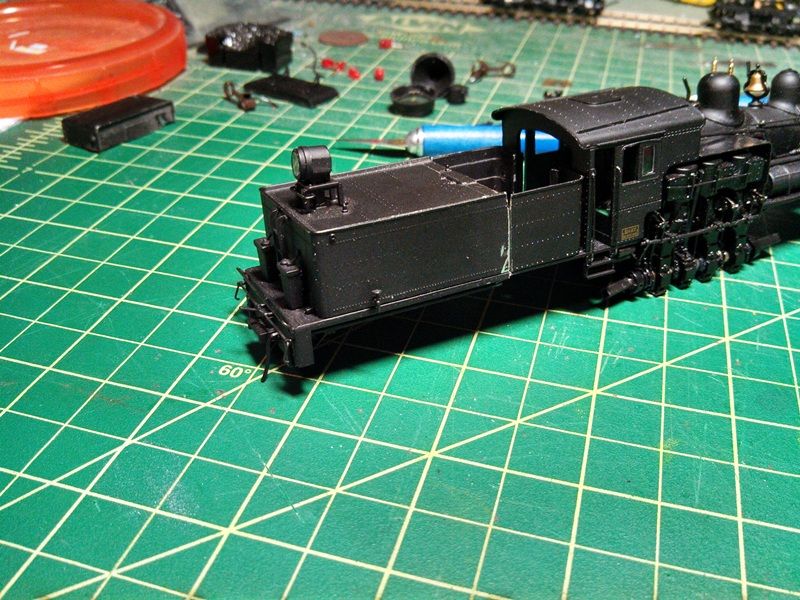
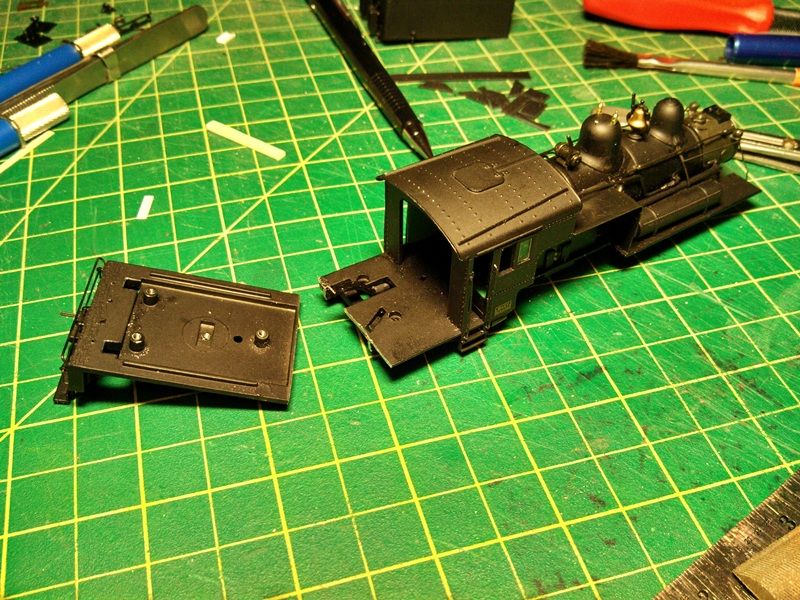
Getting closer, a little more work done fitting the water tank and coal bunker. This is going to take a little more work than I initially thought. The water tank is slightly narrower and slightly taller than the coal bunker. The height issue is easy enough to solve with a shim, but not sure what to do about the width other than blend with some filler after joining. Would mean redoing much, if not all, of the rivet details on the sides. Also, the water tank walls are quite a bit thicker than the coal bunker, so will have to thin them down to reinforce the splice, at least with the way I see in my head.
#37
HO / Re: Thomas1911's Shay Project
April 24, 2013, 05:51:14 PM
Thanks Jonathan. I designed the trucks to run on an 18"R, which is the smallest I plan to use on my logging lines.
#38
HO / Re: Thomas1911's Shay Project
April 24, 2013, 12:37:19 PMQuote from: WoundedBear on April 24, 2013, 11:36:00 AM
I've said it before and I'll say it again..........this is an impressive project! Hopefully you won't have too much rivet detail to redo. I've been using the rivet decals from Micro-Mark....have you tried them yet? I like them better than others I've used in the past.
Keep going Thomas....I'm enjoying this.
Sid
Thanks, Sid. Haven't tried them yet, but I plan to order some soon. There is a few other odds-n-ends I need to order from them as well. I expect there will be some rivet details that I will need to add or replace.
Quote from: jward on April 24, 2013, 11:38:56 AM
it reminds me of a steam version of the sd40-2
I'd say that's probably a fair comparison, Jeff. Maybe I'll start calling this locomotive "Shay-2".
#39
HO / Re: Thomas1911's Shay Project
April 24, 2013, 10:30:29 AM
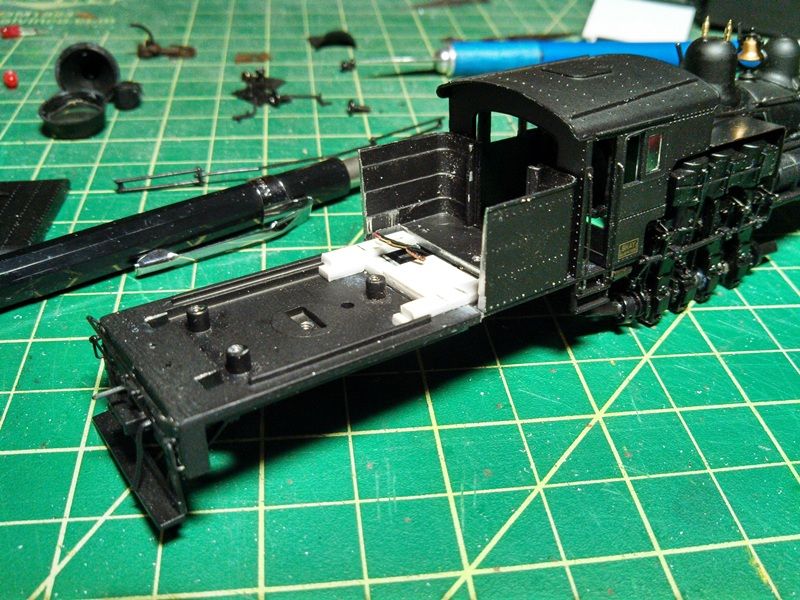
Finally able to find some time to work on this project, starting modifications to form the tender body. Decided on a plan to join the original coal bunker and water tank. Not much yet, but have the coal bunker cut down now. Need to determine how much to cut off the front of the water tank, then join it to the coal bunker. Once joined, will just need to add some trim-work and details. Hope work on this some more over the next few days.
#40
HO / Re: A Consolidation Too Far?
April 24, 2013, 01:30:37 AM
Excellent work as usual Jonathan. Always enjoy seeing your projects.
#41
HO / Re: Ways to idenitify stolen trains....
April 01, 2013, 11:47:05 AM
Ink can easily be cleaned off. Paint would be marginally better.
I would suggest engraving your initials or some other identifying mark on the frames of your locos. The thief would have to file off whatever mark you add.
Should be able to pick up an inexpensive electric engraving tool online or at a local hardware store.
I would suggest engraving your initials or some other identifying mark on the frames of your locos. The thief would have to file off whatever mark you add.
Should be able to pick up an inexpensive electric engraving tool online or at a local hardware store.
#42
HO / Re: Thomas1911's Shay Project
March 22, 2013, 04:57:03 PM
Sid, you are correct.
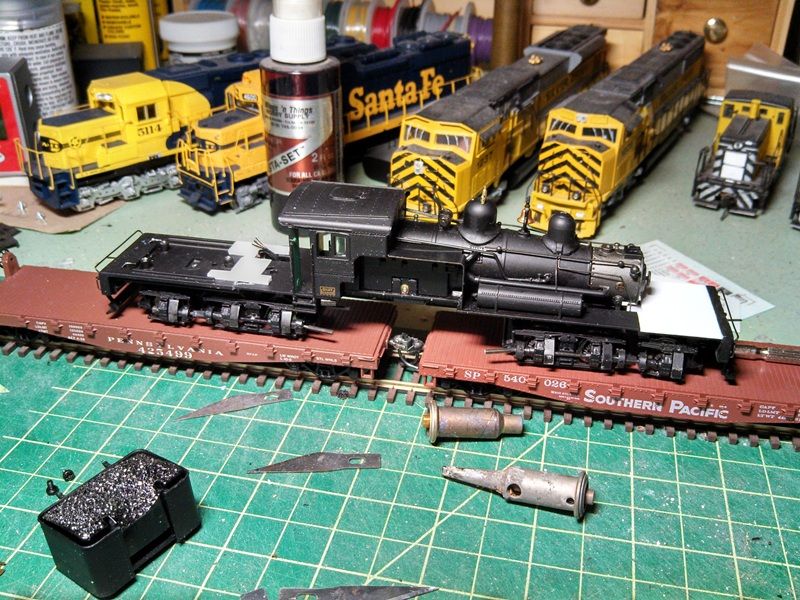
In the photo, I had the cylinder/ash pan assembly removed to avoid damaging i while cutting on the frame. It will take up the space befween the trucks, no modifications. The modified trucks are installed to the original front and center bolsters.
In the photo, I had the cylinder/ash pan assembly removed to avoid damaging i while cutting on the frame. It will take up the space befween the trucks, no modifications. The modified trucks are installed to the original front and center bolsters.
#43
HO / Re: Thomas1911's Shay Project
March 20, 2013, 09:09:56 PM
Been a little tied up with other projects, but have made some progress on this. The rear frame is now modifed by splicing the water tank frame to the rear of the main frame. Still trying to decide exactly how I want to do the new tender body. Planning to build on the existing water tank to add the coal bunker, just not sure how it should look and how I want to attach it to the frame. Need to get a decoder ordered soon to get this thing running, also.
#44
HO / Re: Universals 3 truck Ho Shay
March 13, 2013, 10:35:07 PM
I was going to suggest that. Just swap the new universals onto your existing cylinder assembly and trucks. As you know from the gear install, they're just a light press fit onto the line shafts.
#45
HO / Re: Universals 3 truck Ho Shay
March 13, 2013, 07:15:10 PM
The rods just clip onto the crankshaft. Remove the front and rear rods, then you should be able to get a small phillips screwdriver in to remove the screws.