News:

Please read the Forum Code of Conduct   >>Click Here <<

Main Menu
Menu

Show posts

This section allows you to view all posts made by this member. Note that you can only see posts made in areas you currently have access to.

Show posts Menu

Messages - SideTracked

#1
On30 / Re: Stripes on convoluted siding?
March 01, 2010, 02:55:54 PM
Eureka! :o
Woodland Scenics pressure sensitive graphics (rub ons) also come in stripes!
http://woodlandscenics.woodlandscenics.com/show/category/DecalsGraphics/page/19
#2
On30 / Re: Stripes on convoluted siding?
March 01, 2010, 01:05:54 PM
Has anyone ever tried using a technical pen for striping? I've used K&E Leroy templates and pens for lettering on locos and tenders. Instead of ink, I load the pens with acrylic paint. You'll have to experiment to determine the optimum viscosity. Since it's water based you can male your mistakes vanish will little effort.

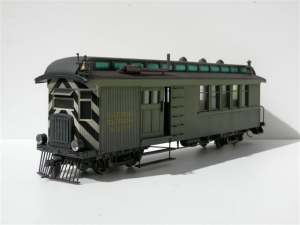
Anubus, I just completed (ready for weathering) my Backwoods Miniatures conversion two days ago; but, took the easy route with a monochromatic livery. Almost 100-years ago, my grandfather, W P Kellett was the founder/chief engineer/general manager of Ontario's Lake Eire and Northern an electric interurban. I thought you'd be interested in their safety chevrons:


Photo credit: Rail City Museum
#3
On30 / Re: Red tail lights for On30 Trolley
February 25, 2010, 01:04:36 PM
I'm in the home stretch of a Backwoods Miniatures railcar conversion, and my lighting concerns are similar to yours. I'm using a Bachmann decoder that provides front and rear lighting circuits, but no interior. Similar to Jim's suggestion, I've had to use some diodes to keep the circuits isolated while providing continuous power to the interior fiber optic illuminator.

FYI: There are several types of two-color LEDs. The 3-wire types share a common cathode (or anode). These are available in red/white and can be used for a color changing lamp, but additional circuitry is required. Another type of two-color LED is the bipolar, it has two wires and changes color as your reverse polarity. Unfortunately bipolars don't seem to be available in red/white. Red/green bipolars are great for marker lamps on DC layouts.

#4
On30 / Re: Red tail lights for On30 Trolley
February 24, 2010, 07:51:11 AM
Hi dtpowell,

I'm not sure what existing circuits you have, are you talking about a DC street car or a DCC trolly and trailer? So, I'll do a generic solution:

For DC operation:
Tap into the existing pick-up and temporarily connect the LED.  It should work in one direction only, switch polarity as necessary to synchronize with the motor direction.

For DCC operation:
Bachmann decoders typically use a yellow wire for the back-up (neg) light and the blue for lighting common (pos). (If your chip doesn't have a yellow wire, look at its edge connector for the "R-" marked terminal.) Connect the LED's longer wire (via the resistor) to the blue and the short to the yellow.

Perhaps someone more intimate with your trolley can provide a more specific approach.

Good luck,
Pete
#5
On30 / Re: Repairing An Observation Car
February 20, 2010, 12:43:52 AM
Dasher,

You're most welcome.

Nice to know the end beam assembly is available, and in gold. Don't worry about having to buy a pair -- rest assured the extra will eventually be called into service. The night elevs are known to make off with brake wheels.

For the swap, first remove the coupler. It may not be absolutely necessary, but it's delicate Method 1: From below, with an x-acto chisel blade, open the gaps between the end beam and the step wells. Work each side open uniformly to avoid over-bending the beam. I've yet to damage an end beam, but there have been times I was concerned. When the center section starts to move, you're almost finished. If the center is being stubborn, coax open the joints, where the end beam overlaps the floor board and forms a pocket, at each side of the coupler gear box. I use a small screwdriver and give it a very slight twist after I get it slightly into the joint. You might try this first before starting to pry with the a-xacto (some cars are tighter than others).

Method 2: Once the beam has been removed and replaced, future removals can often be accomplished by placing a finger tip in each of the step-wells and pulling on the end beam's slight protrusions.

Good luck,
Pete
#6
On30 / Re: Electro Frog?
February 19, 2010, 11:39:17 PM
QuoteThat being said, the Peco turnouts are still the most reliable out of the box turnouts for On30...
Thanks for your explanation, Bill. You've confirmed my initial assumption.
Pete
#7
On30 / Re: Repairing An Observation Car
February 17, 2010, 08:20:12 PM
The standard (non-observation) end's end beam with railing and break wheel simply snaps off and is interchangeable with the other passenger cars. The problem is going to be the finish. If the end beam assembly is not available from factory parts, keep an eye on eBay (or other source) for any Bachmann with gold railings to be your donor car.
#8
On30 / Re: Electro Frog?
February 12, 2010, 05:13:10 PM
I don't wanna sound like a nag, but I'm curious:
Peco's have those under rail wipes (if that's what they're called) and hidden wiring. Supposedly, they automatically take care of the polarity shuffling necessary in non-3-rail turnouts. Now, I'm hearing all sorts of horror stories that the Peco system isn't working and various alternatives are being discussed. If the Pecos are going to require the degree of retrofitting (essentially converting them to isolated frog conventional design) that some of you are recommending, then why use them in the first place?
#9
On30 / FOUND! Re: WANTED: Ridgeway Spark Arrestor
February 01, 2010, 07:15:25 PM
UPDATE

After going with Precision's version of the Ridgeway (the Back Shop didn't respond to my queries) I stumbled across some of the hinged versions. See eBay "On30 Bear Trap Mechanisms Brass, O Scale" item  #360230491924 (Closing Feb 05, 17:45:10  PST)

Bidding on this may be light because the seller didn't include such descriptors as Ridgeway, Spark Arrestor, Cinder Catcher, nor C & S. Prehaps I missed previous listings because I didn't think to look for mechanisms; but, I do recall searching for bear traps. If you're making your Bachmann 2-6-0 more like a C & S #22, this may be for you.
#10
On30 / Re: on30 light out in passenger car
December 27, 2009, 11:09:47 AM
Great, seems I over newbiefied you. With your experience, and the roof off, you'll have no problems.
#11
On30 / Re: on30 light out in passenger car
December 27, 2009, 05:38:34 AM
Hi Masska,

The Bachmann passenger cars are designed to provide access to replace the light bulb. You simply unsnap the roof assembly. With the roof off you'll see the lamp fixture, it's a printed circuit the size of a postage stamp. The bulb and the supply wires are soldered to this unit. There will probably be some clear tape locating the bulb in place.

Before you do anything drastic, let's do a simple check: (Don't worry the voltage, there isn't enough to hurt you and I assume you don't have a meter to measure current). With the locomotive off track.  Place the car with the bad lamp (with its roof removed) and a car with a good lamp on the track and apply power. The good lamp car is just to verify the power is working. Take a new bulb and touch its wires simultaneously to the two connection points where the existing bulb wires are soldered. If the new bulb illuminates, then the old one is bad. If the new bulb doesn't illuminate, then your problem is elsewhere. If it doesn't immediately illuminate try moving the car along the track.

Let's assume the bulb is bad. The clean fix is to solder the new bulb in place of the old one. But, if you are a newbie, this is probably not the best place to learn how to solder. Remove the car from the track and relocate to a well illuminated work space. Now you're going to attach the new bulb without soldering. Fully extend the old bulb and cut the wires as close to the glass as possible, now remove the insulation for a third to about half the the length of each wire. Expose a similar length of wire from the ends of the new bulb's wires. Now, simply TTTSA (twist together to stay attached) the old wires to the new. Apply some tape around each of the twisted splices to isolate them. Another bit of tape will anchor the bulb in the original location. Test again to make sure all is well and snap the roof back in place.

Good luck,
Pete
#12
On30 / Re: Removing Decals From On30 Rolling Stock
December 18, 2009, 01:33:43 PM
BKJ,

I have a Spectrum "Thomas Kinkade" decorated 2-6-0 that I'm about to strip in preparation for a standard color scheme. Out of curiosity, I just tried some laundry ammonia, and it didn't do anything. Perhaps something more concentrated would work, but I don't want anything stronger in the house. The graphics have some thickness to them, so I suspect some sort of paint as opposed to ink.

The main reason I started using brake fluid was that I'd just changed some brakes and had a large container of the stuff, and I didn't have any Goof-off. You know what they say about necessity and the mother of invention and all that stuff.  ;)

Pete
#13
On30 / Re: Removing Decals From On30 Rolling Stock
December 18, 2009, 02:26:37 AM
Hi Steve,

I've refinished several Bachmann locos and cars. It may be considered sacrilege, but I found the easiest way to remove the existing graphics is with automotive brake fluid. It's notorious for damaging paint; but, most of the Bachman equipment has the color in the plastic. I soak a Q-tip and work with a circular motion.

Do not over do the process. When the graphic has been removed, the Q-tip  and the area will still look milky. Now it's time to rinse with clean brake fluid followed by a soapy wash. I remove the graphics because I want a smooth surface before I air brush a fresh finish. It works for me, but you will probably want to make some tests first.

The Q-tip rubbing may put a little gloss on the graphic area, which is good for bonding your new graphic. Afterward, be prepared to hit it with a flattening agent. I use matte clear Krylon because it comes in big cans.

Good luck
Pete
#14
On30 / Re: WANTED: Ridgeway Spark Arrestor
December 17, 2009, 03:17:04 PM
Oops...
There's some confusion here, sorry. The OP pics are of the bear trap I spotted on e-Bay. It's what I'm trying to find. Below is my effort: Brass from shell casings and the screen from an old sink faucet aerator.

#15
On30 / Re: WANTED: Ridgeway Spark Arrestor
December 17, 2009, 12:07:49 AM
Many thanks, Tim.