News:

Please read the Forum Code of Conduct   >>Click Here <<

Main Menu
Menu

Show posts

This section allows you to view all posts made by this member. Note that you can only see posts made in areas you currently have access to.

Show posts Menu

Topics - Loco Bill Canelos

#81
The following represents my personal experience.  I am not an expert, but do like to experiment with things.  Please keep this in mind as you go through this. It is long.

Over the last 6 or so years I have been working with Lithium-Ion Batteries.  Early on the big scare was on about them blowing up, catching on fire, and all sorts of other dire warnings.  I studied up on them at Battery University.com, with guy's who were using them on R/C cars and aircraft, and in correspondence with some of GRR friends in Germany who back then were having great success making their own battery packs.  I also studied manufacturer's info and engineering sheets and found that some of them even had instructions on making battery packs.   I decided to jump in and try it.  Back then I made them using 18650 3.7 volt 1800 Mah or 1.8 Amp batteries from Hong Kong.    There were printed circuit board (PCB) protection circuits which prevented the batteries from overcharging getting hot and rupturing or exploding. This board also protected the batteries from over discharging which would ruin the battery and prevent recharging.  The boards also offered short circuit protection, which essentially shuts down the battery if the condition exists.  Here is a link to one of these add on PCB's from all-battery.com

http://www.all-battery.com/ProtectionCircuitModulePCBfor4Cells14.8VLi-ionBattery-32118.aspx

Following the instructions with the PCB I built my first 14.8 Volt 1800 Mah battery pack using four cells. I used Tamiya connectors, but any connector will do.  I always charge each cell individually up to full charge before building the pack.  I learned that it took a very hot Iron to solder the connections to the batteries especially to the positive end.  I hooked up my Tenergy Smart Charger, set it to the 14.8 volt position and waited for the batteries to blow up, or otherwise burn down my barn.  To my joy it worked perfectly and during the charging period the battery pack remained cool to the touch.  I made another one and used them in my Annies and Connies with great success. They are both still serviceable as I write this, proving to be far superior to my NMIH or NiCad batteries.  The major (to me) pain of all this was all the soldering to the PCB and batteries.  I mentioned my success on one of the major GRR forums and was promptly flamed to death about how it was impossible to do safely, and how NMIH technology was far superior!  blah blah Etc. Etc.  I was not discouraged and loved the low cost and good runtime using the home made packs.

Next All-battery.com  came out with the 18650 Tenergy 3.7 volt 2200 Mah battery with a built in PCB in the negative end of each cell.  I thought WOW! this would really reduce the amount of soldering necessary and greatly reduce the possibility of an error so I built two more packs using them.  Here is a link to show a battery with the built in PCB.  Care is necessary when soldering to avoid getting the negative end too hot and destroying the PCB.

http://www.all-battery.com/4pcsTenergyLi-Ion18650Cylindrical3.7V2200mAhRechargeableBatteriesWithTabs.aspx

These packs were such a success and so much better, that I got rid of my NMIH and NiCad packs altogether.  I had so many inquiries I ended up doing a few clinics on making the packs, and got great raves from others who also had success. I was also flamed, beat up on, blah blah etc.etc. for doing these clinics and "endangering others".  Things have changed since then and Lithium technology has become mainstream.  To me the only real disadvantage of the lithium Ion batteries was that when the packs get down to the 2.5 volt threshold the undercharge circuit kicks in and shuts the battery down abruptly to prevent over discharge.  This occurs without warning since the batteries perform so well there is no subtle slowing down noticeable like you get using NIMH or NiCad batteries.   This would be bad news if it occurred in a long tunnel and you had to fish your loco out of it.   This led to a desire for longer run time.  When Tenergy came out with the 18650 2600 Mah cells I used them as well and loved the improved run time, especially noticeable over the older 1800 Mah cells.  I have had one Tenergy 2600 mah pack fail due to one bad cell.  It is a pain to troubleshoot because all the cells have to be disconnected to find the bad one.  I do not know the cause, but it is possible I damaged it by dropping it, or had a PCB board fail.  
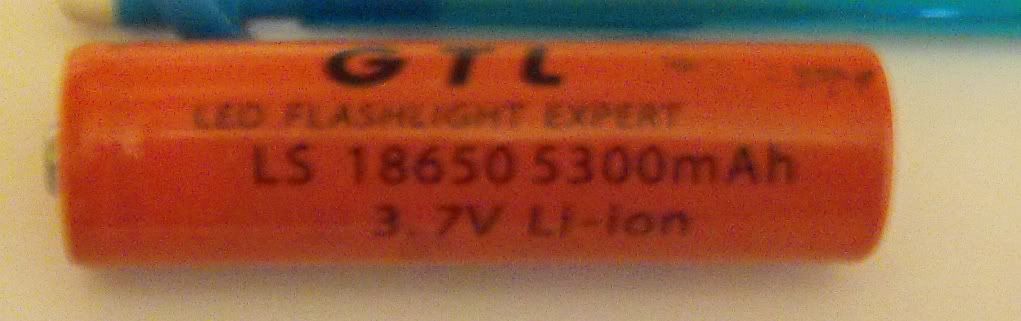
A good friend who likes to run 4 F7's and an Alco PB (ABBBA)  Pulling 13 heavy passenger cars was getting about an hour and 45 minutes run time using home made packs of  12 2600mah 3.7 volt cells connected in series to make a 14.8 volt 7800 Mah battery pack.  He has grades of 3.5%  He saw the GTL 3.7 volt 5300 Mah cells on Ebay and we bought some, thinking they did not have the internal PCB protection circuit.  We were pleasantly surprised to find that they did have the built in PCB protection, and that they were the latest type with the PCB protection circuit enclosed within the case rather than added on the end like the Tenergy example above.   At a price of $39 for twelve cells and no shipping I was amazed.  You can make three 14.8 volt 5300 Mah packs for about $13 each including a connector.  The Tenergy smart charger works fine with them.  The run time is so good that I never run them down to a shut down using my Connies and Annies.  

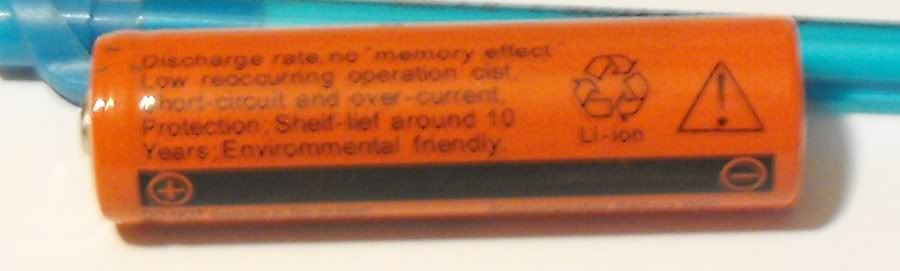
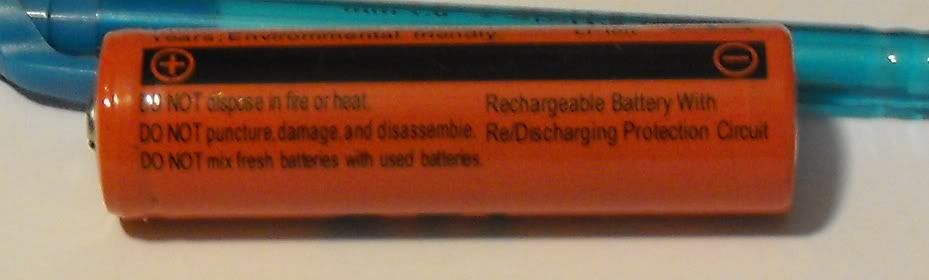
Here are the pictures of the printing on the side of the 5300 mah cells showing the information on the internal protection:  Sorry about the poor quality, had to borrow a camera.


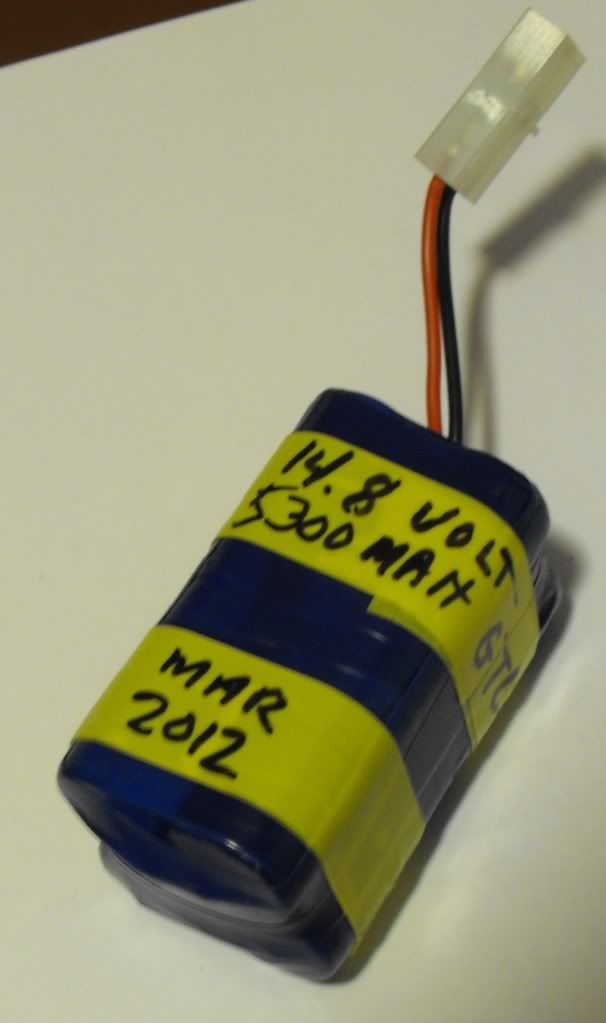
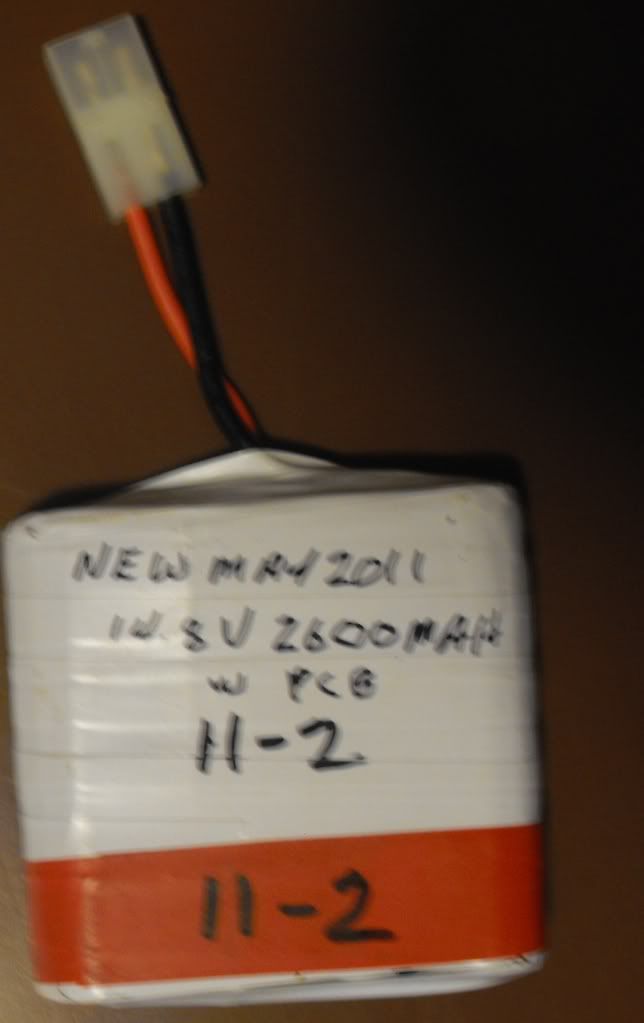
Here is a home made "Square"5300 mah pack soldered and wrapped with electrical tape. It is made to go into a U25B from a top hatch on the loco.  I'm too cheap to use expensive large shrink wrap when color electrical tape is cheap at Harbor Freight.  I have also built them into the fuel tanks of a couple of GP-7's using an external charging jack.  The second pic shows a "flat" one to fit under the coal load on Connies & Annies.


Our testing so far indicates that the 5300 mah batteries are good quality and the protection circuits work like they are supposed to.   We have only been using them for two months so time will tell if they hold up.  Compared to the Tenergy Batteries the GTL's are more difficult to solder to the positive end.   While I personally dislike trail cars with receivers & batteries these home made battery packs are just fine in trail cars as well.

These batteries are 18650 size and fit in commercially available battery holders (or boxes) which hold one to four cells.  If you have room in your locos using these would totally eliminate the need to solder to the batteries.  You would only need to solder on the connector of your choice pop the batteries in and go.  This would be of great advantage if a cell failed.  All you would need to do is take them out test them individually, replace the bad one and you are ready to go again. Here is the link for the battery boxes:
  http://www.ledsupermall.com/diy-battery-box-for-4-18650-battery.html

I have not yet received mine and will post later about my experience with them.  

Remember You MUST follow all safety rules and measures.  I use a clear mask when soldering, wear a long sleeve shirt, and place the batteries in a ceramic bowl when charging.  I also make sure ventilation is good.  There are other rules I probably haven't mentioned.  When engaging in these activities it is your responsibility to learn and follow all safety rules, procedures and instructions.  I do not guarantee your results will be similar to mine or your safety.  Soldering to the batteries will void any warranty.
Most of all have fun!!!
Bill
#82
Large / Shay Replacement Truck Questions
March 29, 2012, 11:27:46 PM
Clarify something for me guys.  I am looking at my notes on this topic and am confused

The 36 ton Shay first run truck have 8 screws??  this truck is a problem truck??

The second run has six screws??  Did the second run have the same truck problems as the first run?

How many screws does the replacement metal truck have?? or how can one specifically identify that a 36 ton shay has the newer trucks??

Thanks Bill

#83
Can either of you give us info on the metal replacement gears for the Connie allegedly being produced by Bachmann industries as noted in Kevin's post at this address:

http://www.bachmanntrains.com/home-usa/board/index.php/topic,20005.0.html

Thanks,
Bill
#84
Note:After discussion with NWSL on September 28 2020 here is what I learned.  They made the 24 tooth gear based on a very early 4-4-0.  They believe that later runs used a 25 tooth gear.  In any case they make both the 24 tooth and the 25 tooth gear. If you bought a 24 tooth gear and have not installed it they told me they would be glad to exchange it for you.  If you installed a 24 tooth gear in your loco and the gear was 25 tooth it should work as long as the gears fully mesh.  If the fit is loose and the tips of the gears are too far apart the gear will eventually fail


Hi Members. It is easier to do the gear replacement than you think.    Here is a link to the related photos but they are not in order. http://s259.photobucket.com/albums/hh291/sharronbillc/Gear%20Replacement%20Spectrum%202%206%200%20and%204%204%200/  Among the photos is a picture of the incorrect NWSL Gear which they said was for the 4-4-0. The correct gear is in a similar package.

How to replace the Axle Drive gear on your Bachamnn Spectrum 4-4-0 or 2-6-0.
By Bill Canelos      
Copyright 2020 All rights reserved. Permission is granted to post this on Bachamnn Industries forum by the author, but no other place without permission from the author. Use for any purpose other than your private use to fix your locomotive, requires permission as well.
The beautiful Bachamnn Spectrum 4-4-0 and 2-6-0s have been around for many years now.  Just like your automobile breakdowns do occur.  The more miles you put on your locomotive and heavier loads do take a toll, and with these locomotives the main failure is the axle gear which cracks or breaks in two.  These instructions are my attempt to show you how you can do the job yourself.  I have done my best to make it like one of those "for dummies" books.  If you take your time, have patience and the necessary items listed below you should be able to do this repair yourself even if you do not have a lot of mechanical experience.  Without experience it will just take longer.  This is the lowest cost way to get the job done.  If you have suggestions on how to make these instructions better please send me a private message or email.  

1.   If your motor runs but the wheels don't turn, you definitely have a bad axle drive gear on your locomotive.    After looking at several of these bad gears there is no doubt in my mind that the gear fails either because the material the gear is made of is weak or because the diameter of the hole in the gear was slightly too small when pressed on during manufacturing process.   I originally recommended a North West Shortline NWSL.com gear which NWSL said was for the 4-4-0 and also for the 4-6-0 #2223-6. It is a 24 tooth gear when a 25 tooth gear is the correct one. If you see some info on NWSL saying this is the correct part, just ignore it.  If you go with NWSL the correct gear to buy is  a 25 tooth gear which is #2226-6.  Go to NWSL.com click on the search button, type in 2226 and it will come right up.  Current price $12.95 NWSL says it is for the 2-8-0, but is actually correct for the 4-4-0, 4-6-0, or the 2-8-0.  

Also available is the Bachmann Gear and axle set.  This set has the gear already mounted on the axle and is designed so as to lock in place so the gear will not spin on the axle. Here is a link to the part: https://estore.bachmanntrains.com/index.php?main_page=product_info&cPath=69_139&products_id=4833.  Current Price $6.60

All prices noted above do not include shipping!   I have no problem with either product.  The Bachman set with the gear already mounted is the easiest way to go.  The NWSL set requires pressing the gear on the axle, but the gear is a high quality and costs more.  If you want to avoid pressing on the gear I highly recommend the Bachmann gear.  At this point you have two options the first is to risk that the problem is only the drive gear, order one and follow the instructions below.  the second option is to open up the loco first  to be sure the only bad gear is the drive gear.  If you find other gears are bad then order all the bad gears and proceed as noted below. If you have the space to disassemble the loco and leave it sit while you order gears this may be the best option.


2.   While you are waiting for the gear, gather together what you will need to do the job.  Get several different size small phillips screwdrivers, a small standard screwdriver; a 9/32th wrench, nut driver, or socket; a small pliers, some Loctite 222, or other brand thread locker for small screws or bolts, some plastic compatible gear grease, assorted lite oils, a small hammer, a small deep well socket, or something similar to drive the new gear on to the axle(when gear is separate), some clear snack bags, a black marker and some assorted blocks of wood to hold your loco firmly upside down while you work on it.  A small digital camera or smart phone camera is handy to take pictures of each step and can be very helpful in getting things back in right.  If you inadvertently break a wire during your work you may also need a small soldering iron, thin rosin core solder and soldering flux. If you have workspace available, assemble your support blocks and add padding. Place your loco upside down on it tweak it as necessary until it sits solid. Make sure your work area is very well lit and that your work surface is white or a very light color so you can easily find items you drop.  Keep one of those handy mini led flashlights handy to see into the dark places.

3.   So your parts have arrived everything is gathered and you want to get started.  Make sure you are rested and relaxed and have 2 to 3 hours to do the job.

4.   I will be using the Bachmann 2-6-0 so the article is based on it, but the 4-4-0 is almost, if not exactly the same. On the 2-6-0 you can leave the front wheel drive rods in place or remove them if you have too much of a problem maneuvering the wheels off the loco.  Start by removing the side rods from the rear two driving wheels by carefully removing the hex head screws holding them on, and push them down out of the way.  If you do not have a 9/32 wrench, or nut drivers, you can use a small pliers (very carefully) to get them loose.  Spin them off with your fingers and put them in a plastic snack bag marking it number 1.

5.   Now remove the guide plate with two pins centered between the main driving axle.  Put it and the two screws in a plastic snack bag and mark the bag number 2  "guide pins".  Next remove the eight screws that hold the cover of the bottom plate and put the screws into a snack bag and mark it number 3 "bottom plate" screws.  On my loco I noticed they were already very loose.  Carefully remove the bottom cover lifting it up and backwards.  The chuff sensor leads are attached to it so you cannot totally separate it from the loco bottom.  It may be necessary to wiggle and push the chuff sensor lead wires while lifting the cover.  Move it out of the way.

6.   Next pry the little plastic hubcaps from the main driving wheels. It exposes a Phillips screw which holds the wheel on the axle.  Loosen the screw and wiggle the wheel off and place it and the screws in a plastic bag number 4.  Now remove the drive wheel from the other side and place it in the same bag.  Watch out that you do not lose the plastic spacers and metal washers when removing the drive wheels. With the wheels off you will now have to remove the eccentric assemblies from each side of the axle.  You will have to pull up on the gear box, lifting the bearing blocks up and out of their guide rails. Note: The 4-4-0 has sprung suspension on all the drivers and the 2-6-0 has it on the front driver.  The springs are centered at the base of the bearing blocks.  When lifting out the bearing blocks the springs often fall out or stick to the base of the bearing blocks.  Be sure you do not lose them. With the bearing blocks lifted push them off the axle and out of the way.  You can now slide the eccentrics off the ends of the axles.  If you can find a way to clamp them to keep them from coming apart, good, if not, the two plastic spacers and metal end washer will fall out and you will have slightly more difficulty when putting them back in.  If they fall out put them in Bag No.5 and mark it.

7.   At this point you will be able to slide the gear box and motor forward and up.  This will allow you to disassemble the gear box which has six screws, two on one side and four on the other.  On my gearbox all six screws were pretty loose. During this process you should not remove the gear box cover from the motor.  But be careful not to break a wire off the motor while manipulating things around. Turning the gearbox to one side remove the screws from the side with two screws on it.  Put them in Bag No 6 and mark it.  Turn the gearbox to the other side and first remove the two end screws and then the center two while holding the gearbox with two fingers.  Put the screws in the bag.  It is now time to separate the halves of the gearbox. You will notice that the gearbox has a thick side and a thin side.  Rotate the gearbox till the thick side is facing down and lift the thin side, motor still attached to expose the gears inside.  Lift straight up carefully so as to leave the gears and pins they turn on, in place. You should now see your broken or cracked gear.  The other gears and pins in the box turn freely and care should be taken to keep them from falling out.   Remove the axle and broken/cracked gear from the gearbox and set the gearbox with the remaining gears on your workbench in a safe place so you don't dump the gears out of the box.  At this point verify what gear or gears you need and order them if you chose option 2.

8.   (Skip this step if using the Bachmann part)It is now time to press the new NWSL gear on the axle. Slide the new gear on the axle as far as possible.  I then slide a small as possible deep well socket over the axle and gear,  place the axle end on a wooden or other soft surface and use your small hobby hammer to tap on the socket forcing the gear onto the serrated part of the axle until it is fully locked and centered on the axle.  Keep your blows centered to avoid damage to the gear, and make sure everything stays level as you tap it into place.  It may take a fairly heavy blow to get things started. If you go too far simply turn it over and use the socket to tap the gear back just enough to get it centered.
 
9.   It is now time to reassemble the gearbox.  First use the plastic compatible grease and thoroughly grease all the gears in the gearbox.  Grease the side of the gearbox where the axle goes thru and the gear itself. Slide the axle and gear back into the box and grease the exposed side of the gear. Now the gearbox cover with motor attached goes back on.  Carefully place the thin side of the gearbox over the thick part and wiggle them as necessary until the two sides are fully engaged.  I then put one screw in place to hold the gearbox together.  Then I apply thread locker to each screw in turn and drive them firmly into position, I then remove the screw without the thread locker on it, apply some, then put it back in.   Be careful not to get the thread locker on any plastic surfaces as it may damage or even ruin the plastic. This basically finishes the repair and it is time to put everything back together.  Putting things back is as basic as reversing the instructions and is fairly straight forward.  You will need to make sure the drive wheels are properly quartered.

10.   Here are some thoughts on getting things back together. Be patient and take your time.  Use thread lock on all screws.  Go step by step using the bag numbers and photos you took as your guide.

11.   The first crunch point is getting the eccentrics back on. If the washers came off, be sure to put the first plastic washer on the axle turning it so the widest part of it is flush against gear box side. Slide one of the eccentric loops onto the washer; put the next plastic washer on turning it to fit, then the next eccentric loop goes over that. Next comes the plain metal washer.  Holding things in place slide the axle through the bearing block being careful not to break the wire lead off.  Next slide the drive wheel back on to the axle turning it until it fully seats in place.  If the washers fell out when you did this, put the plastic spacer in first then the metal washer. Use the thread locker on the screw and firmly drive it back into place. Then put the plastic hubcap back on.

12.   Repeat this process on the other side.  You will need to be sure that when you do this second side, you position this driver on the axle correctly quartered.  It will go on either correctly or 180 degrees off.  Slide the wheel onto the axle and before inserting the screw check to see that the side rods line up properly in a straight line on both sides.  If they do then drive the screw home firmly. If not pull the wheel back off the axle, turn it 180 degrees, and slide it back on.  All side rods on both sides should now be properly aligned. Leave them loose until you complete the next step.

13.   It is now time to slide the bearing blocks back into the slots on the frame.  It will be a lot harder than getting them out, because of the wires and stiffness of the reassembled axles to this point. I fussed and wiggled and raised them up, trying to align them with the slots at same time I was trying to push them evenly down into the frame and pushing the motor end back far enough to get things lined up. If your loco has sprung bearing blocks be sure the little springs are in place and stay in place. I had a frustrating time doing this step and broke one of the wires off the top of one of the bearing blocks.  Once I finally got them seated, I fired up the soldering iron. I then striped the insulation to expose just enough wire to reattach to the bearing block. I tinned the end of the wire then brushed extra flux on the wire and the solder blob on the bearing block.  I melted a little bit of solder on the soldering iron and carefully and quickly soldered the wire back in place.  Hopefully you will not need to do this, but don't be surprised if it happens. At this point I tested the installation, by using a small transformer to make sure that the gears were working properly and that the pickups on the drivers were all getting juice. Now you can reinstall the side rods insuring that all they are properly aligned on both sides. Again use thread locker on the hex screws, carefully tightening them firmly into place.  Apply a little power again to make sure the side rods and all running gear are working smoothly.

14.   If the circuit board with the two orange/red flat LED's have slipped out of their slot during the manipulation of the motor, now is the time to be sure you push it back down into its slot so you can get the bottom plate back in proper position.  Tuck the wire leads down alongside the motor making sure they do not interfere with the drivers, or your efforts to get the bottom cover back into position. As you realign to bottom cover, be sure the two brass wipers on the chuff sensor are positioned against the rear axle.  You will need to pull gently on the leads as you position the bottom cover back in place.  Again using thread locker replace all eight screws.

15.    If you are using very tight radius curves you may want to reinstall the guide pins.  I have wide radius curves and find that the guide pins are not needed.  The guide pins will catch on some brands of switches, if they do try leaving them off.  At this point you are about done.  I went ahead and forced more gear grease into the two holes on the bottom of the gear case.  I then used very light oil and sparingly oiled all the moving parts of the side rods and running gear including the eccentrics.  I then put the loco on the track and ran it forward and backwards for about 20 minutes to kind of break things in. I then attached it to 5 Jackson & Sharp passenger cars and made the schedule for the evening train on my Missouri Western Railway.  With any kind of grade, pulling five cars would really need to be double headed, or run it with a reduced consist, just like on the big trains!

Congratulate yourself on the great job you did and go play with your loco.

Loco Bill


#85
Large / K-27 463 Rides Again The 1:1 version
February 08, 2012, 10:14:05 PM
The 1:1 K-27 463 lovingly restored by the Friends of The Cumbres & Toltec Scenic RR will head up a special Charter on May 15th 2012.

this will  be a great opportunity to ride behind the beast!

http://www.cumbrestoltec.org/news/219-its-showtimethe-463-is-back.html
#86
General Discussion / protect the rear end!!!
January 06, 2012, 07:02:03 PM
This is what happens when you don't protect the rear end!!

http://www.cnn.com/2012/01/06/us/indiana-trains/index.html
#87
Oh No!,  You have unpacked your Big Hauler set or Radio controlled set and can't find the instructions!!!  :-[

Well here is the link to the Big Hauler Set instructions, for sets made from 2000 and later.  Most of the instructions are useful for earlier sets as well. :)

http://www.bachmanntrains.com/home-usa/dwg/dwgs/Big_Hauler_Instructions.pdf     This will download a .pdf file.  Go to your download files and click on the download to open it!

So you have a Radio Controlled Big Hauler Set or locomotive and there are no instructions.  Well here they are :):

http://www.bachmanntrains.com/home-usa/board/index.php/topic,32620.0.html

REPAIR TIPS
If you are having a problem with your Big Hauler or Anniversary 4-6-0 Locomotive, check out the link below. Sound troubleshooting is now included as well:
: http://www.bachmanntrains.com/home-usa/board/index.php/topic,30394.msg224039.html#msg224039

Still have questions or problems, be sure to ask them as a forum item.

Have Fun!

Loco Bill
#88
Large / Bach-Man Any Specialty Store sets This year?
November 11, 2011, 09:44:25 PM
Bach-man or Yardmaster,  Had to Ask,  Did Bachamann do any specia;l sets for  Front Gate, Bass pro, Orchard Supply, Sam's or any other stores this year??

Thanks!!

Bill
#89
Large / Unnofficial Survey on Bachmann practices
September 28, 2011, 09:56:14 AM
Wade Colyer and I have been talking about this for years.  We have suggested it to no avail.  We felt it would lead to higher sales and give the buyer and easy way to get different road numbers with a minimum of trouble.
Please give your responses as yes or no or no opinion. If you want to express a longer opinion please do it in a separate post. 

Question 1

Should Bachmann change the road numbers each time they rerun a car or loco?

Would you buy more product if they did?

Question 2
After an initial run with numbers, should Bachmann run locos or rolling stock without numbers and provide numbers for application by the buyer?

If yes, what would you prefer, Waterslide decal, rub on dry transfer, or rub on vynil???

Would you buy more product if they did?


#90
Large / Hi! Bach-man Unusual Train Set
July 22, 2011, 10:51:49 PM
Bach man,

Please check out this post.  Did you make this as a prototype for a set that was never made??

http://www.bachmanntrains.com/home-usa/board/index.php/topic,17580.0.html

I tried to forward pictures but apparently you have a newer email address than the one I have.  If you email me I will forward Ed Trainman2 pictures to kook at!!

Thanks $ regards,

Bill

#91
Large / Hi! Bach-man: New Lyn just a Big Hauler!
April 02, 2011, 10:44:22 PM
When the Bachmann 81304 "LYN" first came out in 1994 it was considered to be the first Bachmann large scale "Spectrum" locomotive.   

Now that it is downgraded to a "Big Hauler" in the new catalog, what has changed?  Does it now have plastic siderods?  It has a metal gearbox, but are the gears metal?

It does have a new Bachmann number 91196 and is DCC ready.

What are the specific differences???
#92
Large / Paint removal from locomotives
December 31, 2010, 01:40:34 PM
 First, Happy New Year to all board members & lurkers!!

After all these years I can no longer state that I am 100 percent Bachmann!!

I got my very first USA Trains locomotive, and first diesel ( a GP-7) and want to remove the paint.  On the off chance that some of you may have some experience with USA Trains paints I thought I would ask here as I could not find a USA Trains specific forum site

My usual methods do not seem to work, so any ideas will be appreciated. 
#93
Large / Can you help this fellow?
December 02, 2010, 10:17:33 PM
Can any of our electrical experts help this fellow?
http://www.bachmanntrains.com/home-usa/board/index.php?action=post;topic=15024.0;num_replies=0

Maybe you have better ideas than mine!!
#94
I had planned to feature these next week but Cale's earlier post about the new Bachmann Starter sets prompts me to make a more detailed report   These sets are very different than the usual run of sets in the past.  They are the first to feature a gas mechanical locomotive, or a 1:20.3 item.   They are a super value for the price and sure to be a hit with those who have yet to buy the Davenport and must have one.  It will be almost like buying the loco and getting everything else free.   

This will be a must for those with mining or logging as their theme or for those wanting to add the theme.

90070 The Prospector 
0-4-0 Yellow Davenport Gas Mechanical loco and 4 side dump ore cars 14 pieces of track power pack w/ speed controller & DVD instructions.

90071 Lumberjack
0-4-0 Green Davenport Gas Mechanical loco,  2 skeleton log cars, and a logging caboose 14 pieces of track, power pack w/ speed controller & DVD instructions.

Do not confuse the set names with the earlier sets of the same name!!  Bachmann has managed to muck up the situation by repeating the earler set names.  Be sure to look up the new sets by the Bachmann number, rather than the set name to be sure you are looking at the newer sets!!

The Bachaman 2009 catalog has pictures of these sets.  You can download the catalog at http://www.williamstrains.com/2009/2009_bachmann.pdf   

It takes a while for the file to download and may be really long unless you have high speed service, or check out Cale's post & link to Tower Hobbies for pictures.

The Trainworld price is $159.99 These are a steal at this price just $10 bucks above the cost of the locomotive alone. 

The only Question, as usual,  is when will they be available??   Bach man what say you!!

Cheers
#95
Large / Scale of the new Thomas kine
March 12, 2009, 10:27:22 AM
Bachman,

I was asked about the scale of the new Thomas line, but do not know the answer

Will the Thomas be 1:22.5 or 1:20.3?

Thanks
#96
 ;D Hope to see you there!!
#97
Hi Williams guys,  Ther is a guy in the general discussion section who needs your expert help.  His post topic is "Station sounds.

Thanks
#98
Large / Real snowplowing in G Scale
December 08, 2008, 03:55:57 PM
Hi all I posted this in the General discussion forum by mistake, so here it s for those G Scalers who don't look at the General Discussion topics!!

My son Nick is a G Scaler as am I.  I am a proud Dad, because he is a member of the Denver Garden Railway Society and his railroad will be featured at the G Scale National  Convention next summer.  It will also be in the next issue of Garden Railways Magazine.

Here are some great snow plowing shots on his mainline:

Video one shows the actual plowing of the line with an Aristocraft plow and Four USA Trains diesels in order to clear the way for the California Zephyr. (link below)

http://www.youtube.com/watch?v=v7Y5fJGrJ3k

Video two shows a USA Trains California Zephyr carving its way through the canyons of snow created by the plow.  It also makes the full loop, including straight through the house via the crawlspace. (link below)

http://www.youtube.com/watch?v=zlXkaGgs1cI

Video three shows a complete circuit of the line by the California Zephyr from the engineers perspective (on board). A nice wide angle lens keeps the rails in sight 100% of the time.  This in a little faster than I normally go, I was shooting for a scale 55 mph. (link below)

http://www.youtube.com/watch?v=PH62n2-Pumo

He is also heavily into Bachmann 1:20.3
Enjoy


#99
General Discussion / Real snowplowing in G Scale
December 07, 2008, 10:38:09 AM
Hi all

My son Nick is a G Scaler as am I.  I am a proud Dad, because he is a member of the Denver Garden Railway Society and his railroad will be featured at the G Scale National  Convention next summer.  It will also be in the next issue of Garden Railways Magazine.

Here are some great snow plowing shots on his mainline:

Video one shows the actual plowing of the line with an Aristocraft plow and Four USA Trains diesels in order to clear the way for the California Zephyr. (link below)

http://www.youtube.com/watch?v=v7Y5fJGrJ3k

Video two shows a USA Trains California Zephyr carving its way through the canyons of snow created by the plow.  It also makes the full loop, including straight through the house via the crawlspace. (link below)

http://www.youtube.com/watch?v=zlXkaGgs1cI

Video three shows a complete circuit of the line by the California Zephyr from the engineers perspective (on board). A nice wide angle lens keeps the rails in sight 100% of the time.  This in a little faster than I normally go, I was shooting for a scale 55 mph. (link below)

http://www.youtube.com/watch?v=PH62n2-Pumo

He is also heavily into Bachmann 1:20.3
Enjoy

#100
Large / Train Collectors Association Convention Boxcar
December 06, 2008, 02:39:36 PM
If any of you TCA members are interested I have a G Scale TCA convention Boxcar listed on Ebay right now:  It is the Valley Forge by George 1954 to 1989 Car

http://cgi.ebay.com/ws/eBayISAPI.dll?ViewItem&ssPageName=STRK:MESELX:IT&item=270312627500

Thanks for your time