News:

Please read the Forum Code of Conduct   >>Click Here <<

Main Menu
Menu

Show posts

This section allows you to view all posts made by this member. Note that you can only see posts made in areas you currently have access to.

Show posts Menu

Messages - kdgrant6

#1
HO / Re: trackplan
March 08, 2016, 09:42:47 PM
I really like your layout idea, but I have a few suggestions.

Based upon my entrance into this hobby a year ago, I concur wholeheartedly with Len: abandon EZ track; go with flex track instead.  The options (and the costs) are greatly in your favor. 

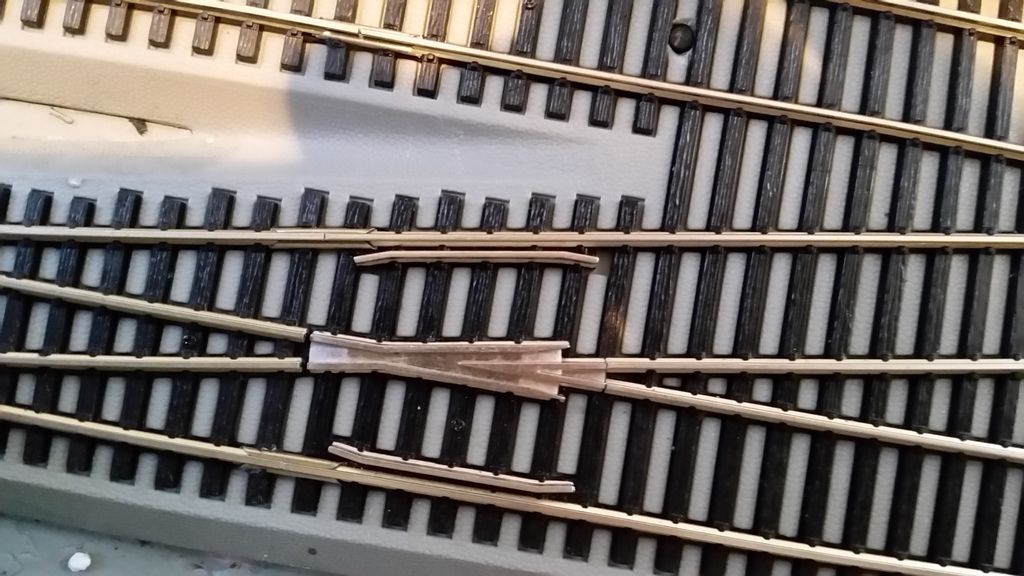
I agree with jward about 18'R turnouts.  I've replaced EZ Track 18"R turnouts with Peco SL95's and 96's, and wish I had gone with them initially.

In regard to layout, rogertra's suggestion to build around the walls is a fundamentally solid one.  It gives you much more control and "reachability."  I have a 4x8 and a 3.5x7, bridged with a 2x2.5 section.  There is an 18" set off from the side walls and a 2 ft center aisle, but it is really tough to reach parts of my layout.  An around-the-wall layout would be much better for reaching everything, but I agree such a layout limits the creation of a miniature reality.  With your expansive layout, you can view it from different angles and be swept away by the realness of it all, depending upon the success of your scenery.  Around-the-wall layouts have limited angles from which the layout looks good.

Work through the possibilities before you commit to the layout.  You'll be happy you did.
#2
HO / Re: EZ Crossover Shorting Out Layout
February 10, 2016, 08:45:28 PM
HoModeler,

Thanks for the details.  

Your use of air compression to power your turnouts sounds very effective, but from your description, you're not using your NCE DCC controller to activate the turnouts.  Instead, you're flipping a toggle to engage the compressor to mechanically switch the points.  

However, your system sounds as if it is much more user-friendly than an actual DCC-operated one that requires you to push a number of buttons to operate just one turnout--unless you can somehow program macros.

What brand of turnouts are you using?

Maybe someone can enlighten us on this topic.
#3
HO / Re: EZ Crossover Shorting Out Layout
February 05, 2016, 02:19:10 PM
HoModeler, thanks for your suggestions.

Of course, one of the first things I did was check all the obvious things, which you mention.  All of those were fine, which was why I posted this thread.  It's not a power issue, either, which should be fairly obvious from previous comments on this thread. 

As for your layout, I'm glad the 16 DCC turnouts work for you, but if you're using an "air system" to operate your turnouts, then you're not using the DCC function of the turnouts unless you have some sort of interface installed, which you don't mention. Neither do you mention which DCC controller you're using. 

I can tell you that with either Bachmann or NCE, changing points is a hassle because doing so requires several buttons to be pressed before the points turn. 
What DCC system are you using?  Since you say you're operating a turnout by pressing a button that engages the Air System, what button on your DCC controller are you pressing? 

If you're pressing a button or flipping a toggle on your control panel, then you're not really operating the turnouts in DCC mode unless you're using an interface. 

If so, what interface do you have?

I did refer to an interface possibility as a possible exception on my last post.  If you really do have an answer, I--and others--would like to know the details. 
#4
HO / Re: EZ Crossover Shorting Out Layout
February 03, 2016, 02:57:16 PM
I wanted to answer Jeffery and close out this thread.

First, nothing I can see on the crossover can be causing the short.  As I mentioned, I cut a wider gap at the junction of the frog and the rails on the right.  Under magnification, the gap is apparent.  I thoroughly vacuumed the joint to remove any metal particles.  The problem crossover looks identical to the other crossover and to the other frog on the same crossover.  

As for the decoder not being able to cause a short, Bachmann's service technician Rodney said that the decoder was the likely culprit because it did control the routing of power through the frogs.

An earlier request was that I put a voltmeter to the piece.  By the time I attempted to do so, the system would short out each time I powered up.  I did find that if I placed a screwdriver handle under one end of the crossover, I could keep the layout powered.  However, immediately upon lowering the piece, the layout would short.  To me, that indicates problems other than just a wrongly-powered frog.  

Regarding the operation of the crossover with a screwdriver handle under one end, even if I kept the power on and pushed a loco across the frog in question, the system would short, but it would not short if I ran the loco across the divergent route instead of the main one.

(By the way, Bachmann EZ crossovers have frogs that can be powered.  I reported incorrectly that they were plastic.  Turnouts have plastic frogs, but crossovers have metal frogs that have an unattached wire on either end of the piece that can be attached in sockets underneath the unit if desired to power locos with short wheel bases across the frog.)  

In conclusion, I am done with EZ crossovers and turnouts (except for one that I need to leave in place to keep from doing major layout changes.  I'm keeping my fingers crossed that it will behave.) I have removed both crossovers and both a left and right hand snap turnout--all EZ Track.  I have ordered Peco large radius turnouts as replacements for the crossovers and a medium radius (36") turnout for the snap track.  I will adjust existing track to accommodate differences.

I would strongly urge anyone considering DCC turnouts and crossovers to reconsider.  The primary reason I do so is not prompted by a lack of quality from Bachmann, but from inherent difficulties encountered when attempting to operate turnouts and crossovers from a DCC controller, whether from Bachmann or from others.  You simply have to push too many buttons to switch the points, and very frequently, those buttons, even when pressed correctly, don't do what you want them to do.  I find it much easier to operate wired turnouts.  The exception may be DCC controllers with screen interfaces that will allow touch screen interaction to move points.

I hope this thread will be of help.
#5
HO / Re: EZ Crossover Shorting Out Layout
February 01, 2016, 10:57:15 AM
Well, this problem may be resolved.  

I just spoke with Rodney at Bachmann.  

He said out-of=the-box Bachmann Crossovers have dead frogs.  There is an unconnected wire underneath that can be connected to power the frog if you're running a locomotive with a short wheel base.

He said that since the wire underneath mine is not connected, the problem with my crossover is most probably a decoder malfunction.  He said that apparently the crossover is stuck in the position that routs power for the divergent leg.

Does this make sense?  I still don't understand that if the frog is dead, why my locos short the system when their wheels touch the frog and the mainline.  If the loco straddles the frog, there's no problem either.

Although Rodney said that this is very unusual, I want to leave this thread as a help to anyone else running into a similar problem.

Maybe someone could offer an explanation here that will help someone else.

Thanks.
#6
HO / Re: EZ Crossover Shorting Out Layout
January 31, 2016, 05:31:49 PM
Thanks, Jeffery.

Actually, I disconnected the crossover this afternoon.  In the process of this less-than-easy procedure, I have created another problem because of the feeder wires I had connected to the crossover.  Something in that area keeps shorting out the system.  I need to take time tomorrow to identify what's wrong.  Then I can put the meter on it to confirm what we probably already know--that something is wrong with the polarity for the main rail. 

To me, it seems that the decoder has "frozen" in the correct polarity position for the divergent rails because it remains the same no matter how I switch the manual tab on the crossover's side.

Since the DCC decoder controls the polarity switching and since the polarity doesn't switch, wouldn't the decoder (or maybe a crimped wire) probably be the culprit?

Wouldn't disconnecting the wire create a dead area in the crossover?
#7
HO / Re: EZ Crossover Shorting Out Layout
January 31, 2016, 01:36:35 PM
Thanks, Johnny.

As I mentioned in the post, I have cut a space in both rails, but that action did not stop the shorting out. 

As for the spacing shown in the picture, I used this crossover for nearly a year and had no problems. 

As for moving the rail, there is no place for it to move.  It jams tightly against the rail joiners of the adjacent EZ track pieces.  I'm sure you experienced the difficulty of removing or even adjusting rail joiners that come with EZ track pieces.

If the rails have somehow shifted toward the frog over time, why does a short NOT occur when a locomotive wheels touch the frog when traversing the divergent rail?  It shorts only when a loco is on the main rail.

Thanks again.
#8
HO / EZ Crossover Shorting Out Layout
January 31, 2016, 08:41:53 AM
I have a hybrid layout of EZ Track (Nickel-Silver) and flex track.  I have two Bachmann crossovers that have been in the layout nearly a year.  I operate the crossovers manually because it's easier to do so than to go through DCC commands. 
Ten days or so ago, I manually changed one crossover from divergent to straight, and the system shorted out.  I turned it back to divergent, and the system restarted.  That happened several times in a row, so I unplugged the layout, re-plugged it, and everything worked fine.   The next day, the same thing occurred, then it went downhill from there.  For a short time, I could physically adjust the crossover's position by pressing down on it and keep it from shorting.  But that changed, too.

Now, whenever locomotive wheels touch the frog, the system shorts.  This problems occurs only when the loco is traveling the main line.  If it is on the divergent rail, no short occurs.  Flipping the manual switch in either direction does not short the layout.

My guess is that the DCC decoder in the unit has malfunctioned, and it is not properly directing the current through the frog.

In the picture below, you can see the narrowness of the gap between the frog and the junction of the main and divergent rails on the right.  I have widened that gap slightly, but doing so did not change the problem.

The other crossover works well.  In it, the corresponding gap is slightly larger than one that is giving trouble.  With the widening of the gap, they are now about the same.

I've searched this forum and have done Google searches as well.  I've consulted two members of this forum, but have not been able to straighten out this problem.

The only solution may be removing the crossover and replacing it with a pair of large radius turnouts.

Any other ideas out there?  I welcome any advice that could help me resolve this problem.

Thanks.

#9
OK. 

Anyone reading my last response on this thread I began weeks ago, I'm sure had a good laugh.  I should qualify that by adding "anyone who also had adequate knowledge of how electricity works." (It is readily apparent through my posts that I do not, although a couple of this forum's very knowledgeable contributors have attempted to help me with that.)

Here's what I've found about these Bachmann turnouts (remember this is about the 44130 and 44131 turnouts).

The RED wire is common to both directions of the turnout's operation.  But it is connected to the positive side coming out of the Peco DCU.
(I say "but" because I thought commons were always negative.)
The  GRAY wire, connected momentarily to the negative side of the CDU, turns the switch to the straight position.
The  BROWN wire, connected momentarily to the negative side of the CDU, turns the switch to the divergent position.


As I said in the beginning of this thread, having the option of using momentary push buttons on a control panel to control turnouts is much easier than accessing their DCC commands.  In addition, by adding an Atlas Snap Relay to the turnout connection, you also have the convenience of adding signal lighting and panel lighting for the turnout.  If you know how to do latching relays, you can do that without buying the Atlas piece.

Please, if you find an error in this information, please post a correction.

I hope this information helps someone.
#10
OK, so it's been awhile, but I continued with this project with special help from a couple of you guys on the board.

First, let me say that Bachmann's tech department says that the turnouts can be converted to dual function (by that I mean controlling them either through the DCC controller or through momentary push buttons.)

So today, I finished one turnout.  I cut, spliced, and soldered the three wires that enter the sealed solenoid compartment (see earlier pictures in this thread). I put shrink tubing over two of the wires and pulled it back over each of the connections. 

I reattached the turnout to my layout and was satisfied that the DCC function wasn't compromised.

I had three wires coming out of the side notch of the turnout.  I experimented to find which was which by using my common and positive terminal strips that power my other non-EZ turnouts.  I figured out which was common, then I tried to determine which wire controlled which solenoid. 

I was surprised.  Both of the non-common wires switched the turnout from the divergent to the main position only! 

That shouldn't happen.  With the common established, one of the other two wires should switch the turnout one way.  The other wire should return it to the opposite position.

Or have I overlooked something very important? 

By the way, earlier pictures show 5 wires coming out of the decoder, but two of those apparently power the frogs.  Only three enter the sealed solenoid compartment.

Anyone have an idea what is going on?
#11
General Discussion / Re: E-Z Track Turnouts
August 11, 2015, 09:24:58 PM
Hey, trains4life,

if I may be so bold to throw this in, I have the first two Len mentioned above.  They are Item #s 44130 and the 44131 (left and right).

As jbrock pointed out, the questions is manual or remote.  These two are DCC, but have manual controls, too.  They each have a curved radius of 18", which are widely disparaged, but for your purposes may not be a problem, depending on what you have and where you intend to take it.

I would urge you to do a lot more homework before making these purchases.  Many people in this forum would be excellent resources.
#12
I finally reached Bachmann's Service Department this morning.  They closed last Thursday at noon and were closed all day Friday.  It would have been good to have heard that message when I called, but that's another matter.

I spoke with Rodney in the Service Department, who coincidentally had been working on a Bachmann DCC crossover.  He was friendly and informative.

This is the answer:

There's not really a color code to either turnouts or crossovers.  He told me you could tell based on position of the wires coming out of the decoder and going to the solenoid compartment.  On turnouts, the middle wire is the common.  For  crossovers, there are four wires.  The outer two control the solenoid direction.  He did not know which side controlled which direction of the solenoid, but that's not important for my original question.

So in my earlier picture of the turnout, the red wire is the common.  Incidentally, I checked another turnout and found the wiring the same.


As for crossovers, they have 4 wires.  The two on the end are the ones that throw the solenoid.  One middle is the common; the other, the link to the frog.

Here are two shots of the more complex underside of this piece of track.  The first shows the solenoid compartments to either side with the decoder in the middle.  Eight wires exit the decoder, with four going to each side.  The outer two control the solenoid.


This shot shows both the turnout (top) and the crossover.


So the color of the wire isn't important.  It's its position.

Of course, Rodney offered the big caveat: Check it first before you lock everything down. 

Well . . .


#13
In an attempt to get a simple answer to a simple question, I have posted a thread on this forum.  I have had helpful responses, but no response from Bachmann, who could answer the question quickly.

I called Bachmann yesterday.  I listened to "The Twelve Days of Christmas," an advertisement, and a voice telling me that my call was important to them and that he apologized for the delay. I listened for a long time.  No answer.

I called at 9:02 this morning.  I have been placed on hold for 40 minutes and counting.

I also sent a PM to the Yardmaster.

My question is simple: What is the wiring diagram for Bachmann turnouts and crossovers?


#14
Jim, with chain saw buzzing, the chimp came out of the woods at the end of an old synergy ad, showing the genesis of the chaos that had begun the ad.  It was funnier to see it . . .

As to the typewriters, in theory, given enough pianos, chimps, and time, you would produce Beethoven's 32nd piano sonata.  Hard to believe that construct of probability theory.

I tried for a long time yesterday to contact Bachmann by phone, by email, and through this forum.  No response.  Someone there knows the color code. 

I know you're thinking, "So de-solder the wires already and move on!"  But I can't be sure the wires underneath the turnout I photographed are the same color as the other two turnouts and two crossover, which will require more disassembling of my layout to get to.  The crossovers are new, but the turnouts are older, used ones.  I would think they have kept the same wiring pattern over the last several years, but I'd feel better hearing it from Bachmann.

And Len is right that I'd like to keep from ruining the turnout, which is much more probable than the chimps channeling Beethoven. :)

#15
Jim, what you summarize about the connections is correct.  Thanks for partly confirming my reasoning.  But desoldering?  Yikes! That would require resoldering if I wanted to leave the turnout viable for both DCC and pushbutton operation.  Anyone getting a closeup of my soldering work on power feeds would have a good chuckle at my being turned loose on a decoder.  Do you remember the old commercial of a chimpanzee with a chainsaw?

I'm sure you're correct in these instructions, and I thank you for them.  I was kinda hoping someone who has Bachmann turnouts would know the color scheme.