News:

Please read the Forum Code of Conduct   >>Click Here <<

Main Menu
Menu

Show posts

This section allows you to view all posts made by this member. Note that you can only see posts made in areas you currently have access to.

Show posts Menu

Topics - jonathan

#1
HO / SW-7 Mods
February 12, 2021, 07:46:53 AM
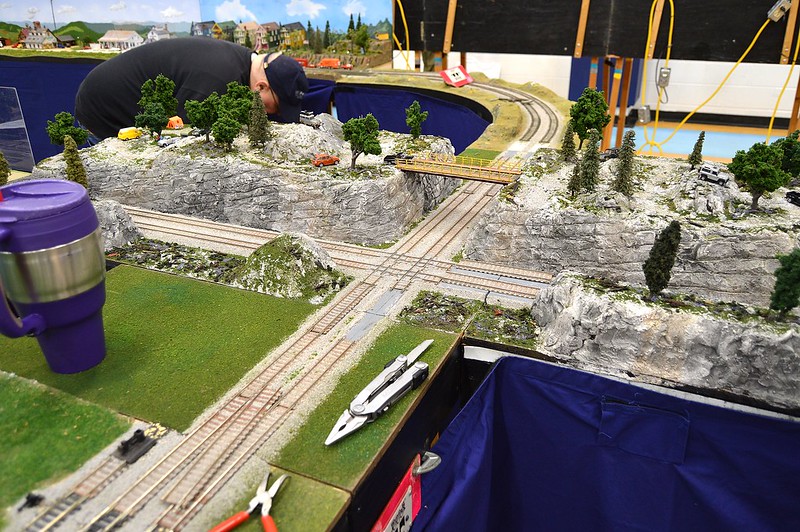
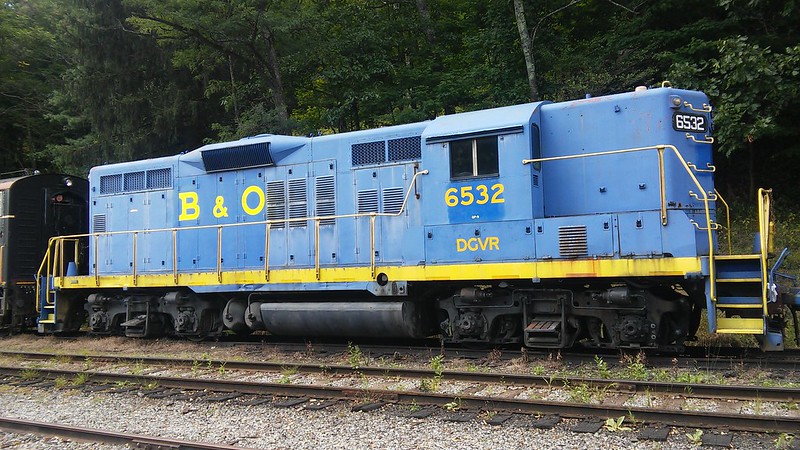
Folks, I'm helping out graywolf with an article he wanted to share. Hope this works:

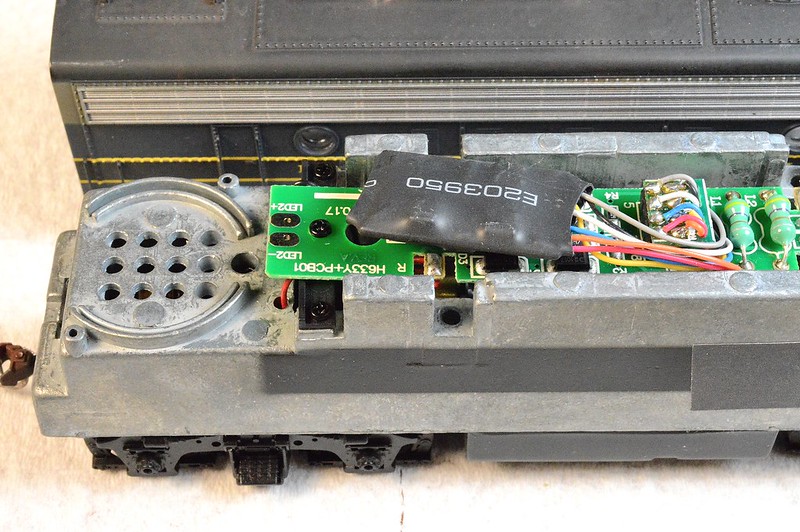
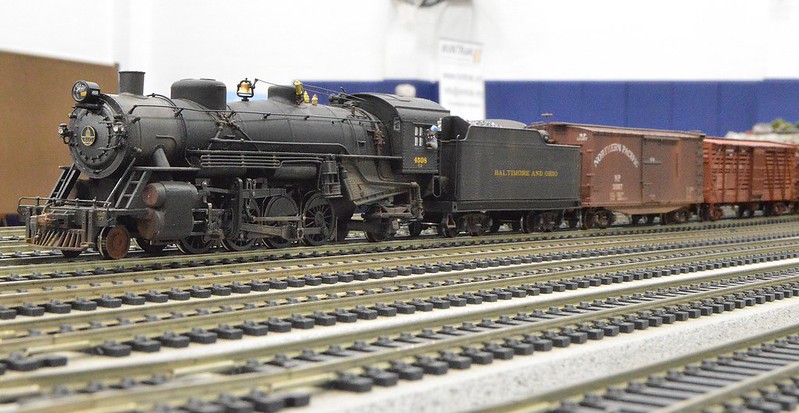
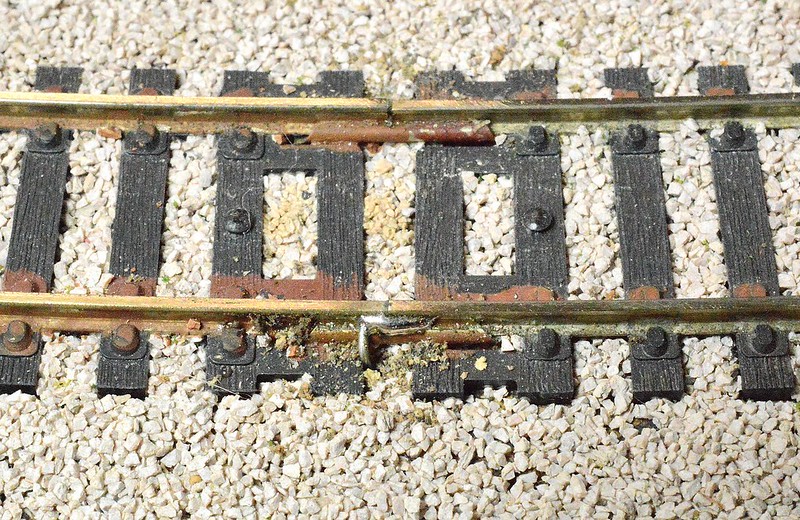
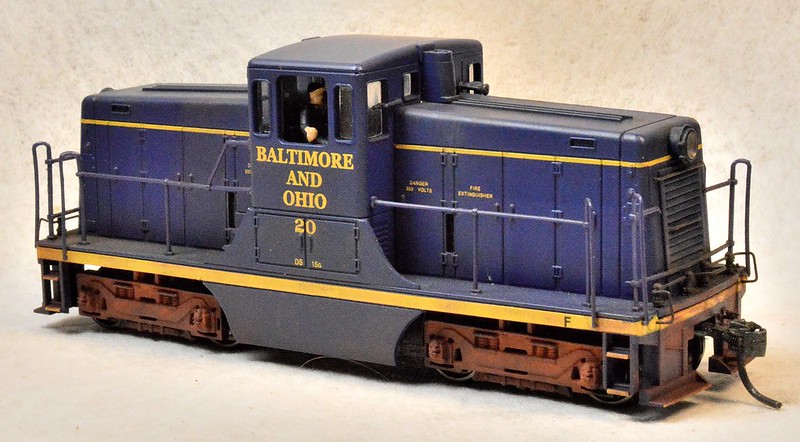
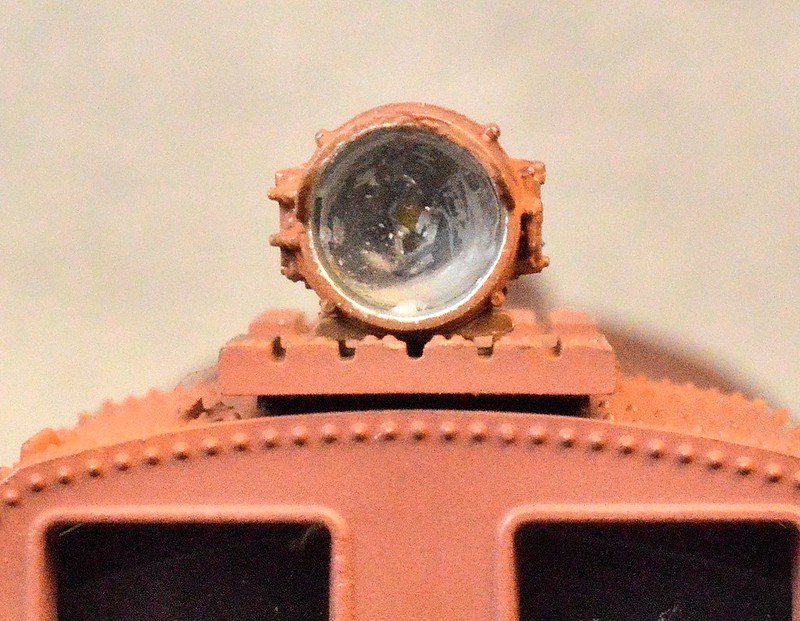
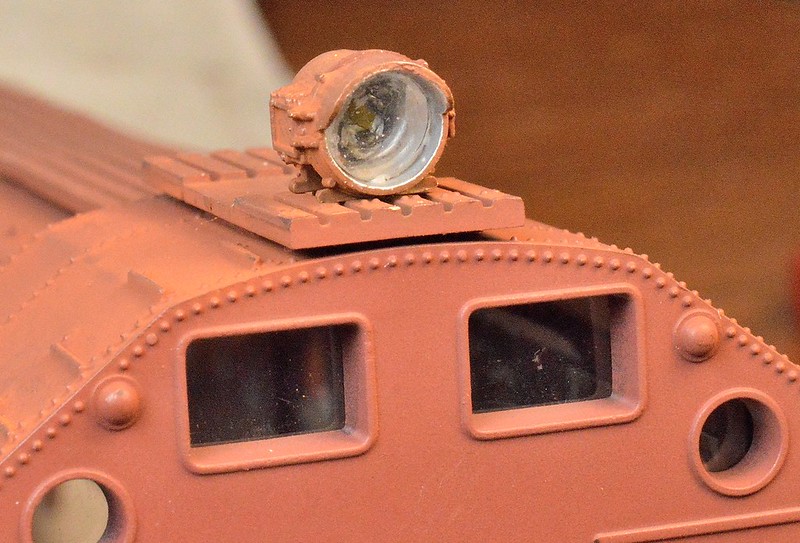
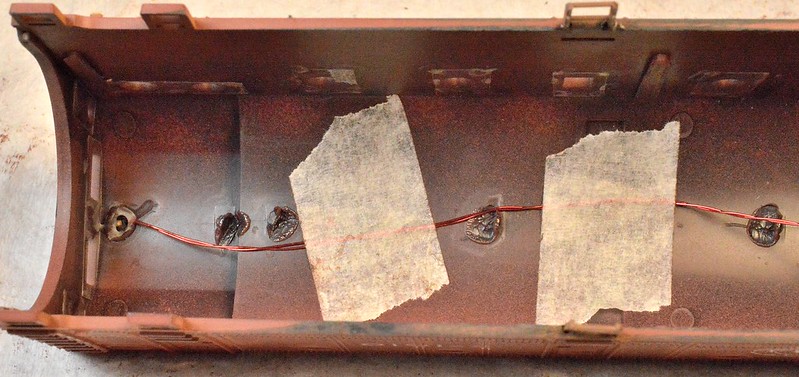
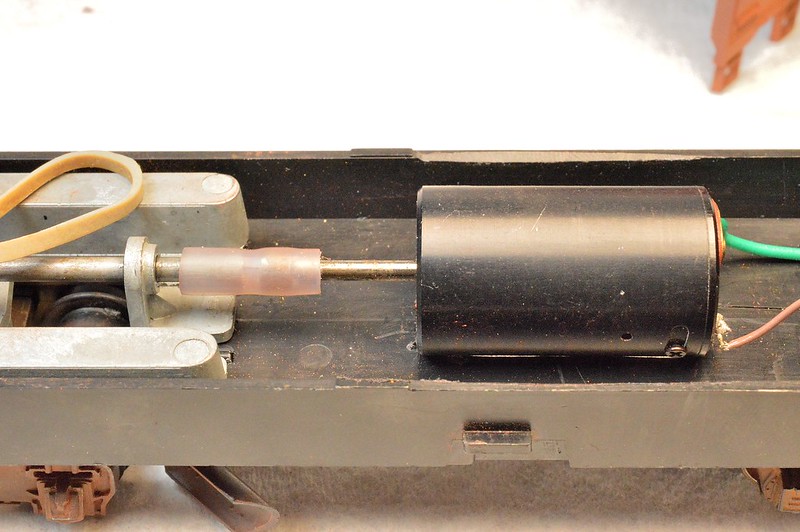
Here are 2 photos of my SW7 switcher which has been causing me trouble because it is so light. Most of the time, it had difficulty going over switches that didn't have power to the frog or some areas of track that were not perfectly spotless. The situation was the fact that it weighed only 9 ounces. I could help it along by placing my finger on top to give it better contact. I tried many things such as cleaning the wheels and even cleaning the track in front of it as it ran along. I powered all the frogs that seemed to be causing the problem. Finally, I decided to remove the shell to see if I could add weight inside. That was hopeless because it was so stuffed with gear and electronics. The engine is only 6 inches long.

The next step was to see if I could add weight externally and also justify the act of doing so and still have realism. I found some new brass toilet bolts in my junk box that weighed in at almost 3 ounces. As you can see, those are now sitting on top of the engine. I cut the heads off the bolts,but didn't want to lose the weight. So I decided to use the heads to bind the threaded parts of the bolts around the exhaust stacks. I glued the heads to the bolts from below using hot glue. I painted them black to blend in and sat them on top. They added 2.85 ounces to the engine and made a big difference in operation.

Now I had to justify what I did to the model train world. In keeping with the current state of the world regarding Covid-19, I rationalized that the engine was assigned the task of moving refrigerated cars which carried the vaccine from place to place. So therefore what you see on top of the engine are the cooling coils for the refrigeration system that was retrofitted to the engine to make things happen. Case closed.   Paul Case   

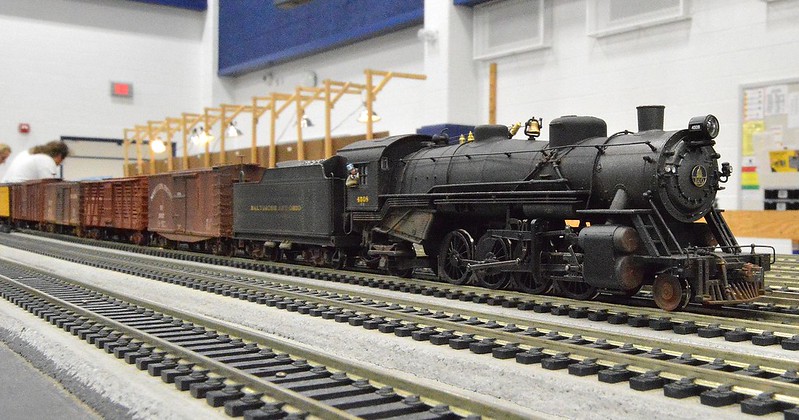
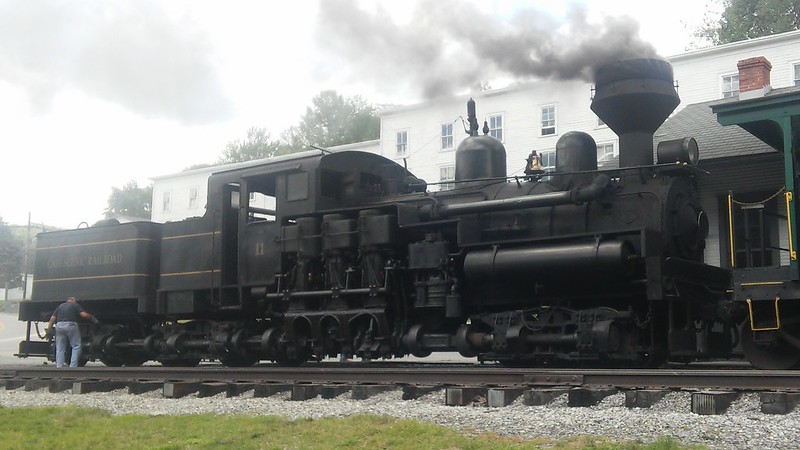
01A by Jon Vogel, on Flickr

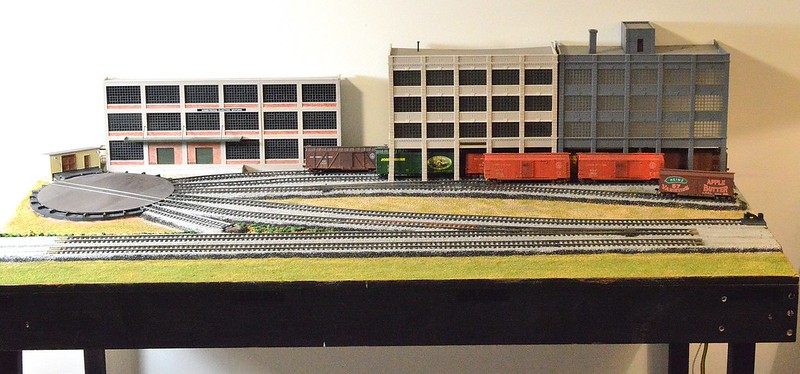
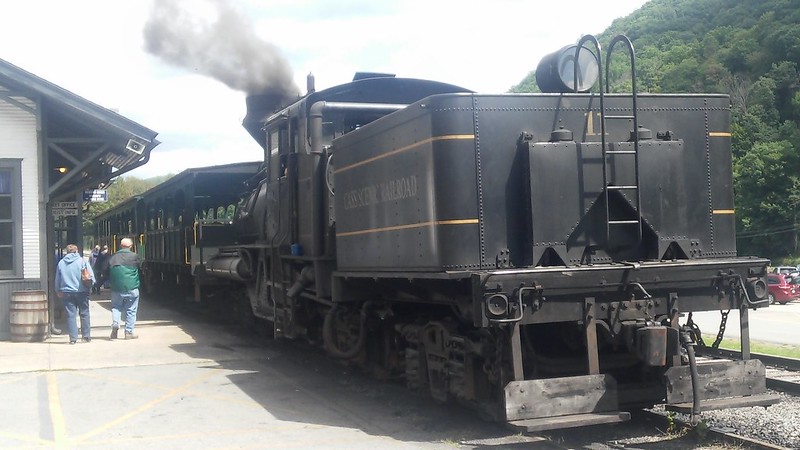
01B by Jon Vogel, on Flickr

#2
HO / Quick Loco Project
November 15, 2020, 07:50:51 AM
Taking a little break from scenery.

Here is a brass B&O S-1a (2-10-2) which I've posted about before:

DSC_0513 by Jon Vogel, on Flickr

I installed a working reverse light, using some gold plated connectors:

DSC_0507 by Jon Vogel, on Flickr

Unfortunately, these connectors, which seemed small to me at first, turned out to be a bit bulky--awkward to manipulate, hang too low, and so on:

DSC_0505 by Jon Vogel, on Flickr

While shopping for scenery material at a hobby shop, I ran across these micro connectors from "Scale Shops" in Prescott, AZ.  As you can see they are quite tiny:

DSC_0504 by Jon Vogel, on Flickr

They are gold plated, there are 20 pairs of connectors for $12.  Had to give it a try.

The wide portion of the connector made it easy to clip on a heat sink and solder to the wires:

DSC_0510 by Jon Vogel, on Flickr

I was able to shorten the wires and move everything in close:

DSC_0508_01 by Jon Vogel, on Flickr

Now the connection is easy and doesn't interfere with trackwork or the drawbar:

DSC_0511_01 by Jon Vogel, on Flickr

And it works!

DSC_0512 by Jon Vogel, on Flickr

OK. now I have to get back to scenery. Just made 171 new trees.  Will get back to the layout stuff soon.

Regards,

Jonathan
#3
HO / Bachmann F7 Diesel Project
July 14, 2020, 01:53:50 PM
Taking a break from scenery for a while.  Felt it was time for yet another locomotive project.

This is an F-7A, DCC ready loco.  The guts are the same as Bachmann GP units. The photos should be helpful for those curious about the inner workings.  I've installed DCC and sound in this type of loco before... one of the easier sound installs.  This one is going to stay DC for my home layout.

Took about 5 minutes to disassemble, with the four tools in the photo:

DSC_0406_01 by Jon Vogel, on Flickr

I started with the trucks:  inspecting the gears, cleaning out excess lubricant, adjusting pick up brushes if necessary, whatever is needed.  These trucks were in good shape.  I only needed to adjust one pick up brush.

When installing the truck, I find it's easier to leave-off the truck frame until the truck is back in place.  I feed the wires through their holes before putting the drive axle back in the flywheel. Do this SLOWLY, as the wires are delicate:

DSC_0407_01 by Jon Vogel, on Flickr

The new Kadee coupler is visible. You can see the shank is shiny from where I filed just a bit from the shank's top and bottom.  This makes them fit into the Bachmann coupler boxes.

Once the wires are pulled through and the drive axle back in place, it's time to line up the truck's screw hole with the frame hole and put in the small screw. Don't overtighten. This should be a bit loose for proper play in the truck:

DSC_0408 by Jon Vogel, on Flickr

Now the trucks' wires can be fitted back on the pcb.  Red goes on the right.  The little black plastic tabs hold the wires in place after the wires are threaded:

DSC_0409 by Jon Vogel, on Flickr

Little tab back in place:

DSC_0410 by Jon Vogel, on Flickr

This is the receptacle for installing DCC, if so desired.  I'm leaving in the jumper plug for this project:

DSC_0411_01 by Jon Vogel, on Flickr

So far, I've drilled 40 holes in the shell, assigned a loco number, changed out the couplers, repainted the crew, and started putting in a rough coupler lift bar. This loco won't be as highly detailed as my sound-installed loco:

DSC_0413 by Jon Vogel, on Flickr

Some lift rings:

DSC_0414_01 by Jon Vogel, on Flickr

Also weathered the truck frames before pressing onto the trucks:

DSC_0416_01 by Jon Vogel, on Flickr

Lots of work left to do.  Will post again when I've made more progress.

Regards,

Jonathan
#4
HO / Jonathan's Layout #3
September 29, 2019, 02:02:06 PM
Well folks...

It's been a long journey, but I'm in a new house, with a new basement.  Mostly moved in...  :)

It looks like I have room for a 6' X 16' layout, with access in the the middle:

DSC_1527 by Jon Vogel, on Flickr

DSC_1525 by Jon Vogel, on Flickr

The first tier will be a double-track mainline--peanut shaped--with plenty of room for switching with industries.

The second (maybe 3rd) tier will be some kind of roundy-round thing for my smaller equipment.  

Enjoying the planning process for now.

I'M BACK!!

Regards,

Jonathan
#5
HO / Craftsman Boxcar Kit
May 17, 2019, 05:17:59 AM
As most of  you know, I had to take down my layout some time back.  Getting ready for a move coming up in the future.  

The itch was driving me crazy so I had to build something... lest I fade into nothingness.  :)

So, here is a Westerfield kit.  Not my favorite, because one usually has to connect the under-frame to the main body while building.  Makes painting a bit harder in the end.

This is suppose to be a B&O M-15J boxcar. Interesting (to me only), as these were the frames used to start fashioning the M-53 Wagontop boxcars.  Many M-15's survived... 6 made it all the way to 1964.

DSC_1503 by Jon Vogel, on Flickr

DSC_1504 by Jon Vogel, on Flickr

DSC_1505 by Jon Vogel, on Flickr

I'm a little out of practice (and getting older). The build is not as sharp as I'd like. Should still look OK from a foot or two away:

DSC_1506 by Jon Vogel, on Flickr

With a coat of primer:

DSC_1507 by Jon Vogel, on Flickr

Hoping to get it all painted and decorated over the weekend.  Depends on the weather (humidity affects drying time).

More photos as the boxcar gets completed.

Regards,

Jonathan
#6
HO / The Last Project on My Layout
November 10, 2018, 01:18:34 PM
We all have to face the inevitable at some point...

For many boring reasons, it's time for my layout to come down:

DSC_1490 by Jon Vogel, on Flickr

DSC_1489 by Jon Vogel, on Flickr

DSC_1488 by Jon Vogel, on Flickr

Trains are packed; trees are packed; some scenery torn out, vehicles and figures packed; some structures are removed; and a little trackwork is gone.

I'll start on the electronics next. 

Very, very sad...

Jonathan
#7
HO / Adding Sound to a Diesel Locomotive
October 28, 2018, 09:05:14 AM
Folks,

We get a number of threads inquiring about adding sound to locomotives.  So, I'm sharing this sound project in hopes that it's helpful to those who are looking to add sound to their locomotives.

This is a Bachmann F-7A which happens to be DCC ready.  A non-DCC-ready locomotive would require a bit more soldering, but the principle is the same.  I already have a standard motion decoder installed.  Just have to unplug the old decoder:

DSC_1472 by Jon Vogel, on Flickr

I am working a train show this weekend.  While taking a break to shop, I happened across some bargain prices on the necessary parts for this project.

The Soundtraxx Tsunami TSU-1000 for EMD diesels is an early generation product, but perfectly fine:

DSC_1454 by Jon Vogel, on Flickr

This decoder puts out less wattage to the speaker than the newer generation decoders... So I can also get away with using the less powerful speaker.  The newer Soundtraxx decoders are more powerful and require their more robust speaker.  

For this project, I need a 28mm, 8 ohm speaker:

DSC_1457 by Jon Vogel, on Flickr

To save myself a little extra soldering, I also picked up an adapter, to make it easier to connect the decoder to the DCC-ready connector in the locomotive:

DSC_1459 by Jon Vogel, on Flickr

Less than 100 bucks to add sound is pretty good these days.

Now the work begins.  I started by carefully cutting back some of the shrink wrap on the decoder, to expose the spot where I will install the adapter plug:

DSC_1460 by Jon Vogel, on Flickr

This was done, gently, with the blade of Exact Zero (Exact-0 knife).

I used my thumb nail to gently wedge-out the existing plug:

DSC_1461 by Jon Vogel, on Flickr

Adapter plug installed:

DSC_1464 by Jon Vogel, on Flickr

Now to connect the speaker to the decoder.  There are two purple wires for the speaker.  Polarity (+/-) does not matter, since I am using only one speaker.  Here's the little bit of soldering required.  Stripped the wire and tinned the the ends:

DSC_1465 by Jon Vogel, on Flickr

The speaker is already prepped. It has two solder blobs at the connecting points.  This is convenient.  Only takes a second or two to connect the wires.  You don't want to spend a lot of time with heat applied to the speaker:

DSC_1469 by Jon Vogel, on Flickr

Now the electronics are prepped and ready to be installed in the loco.  I start by laying everything out, in position, just to get a feel for how much room is needed to make it all fit:

DSC_1473 by Jon Vogel, on Flickr

I forgot to mention earlier... In the above picture you can see a bit of tape I applied on two wire ends.  These wires are for extra functions:  flashy lights, smoke, whatever.  I won't be using the extra function, and I don't want any bare wires floating around, so I taped 'em.

Now that I've pondered for a while, I think turning the decoder around to face the other direction will save some room and make it easier to rout wires:

DSC_1474 by Jon Vogel, on Flickr

Now that I have a plan, I can mount the speaker.  I'll to work on that tomorrow.  Gotta head back up to the train show.  AND I can't seem to locate my silicone gel at the moment.  

More later...

Regards,

Jonathan
#8
HO / Layout Progress
March 24, 2018, 06:59:27 AM
Over the last two months, I have planted well over 100 trees.  Trying to build a forest on the hill behind the trackage:

DSC_1186 by Jon Vogel, on Flickr

I like the results, but it's taking forever to finish.  I had the same issue with my last layout... never enough trees.  I got issues:

DSC_1187 by Jon Vogel, on Flickr

These are the mainline locos I am running at present:

My Bachmann USRA 2-6-6-2 (KK-4b) runs at exactly the same speed as this brass Mikado Q-4b:

DSC_1189 by Jon Vogel, on Flickr

They can pull a pretty good sized coal drag.  Took a while to find a loco that would double-head with the mallet.

I'm considering adding sound (econami 200) to the 2-6-6-2.  Just pondering at this point...

Next are the two Bachmann 4-8-2 Heavy Mountains.  The second one in the photo has given me all kinds of grief over the years.  It was always stalling on me.  I changed the motor and PCB.  Cleaned the thing inside and out.  I took it completely apart over a dozen times.  Finally, got it running as smoothly as the other Mountain:

DSC_1190 by Jon Vogel, on Flickr

Last on the mainline are also Bachmanns; H16-44s. Tinkered with these guys a lot.  They run great:

DSC_1193 by Jon Vogel, on Flickr

Of course, I have other choices... and run these other locos too:

DSC_1195 by Jon Vogel, on Flickr

Took some low-light shots to check progress on lighting for night-time running.  Have a ways to go, but I'm starting to like this, too:

DSC_1198 by Jon Vogel, on Flickr

DSC_1199 by Jon Vogel, on Flickr

DSC_1202 by Jon Vogel, on Flickr

Thanks for looking.

Regards,

Jonathan

#9
General Discussion / Scouts Train Show
March 11, 2018, 12:57:20 PM
Every year, the local MR clubs in our area gather for a fund-raiser for the Boy Scouts.  We have all scales represented, including a live-steam club... not sure what scale it is... big though.

Here are three layouts in the gym; two HO and one N:

DSC_1136 by Jon Vogel, on Flickr

We get up early to start setting up for a 1000 opening.  I took these shots with about two hours to showtime:

DSC_1138 by Jon Vogel, on Flickr

This is my club.  We have a handy swing-up bridge for getting inside.  

DSC_1140 by Jon Vogel, on Flickr

As part of the merit badge program, the Scouts built this section of modules.  Each module is 2'X4' and wired to connect to any standard club module.  They're still setting up in this shot:

DSC_1141 by Jon Vogel, on Flickr

One of our members, built an N scale layout on top of his HO scale module (it's a corner piece).  It has HO scale scenery, so it looks like a theme park ride when it's running. Very cool

DSC_1142 by Jon Vogel, on Flickr

Sometimes we run a figure-8 layout.  It's surprisingly fun, though, one must really pay attention while operating.  No severe crashes so far:

DSC_1145 by Jon Vogel, on Flickr

One of our members built three consecutive modules, so he could put in something a bit different.  This section has a hill (2.5%) and curve.  Good trackwork. Trains run pretty smoothly through here.  Make sure you have enough power!

DSC_1147 by Jon Vogel, on Flickr

This is our staging yard:

DSC_1148 by Jon Vogel, on Flickr

This is my first train of the day, getting ready to enter the mainline:

DSC_1149 by Jon Vogel, on Flickr

DSC_1151 by Jon Vogel, on Flickr

I have acquired two modules in the past.  I built them up and gave them to other club members.  This is my third module, under construction:

DSC_1154 by Jon Vogel, on Flickr

Perhaps I'll hang on to this one... maybe.

Anyway, just thought I'd share the fun we're having this weekend.  Gotta get back to the show...

Regards,

Jonathan
#10
HO / Isolating track and Layout Progress
February 23, 2018, 11:57:42 AM
Thought I'd share a little progress on my layout and show how I accomplished a little track isolation, since the question comes up from time-to-time.

This is my industry yard which sits inside the mainline:

DSC_1112 (2) by Jon Vogel, on Flickr

I put in quite a bit of scenery, BEFORE I got around to powering up the track.  Gotta make it operational now.

To start, I need to be able to park my locos that will push the freight out onto the mainline:

DSC_1115 (2) by Jon Vogel, on Flickr

I used a dremel and cutoff wheels to create an isolated parking space for my 4 locos.  Then jammed a piece of plastic in the cut.  Secured it with CA and trimmed the plastic.  Finally, added a bit of paint to hide my work:

DSC_1106 by Jon Vogel, on Flickr

DSC_1104 by Jon Vogel, on Flickr

I'll drop in a bit of fine ballast and diluted glue to hide the gouge left by the dremel.

Then I need to solder a couple feeder wires to the track and connect them to a switch to turn on/off the tracks:

DSC_1123 (2) by Jon Vogel, on Flickr

I'll number the toggle switches and track to know which switch is which...

Next, I need to add feeder wires to power the track.  I used some solid core wire... because it was free and I have a lot of it.  I soldered the feeder wires to every-other track joint.  I use to over-engineer and add feeder wire to every joint.  Getting old and lazy:

DSC_1108 by Jon Vogel, on Flickr

Again, a little paint and ballast should hide my work.

Finally, I need to clean the track, loco wheels, and test my work.  These little 0-6-0s can push quite a few cars on level track:

DSC_1119 by Jon Vogel, on Flickr

At some point, I will need to build/modify a curved loading dock for this industry:

DSC_1116 (2) by Jon Vogel, on Flickr

Anyway, making progress...

Regards,

Jonathan

#11
HO / Train Show Treasure
February 04, 2018, 06:32:00 AM
It's train show weekend here in the upper DC Metro Area (ahem Baltimore).  Here are couple of things that I picked up for projects.

Been wanting to make my F-7A/B set an ABA set (more prototypical).  So I picked up another F-7A:

DSC_1052 by Jon Vogel, on Flickr

Must have been an older version.  It didn't say "DCC Ready" on the box.  Turns out it is DCC ready.  Added a decoder, replaced the couplers, cleaned and weathered the truck frames, and thoroughly cleaned the wheels.

I've programmed it to run backwards, of course:

DSC_1053 by Jon Vogel, on Flickr

Will get to detailing the shell later as I will be traveling back to the show, today, to run trains on our club display.

BTW, the A/B arrangment was strong already (33 cars without breathing hard).  A-B-A ought to be something to behold.

Also, I've been wanting to replace the European (NEM) coupling arrangement on my Acela set.  Just too hard to snap together and take apart whenever I want to run the set at the club or shows.

I found these Kadee replacements.  They are #20s, but also marked 'NEM 362' in smaller print:

DSC_1049 by Jon Vogel, on Flickr

Turns out they are NOT a great fit for the locomotives, as the new couplers spread the distance between the locos and the passenger cars.  HOWEVER, they are great for coupling between the passenger cars:

DSC_1056 by Jon Vogel, on Flickr

That's about the same distance apart as with the old couplers.  I'll run them today and see how they hold up.  The couplers are plastic, not metal.  I think they have to be plastic in order for the connecting prongs to pinch and click in place.

Anyway,  I picked up some scenery stuff and a couple boxcar craftsman kits as I am wont to do.  Just wanted to share some of the fun I had yesterday, along with running trains.

Regards,

Jonathan
#12
HO / Split Gear Syndrome
January 15, 2018, 08:33:46 AM
Decided to open up the trucks on my 44-ton switcher.  In the past, lots of folks have posted about split gears and trouble getting this little locomotive to run well.  Thought I'd get a look for myself.

This is mine:
DSC_1046 by Jon Vogel, on Flickr

While it is more noisy than when new, it still runs pretty well. I can't recall exactly, but I think I've had this loco for around 10 years.

To open up the trucks, one can use a flathead, jewelers screwdriver to pop the tab on the bottom plate:

DSC_1038 by Jon Vogel, on Flickr

Sure enough, there are little splits along the axle mounts on the gears.  Hope this is a clear-enough photo:

DSC_1033 by Jon Vogel, on Flickr

A closer look:

DSC_1041 by Jon Vogel, on Flickr

I washed the wheelset with the split gears (whole assembly).  Then, while the axle was inserted, AND with the wheels were properly guaged, I added a drop of CA to each crack and let the CA wick around.

Not really trying to repair the split... Really just adding a stop-gap. I want to prevent the split from getting any larger.  Plus, the CA may also hold the axle in place (no slippage).

I then put it all back together, and ran it around the layout.  Still runs well.  Only time will tell if the CA will prevent the gears from slipping.  So far so good:

DSC_1047 by Jon Vogel, on Flickr

On a photography note:

Whenever I use a macro-lens for close-up shots,  the pictures end up grainy.  Dunno why. Perhaps I need a fancier DLSR.

Regards,

Jonathan
#13
HO / Snowplow Project
December 10, 2017, 06:30:18 AM
There use to be a-half-dozen-or-so modelers on here who would share projects, so we could all learn from their successes and failures... basically tinkers. They taught me a lot. I miss 'em, and I hope we get some more folks who like to share.  In the meantime...

A fellow clubmember of mine handed me this old snowplow model, and wondered if I might enjoy tinkering with it.  I think it may be an old Athearn model from late 60s to early 70s (just a guess).

DSC_0954 by Jon Vogel, on Flickr

Don't think they're made anymore, and I don't have anything disparaging to say, so hopefully the moderator won't mind my sharing this project.

I'll start with the outside and work in...

I fixed the broken stirups with a tichy ladder.  Just cut up the ladder and drilled a few holes:

DSC_0979 by Jon Vogel, on Flickr

You may also notice I did a bit of touch up, weathering, and added window glazing. Couldn't get a decent photo, but I also fixed the snow throwing guide, so it easily flips from right to left.

Added some metal wheels to the rear truck:

DSC_0978 by Jon Vogel, on Flickr

I absolutely HAD to add a working headlight to the thing!  This is a brass headlight. I drilled a hole in the bottom, behind the mounting post.  Then prepared and inserted an SMD (warm white):

DSC_0977 by Jon Vogel, on Flickr

DSC_0973 by Jon Vogel, on Flickr

DSC_0971 by Jon Vogel, on Flickr

DSC_0970 by Jon Vogel, on Flickr

DSC_0969 by Jon Vogel, on Flickr

On to the inside:

The old rubber band trick never worked too well.  Here we see that two small rubber bands were suppose to be connected to a drive shaft... which in turn, caused the plow blade to turn:

DSC_0962 by Jon Vogel, on Flickr

Instead, I took an old can motor from a '70s brass loco and attached it to the drive shaft. Don't worry. The brass loco got a new motor.

DSC_0964 by Jon Vogel, on Flickr

To get things lined up, I cut and filed a notch in the floor, to which I will add silicone gel, when I'm ready to make everything permanent:

DSC_0966 by Jon Vogel, on Flickr

I know what you're thinking... "Holy crap! Jonathan, that's going to be the world's fastest spinning plow blade."

Yes, well this is the part of the project I'm noodling with right now.  

I'm using a 9v battery to power the motor and headlight.  I considered adding pick ups to the wheels, along with a decoder, to run off track power.  Instead, this will operate either DC or DCC and have a toggle switch to do the old on/off thing:

DSC_0967 by Jon Vogel, on Flickr

If my math is correct, I can use a 30 ohm resistor (2 watts?) to let the motor receive about 3 volts.  That about the minimum current needed to get the motor running.  I considered using two AA batteries, but they would require replacement too often.  Anyway...

Here's the plot twist...

I went out Xmas shopping yesterday and intended to stop at one of three Radio Shacks located near my house.  I needed a micro mini toggle switch, a 9v battery connector, and some resistors. All three Radio Shacks were gone!  In fact the nearest one, still open, is nearly 50 miles away.  Nervousness and depression came over me like a tidal wave.  I hate shopping on line. In fact I was going to call this thread 'R.I.P. Radio Shack!'  

Perhaps, I'm being a bit over-dramatic.  I really, really hate shopping on line.

So, here I sit... waiting for parts to come in the mail.  While I'm waiting, if anyone out there is real handy with electrical algebra, feel free to knock me in the head and tell me the right resistor size to use.  Imma tinkerin' here...

Regards,

Jonathan
#14
HO / Modifying a Spectrum USRA 2-6-6-2
October 07, 2017, 01:56:09 PM
Folks, couldn't believe my luck today at a train show.

Found a Spectrum USRA 2-6-6-2, in the black box, with a square tender.  This is an early issue, which is just what I have been looking for.  This should modify nicely into a B&O KK-4b or even a KK-5.

My luck continued, as the vendor and I went over to the test track.  The headlight would come on, but the wheels would not turn.  So the seller let me have it for a song.  I'm sure it's too old for the warranty, but the card is still there.  Probably won't mail it in.  The wheels are still shiny.  I wonder if it's even been run before...

Where's the luck in that?

I got it home and took it apart in about 5 minutes:

DSC_0886 by Jon Vogel, on Flickr

Discovered the problem was a disconnected motor lead.  Fired up the iron and had the loco fixed in 15 minutes:

DSC_0885 by Jon Vogel, on Flickr

It's the red wire connected to "M+".  

Ran the loco around the track quick to make sure all is well.  Joy.

I will be posting, from time-to-time, my progress on the modifications.  I'm in no hurry with this one, so don't expect quick results.  Thanks for reading.  

Regards,

Jonathan
#15
HO / Cass Scenic Railroad
September 11, 2017, 05:05:43 AM
Went on a guys-only golfing trip this past weekend.  Unbeknownst to me, the driver/host of our trip planned his route to drive right through Cass, WV, knowing my enthusiasm for trains.

As we pulled into town a steamer was lit off and prepping for an excursion run.  I reverted into my 9-year-old self and begged for the car to stop and let me out... right now!

I managed to take a few shots of the locomotive, billowing smoke and all:

20170908_131511 by Jon Vogel, on Flickr

20170908_131524 by Jon Vogel, on Flickr

20170908_131546 by Jon Vogel, on Flickr

20170908_131640_HDR by Jon Vogel, on Flickr

20170908_131700 by Jon Vogel, on Flickr

20170908_131725 by Jon Vogel, on Flickr

As a special treat, just for me I'm sure, there is a B&O GP-9, parked on a siding... a bit faded I think:

20170908_132909 by Jon Vogel, on Flickr

20170908_132935 by Jon Vogel, on Flickr

This was the highlight of the weekend... certainly wasn't my golf game!  ;D

Regards,

Jonathan
#16
HO / The Acela revealed
August 06, 2017, 07:32:48 AM
Folks, over the years, we have fielded many questions about the the Acela train set.  I finally dug mine out of a bin and started tinkering.  My intention is to get this set running well enough to run at the next Timonium train show.

I am attempting to use my new flikr account to post photos of progress.

Hopefully, this thread will make a good referral for the questions that get asked, from time-to-time. I notice this set still shows up, NEW, at the train shows I attend.  The most more recent set I've seen comes with DCC on board. My set came DCC ready.

So... to begin:

DSC_0751 by Jon Vogel, on Flickr

Disassembly:  one must remove the rear diaphragm and rear wall. They pull out easily.
DSC_0752 by Jon Vogel, on Flickr

The nose cap can be pulled out, starting with a thumbnail to access the edge.
DSC_0745 by Jon Vogel, on Flickr

The dark gray, bottom nose plate, slides forward.
DSC_0744 by Jon Vogel, on Flickr

Then, one can pull down on the frame and slide everything forward, out of the shell
DSC_0743 by Jon Vogel, on Flickr

All the little pieces:
DSC_0740 by Jon Vogel, on Flickr

By the way, When everything is put together, there is a removable panel to access the switch, changing from track power to pantograph:
DSC_0749 by Jon Vogel, on Flickr

The truck sideframes easily pull away from the trucks. This is necessary for proper cleaning. Man, my wheels and pick up brushes were FILTHY!
DSC_0739 by Jon Vogel, on Flickr

Now the decoder.  Here is where the dummy plug and socket are situated... on the top rear of the frame:
DSC_0741 by Jon Vogel, on Flickr

With the dummy plug removed, it's easy to plug in a new decoder:
DSC_0742 by Jon Vogel, on Flickr

Unfortunately, I have an old decoder, that must be fried, because it won't reset nor program, nor respond to a throttle. So, I've ordered a new decoder. I'll continue with this once I can move on to the next steps.

Regards,

Jonathan
#17
HO / 2017 National Train Show Starts Tomorrow
August 03, 2017, 07:06:12 AM
Looks like I'm first in the HO section to bring this up.

Usually, the first day of the NTS (tomorrow) is when all the major manufacturers release their announcements for new products... including Bachmann.  I look forward to this. Every year, their seems to be something new that tickles my fancy.  Last year we got the sound-value E-7A. for instance.

Actually, I have acquired 5 sound-value locomotives already, and wouldn't mind picking up something else... oh, a sound-value 2-8-0 or F-7 in B&O... kinda like the economical side of things (I'm cheap, or always broke, or something).

The last couple of years there has been a fan at the show who posts photos of new products.  If I were in Florida, I would love to get a peek and post a few shots. 

Anyway, here's hoping for some great announcements in the next day or so.

Regards,

Jonathan
#18
HO / Photosharing
July 21, 2017, 05:11:01 AM
OK, if you can see the photo below, I have managed to get flikr working.  Once I get the steps down pat, I'll post some instructions.  Perhaps we can get back to sharing our modeling for free.

On a side note:  I've noticed I can no longer delete my own postings.  This could make for an awkward moment, if one accidently posts something inappropriate and can't take it back right away. Just sayin'...

Regards,

Jonathan

DSC_0535 by Jon Vogel, on Flickr

DSC_0547 by Jon Vogel, on Flickr

#19
HO / Scratchbuilt attempts
May 18, 2017, 05:30:04 AM
Been trying to learn a few new tricks by experimenting with scratchbuiling. I've dabbled a little before.

Attempting to build a boom idler car--one that's a little closer to a real prototype.  My first attempt looks like this:


The tool/bay doors didn't turn out real great, and the paints too thick.  This is an amalgam of a few different cars I've seen.

My second attempt is based on a real car, located at the B&O RR Museum, X-1397:


So far, I've made this much progress:


It won't be an exact match, but close enough to resemble the real thing.  I even played with rivet decals.  I have my doubts that the rivets will actually be visible once the car is painted, but this is a learning project, so I'm trying different things.

The car is made of styrene and resin stuff I had in my junk boxes.  Hand bent the stirups and grab irions.

Regards,

Jonathan
#20
HO / Layout Progress
April 28, 2017, 04:37:01 AM
Just thought I'd share a little project I'm working on...

I wanted to have some utility poles, with lines, as a logical part of the scenery around my structures. So...

I used those bamboo skewers from the grocery store... 100 for a dollar or thereabouts. Drilled #78 holes in each and stained 'em a dark mahogany.  After throwing every color of weathering power there is at them (I exaggerate sometimes), I scraped them with the teeth of a razor saw:


Used 4lb. fishing line for the lines.

Next I strung a test piece of line between a couple track nails to test paint.  I found regular testors enamel flat gray worked fine. Just don't overload the brush with paint, and you're ok:


I strung all the poles before I started to plant them... seemed logical.  I used a 7/64 bit through the subroadbed. This left a tight enough hole where I could push the poles through with small pliers pressure, and not have to use glue:


Experimented with different heights for the poles.  Settled for 3.5" on the east end, and 4" on the west end, needing a bit more clearance westward:


There are little lead sinkers at the ends of the lines, hidden from view. The lines are kept taut by gravity.  

I will paint the lines in the next few days. It will be a bit tedious and hard to reach.  In fact, I'm procrastinating right now, by posting this.  The photography takes time.  ;D

One other note:  these poles are deep into the layout, behind the trackage and structures.  I didn't bother with details like insulators.  I have more detailed poles where they are closer to the edge of the layout. I've shown them before.

Will attach a few shots once the painting and clean-up are done.

Regards,

Jonathan