News:

Please read the Forum Code of Conduct   >>Click Here <<

Main Menu
Menu

Show posts

This section allows you to view all posts made by this member. Note that you can only see posts made in areas you currently have access to.

Show posts Menu

Topics - WoundedBear

#1
On30 / Sandy River & Rangeley Lakes 1930s
June 17, 2020, 06:53:55 PM
Came across this on YouTube today. I take no credit other than posting it.

https://youtu.be/GPnC6qnKfeQ

Sid
#3
Was looking at product labels today. Crazy little habit I have ;D.

First up is a box of Bachmann's SceneScape trees that I had in the studio. Simple trees, that look fine right outta the box. They have a base to stand them up or you can clip it and plant the trunk in a drilled hole on your layout. Not a "hero" tree in any sense, but quite acceptable as forest fill and I have a bunch of these for the layout.


Next are Scenic express' SuperTrees product. A natural material that requires a good deal of preparation and painting and flocking to make work. These will make all sorts of trees, from Foreground "hero" trees to background fill to little shrubs and bushes. I just broke this box out to start using them for the first time.


Both types of tree have a place in any model railroad and I am not advocating one over the other.

What I want to point out is the lack of common sense and good reasoning that has become part of some of our corporate world.

Here is the warning label on the bottom of the Bachmann box............


And here is the warning on the Scenic Express box............


A 5 year difference in age suitability, and the Scenic Express product has small foliage flakes, and is many times more difficult to use successfully, as are the Bachmann trees.

Question. Who comes up with these ridiculous age groupings and why does Bachmann think the average 7 or 8 year old isn't competent enough to safely use their trees?

These are things I wonder about as we sort out our brave new world.

Sid

#4
General Discussion / A video full of ideas
January 21, 2020, 08:37:49 PM
I just finished watching this, and realized I hadn't said a word through the whole thing. Just sort of watched in quiet amazement.

Enjoy!

Sid

https://youtu.be/8FBzHzQ8gEU

#6
HO / First video of my Lye, Stihl & Djheet
December 13, 2019, 02:21:19 PM
Shot my first video of a train on my layout this morning. This is where the tracks enter from staging. There is a 2% grade that ends just before the train comes into view from the other room. The 2 tracks on the right both service the mine only. That's my home-built cab forward 2-6-6-2 at the head end. Sitting at the mine is a Spectrum 0-6-0 and a Bachmann bobber caboose.

So far I think it looks ok.......need to figure out my white balance in video mode. Colours look a little different than when viewed in person.

https://youtu.be/3OdrOCzYrLM

Enjoy!

Sid
#7
Some progress pics. Been a long time since I have posted anything new, but that doesn't mean my hands haven't been busy.

This is Chillery's Cafe kit by Banta Modelworks.


This is an old Mountains in Minutes, foam casting that I rescued from a now closed shop. Every layout needs a cat house  ;D


This is a background kit from Model-Tech Studios...........detailing the siding took forever.


And I managed to get a Tichy Steam crane built. I'll show ya a couple pictures, but also give you the link to the album that lays the build out from start to finish. If anyone has ever been tempted to try one, but a little afraid of it, maybe this album can allay some anxiety you may encounter. It is not a simple kit, but it fits well.

Ask Jonathan......I see he has built one. I need to get my tender car finished now.

Here's the parts layout..........


Link to album............ https://public.fotki.com/WoundedBear/scale-model-railroading/tichy-120-ton-steam/

Enjoy......I'll post more pics if I find them.

Sid
#8
A few of the better shots from around my layout.

Enjoy! .......and let's see some of yours ;)

Sid


#9
My fingers never quit, it seems. Been back at the bench. Pulled this Model Tech Studios ( http://modeltechstudios.com/ ) kit off the shelf before it got any more beat up than it was. This company's decision to package this sized kit in a plastic bag was a poor one, to say the least. At the prices they charge, a box wouldn't have killed them.

Anyhow.............that being said, this didn't build up into a bad kit at all. MTS's idea of corner posts was terrible, so I had to upgrade those, but all in all it's a nice kit. Typical craftsman kit though.....be prepared to have to add and scratch build things as you go. Here is the base kit and a teaser shot. Please follow the link to my Fotki page to view the entire build sequence. All photos are titled and captioned.

Enjoy and thanks for looking!

https://public.fotki.com/WoundedBear/scale-model-railroading/seeleys-milling-bac/

Sid


#10
HO / Martinsburg No. 1 Coal Mine
February 26, 2019, 01:41:18 PM
After finishing the Double Covered Water Tank, This little mine building caught my eye. I had one little corner by another larger mine that was in need of something.

Between Feb 09, when I took the first photo and Feb 20, when I took the last photo, I managed to cobble this little industry together.


The base buildings came together quickly.


#11
HO / Muir Models Double Covered Water Tank Kit#41
February 06, 2019, 03:26:34 PM
Here are a few shots of my latest project. Title says it all. ;)

I opened this not quite 2 weeks ago. Spent a day or so reading and studying the drawings, made a few photocopies of the templates, and got to work.

Base kit..............


#12
General Discussion / Large Scale Modelling..........
December 20, 2018, 06:10:10 PM
I got myself sidetracked again with another large scale build. I have been eager to build this for many, many years. This is the result of 150 hours over the past couple of months.

Please have a look at the build album on my Fotki link. All photos have titles and captions to guide you through the build.

Enjoy!

https://public.fotki.com/WoundedBear/scale-automotive-mo/amts-cat-d8h-bulldozer/

Sid


#13
Popped this one open today. Have I mentioned that I like Banta kits? Even the colors on his box art model grab me.

This one I vowed to myself, that I would document and photograph from start to completion. Follow along if you would like as I build the Silver Bull Saloon.

This is a modest little establishment, that thinks itself far more important to the town's prosperity than it actually is. False fronts rule!!!!

Step one is to get the kit open. Usually with craftsman kits, this is the point where most people chicken out, pack it all back up, and sell it to me at the swap meet for 10 bucks. But I digress. So.......open the box.


Pull everything out, and before you even think of opening those nice baggies........find the instructions and start reading. Done reading? Good. Now read them again. And again.....and again and again.

That's good. Now if you can't read.......box everything up and sell it to me for 10 bucks.. While I'm reading, I am getting a mental image of how this thing goes together. Finally it's time to open them little baggies and start laying parts out.


After identifying all the pieces, it's time to start coloring everything that needs to get color. Only thing to remember here, is to never use water based paints on wood. OK.....almost never. ::) 
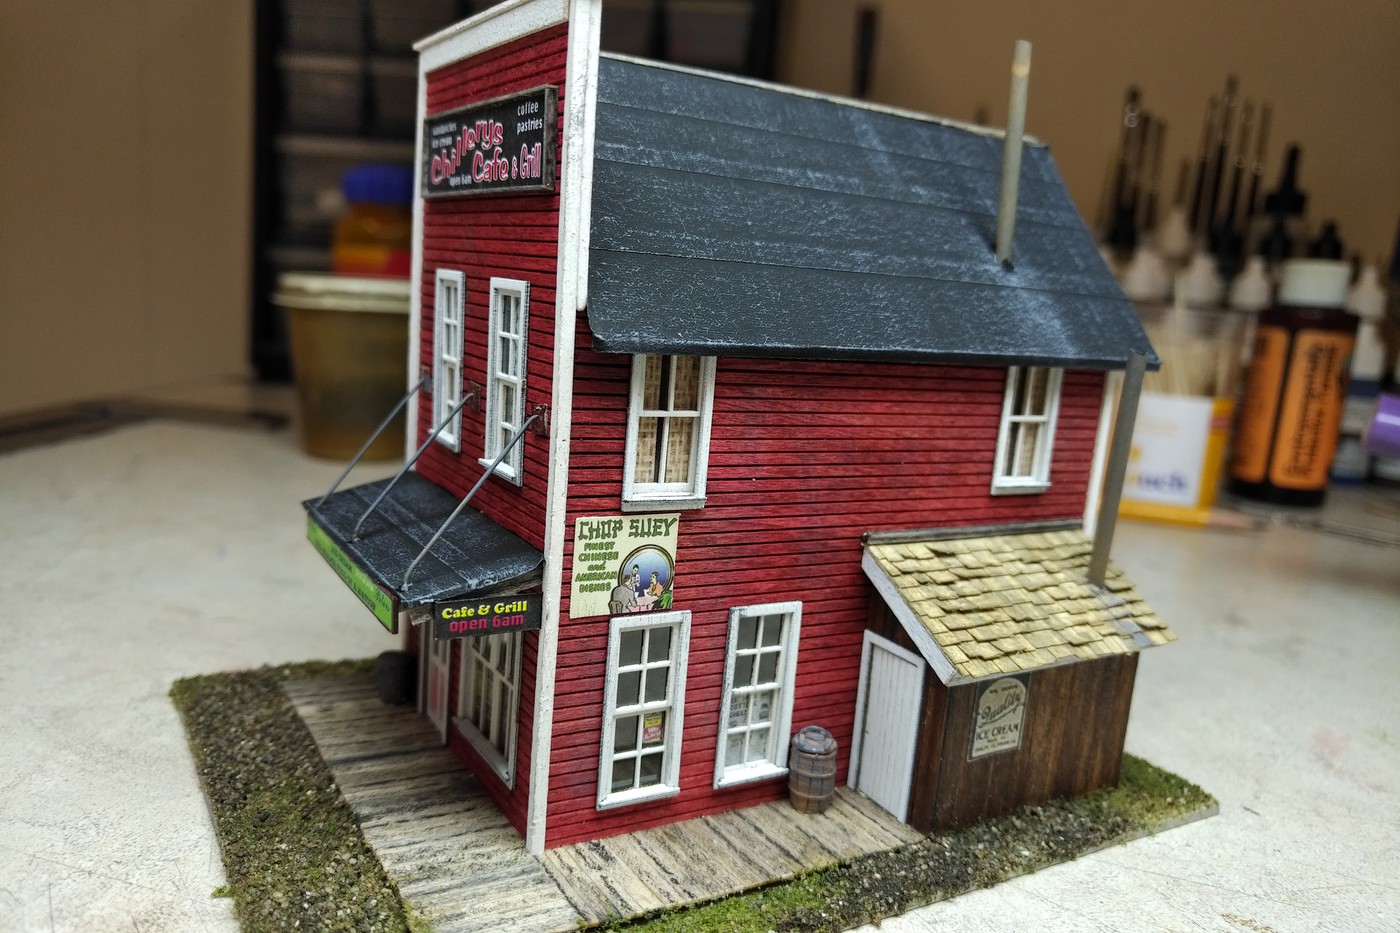
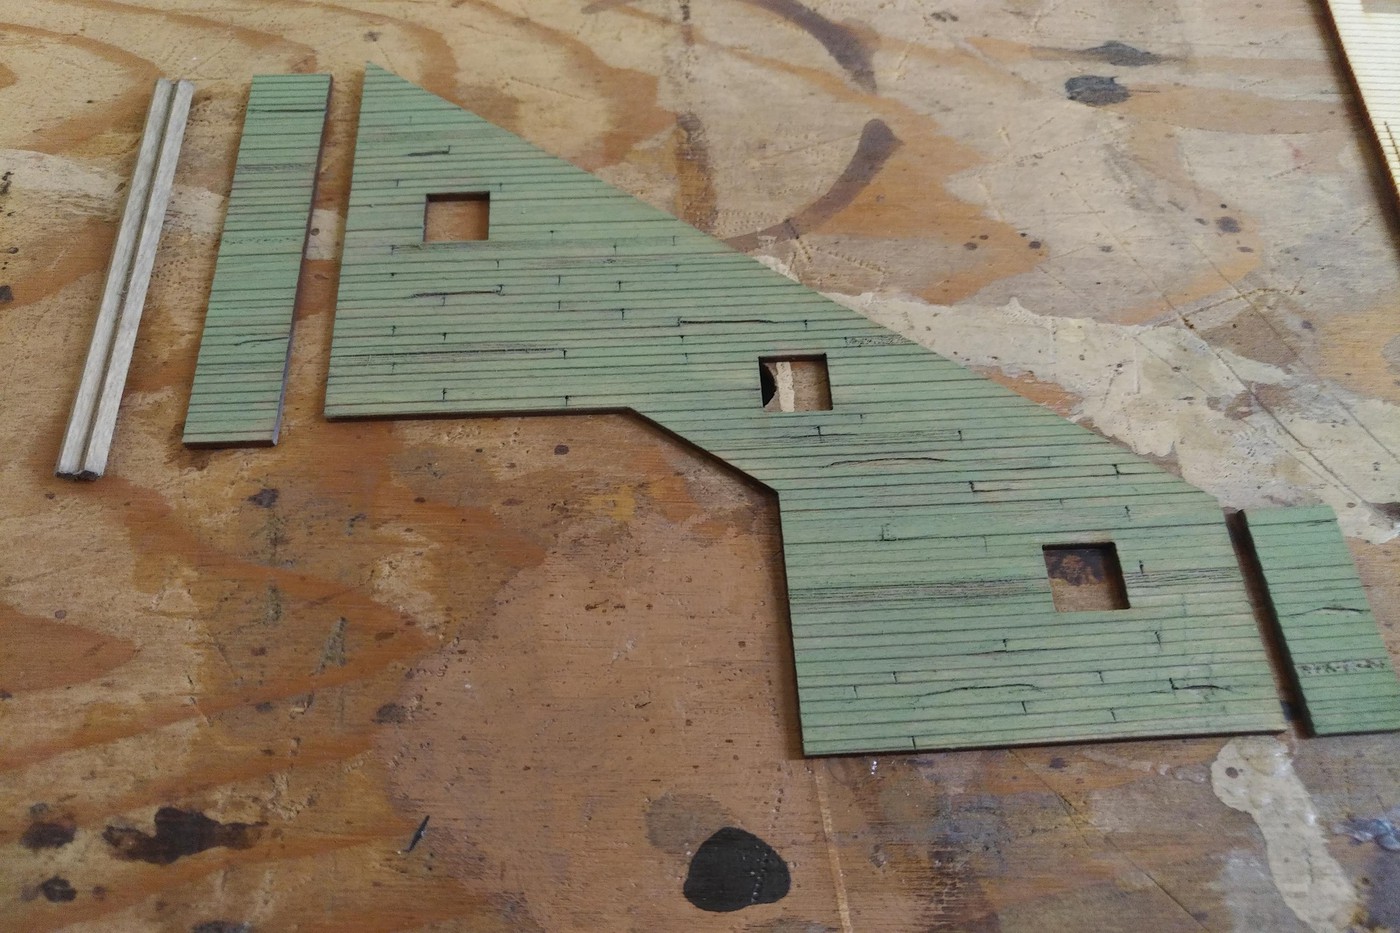
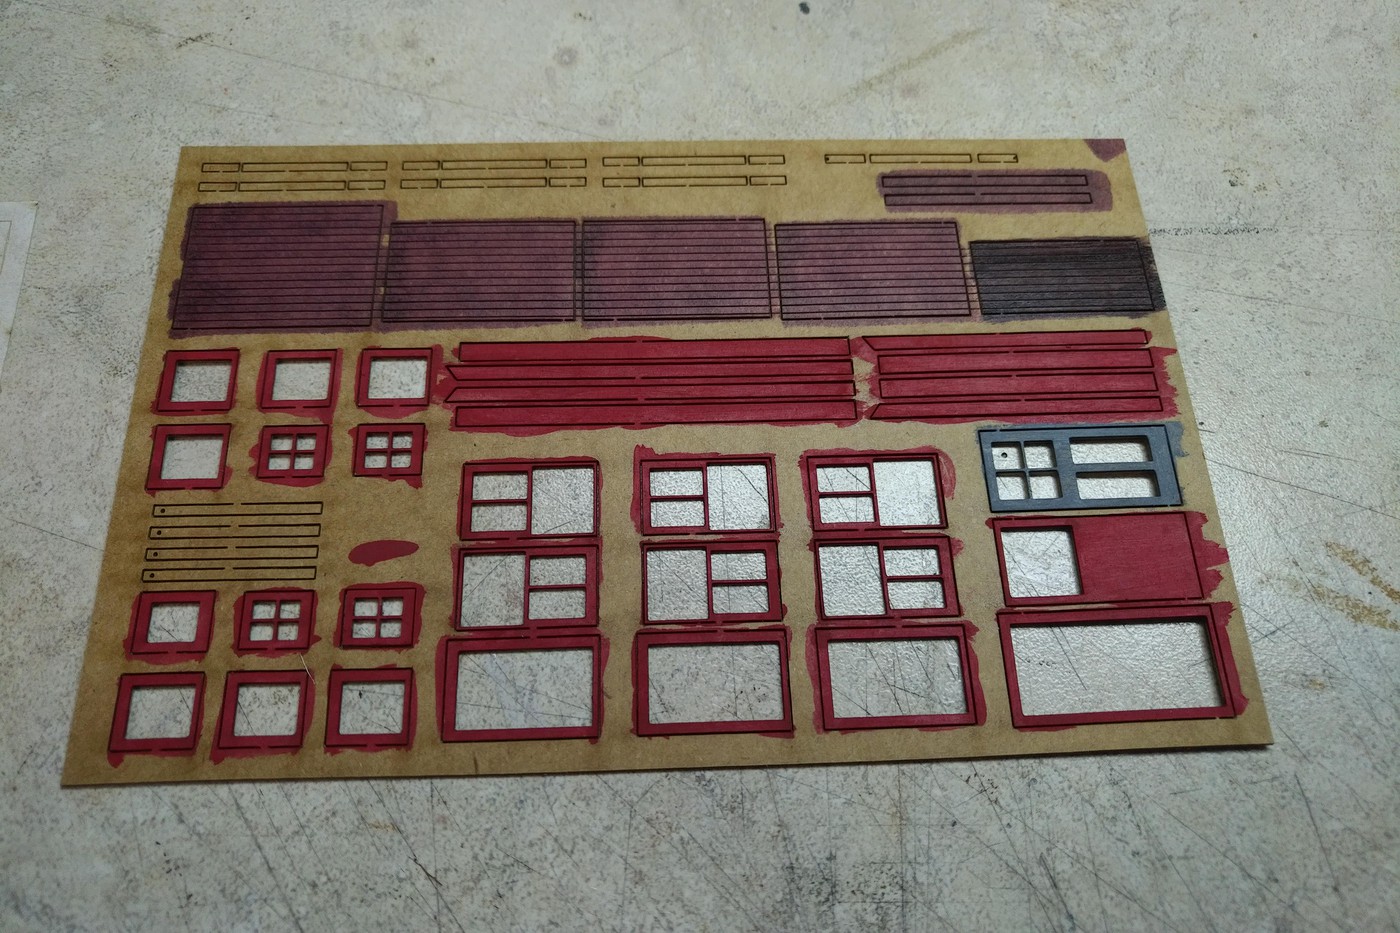
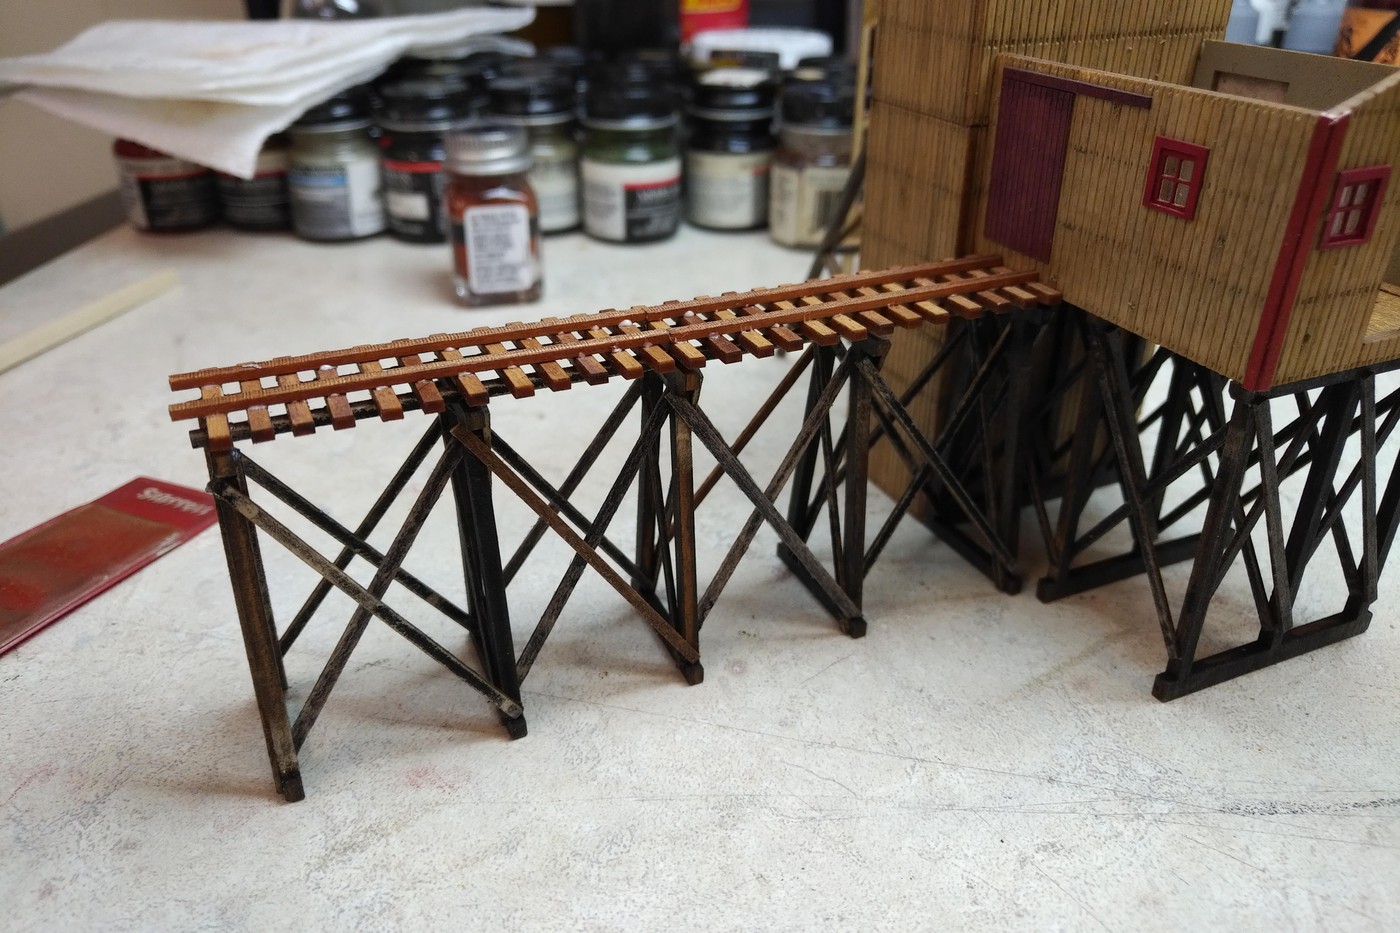
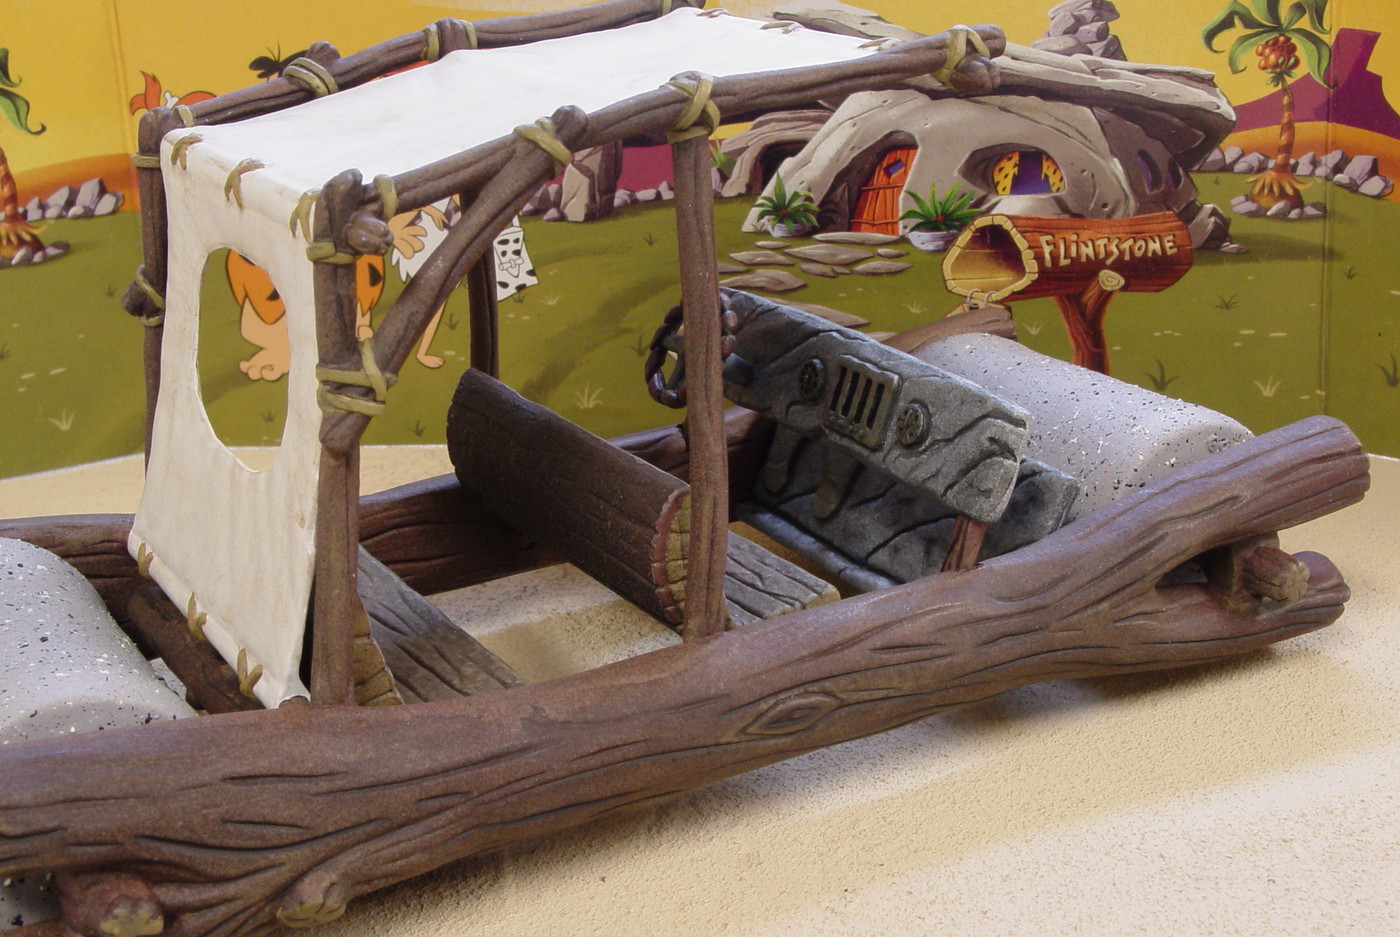
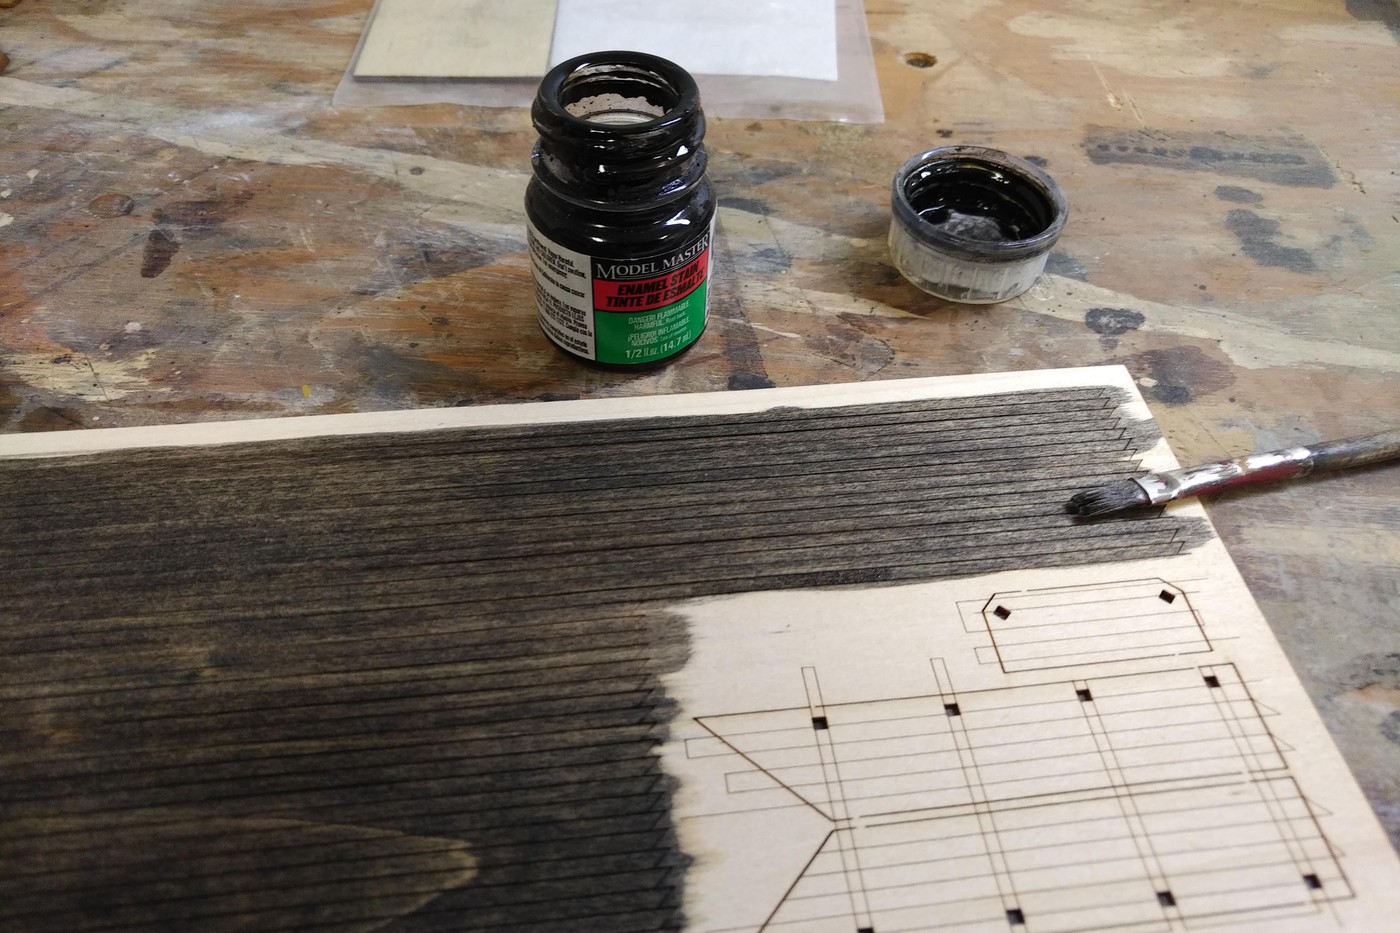
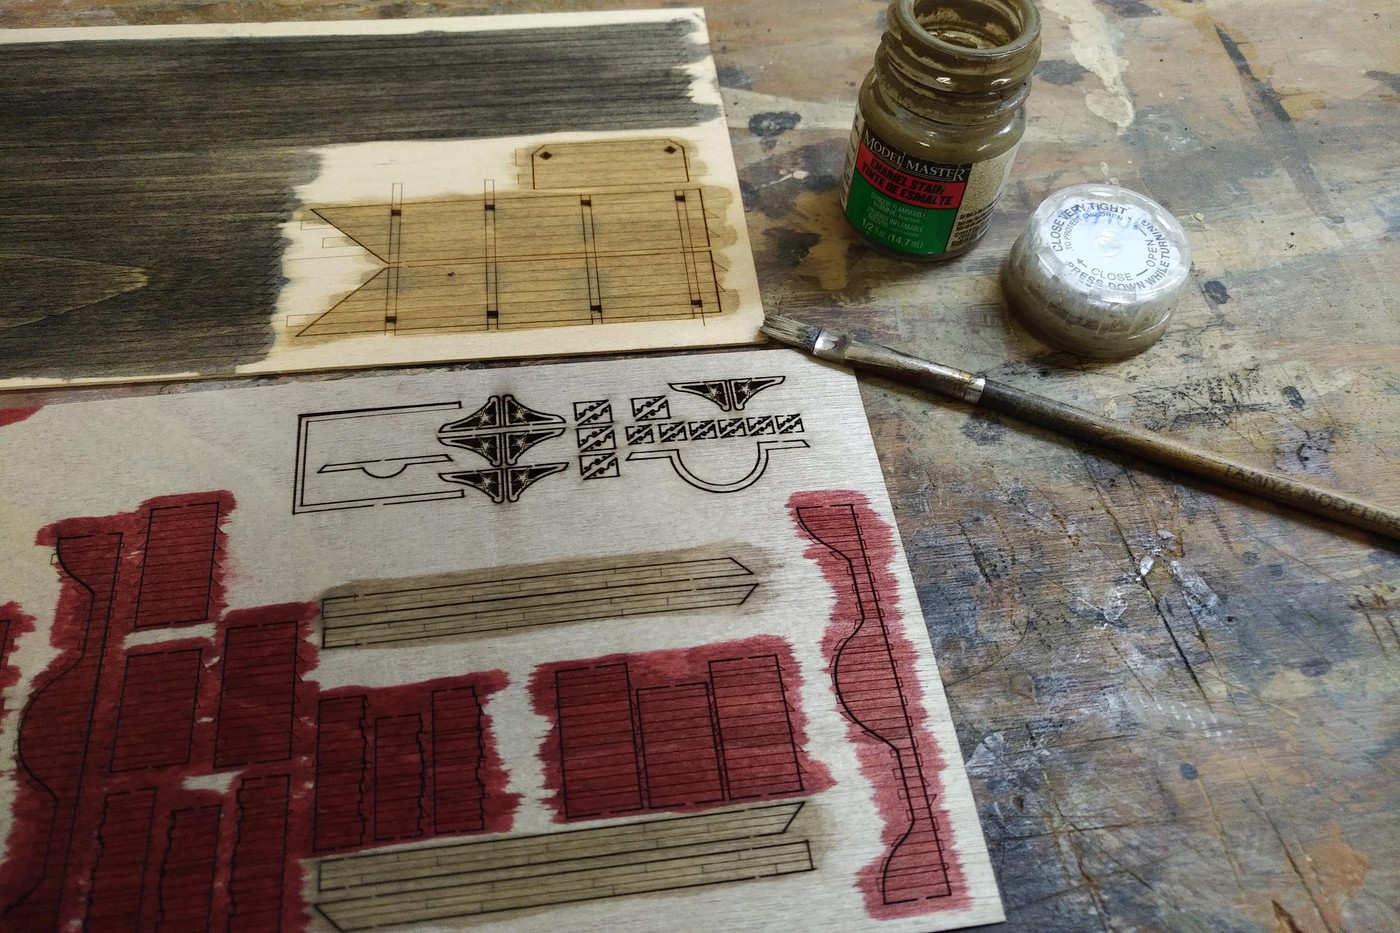
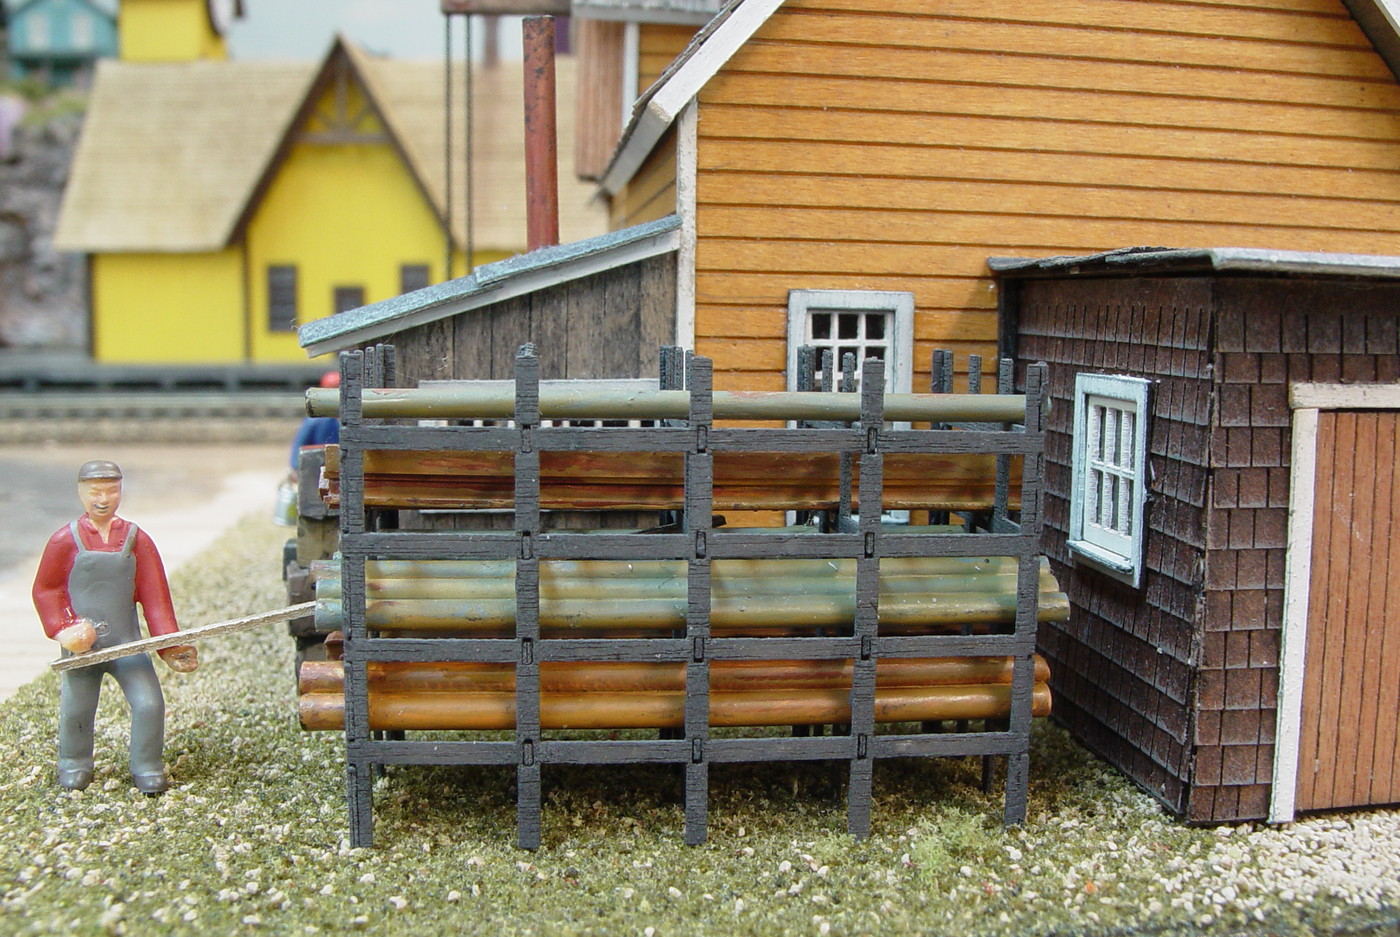
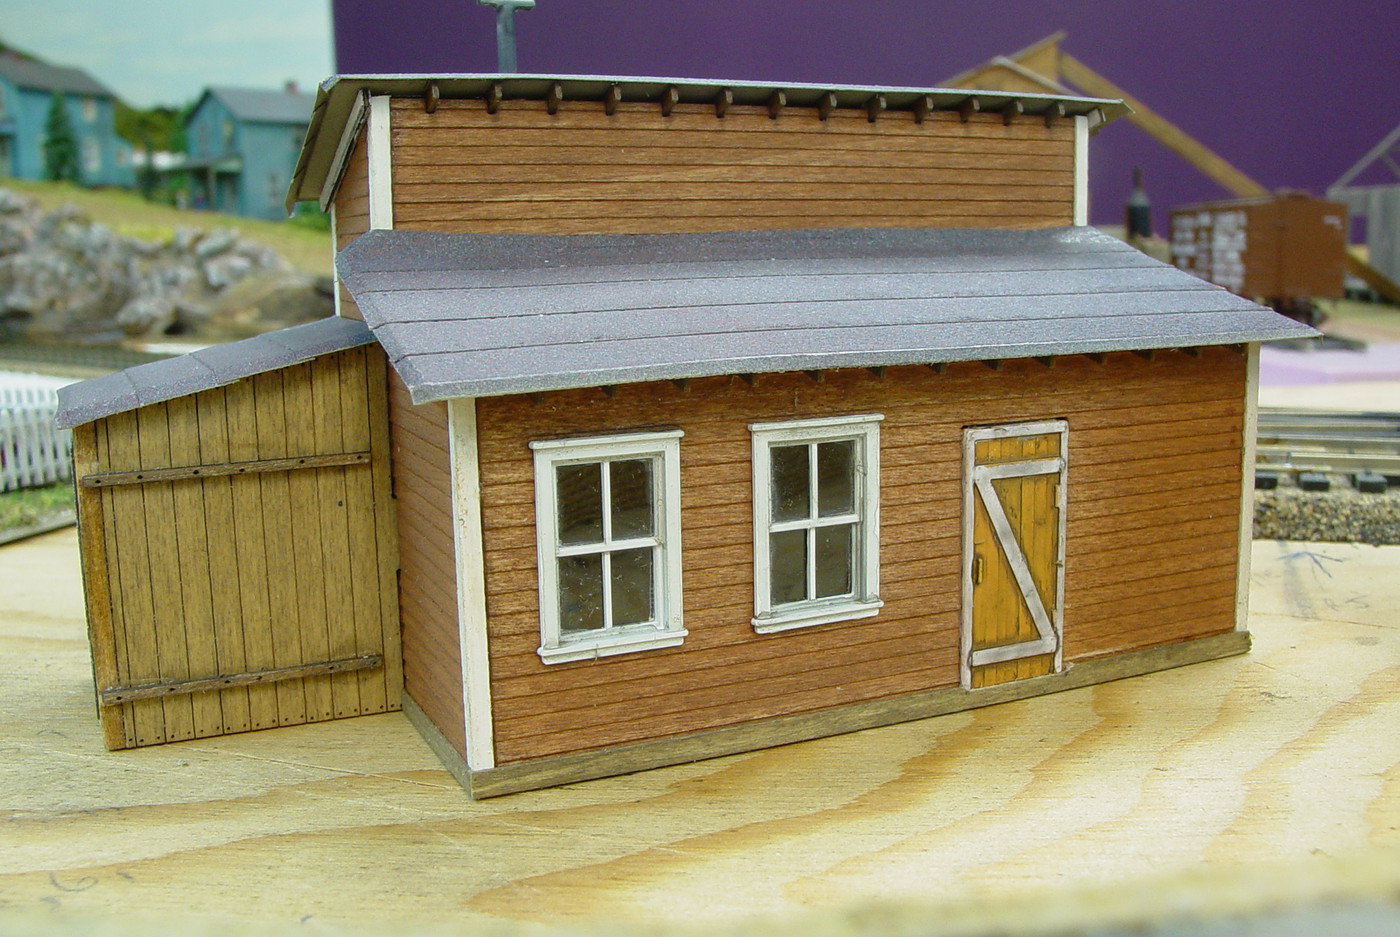
Seriously, if used incorrectly, or excessively, water based paints will warp your wood badly.

The side and rear walls got stained with good old Minwax from your local hardware store.


The front wall panels got sprayed with a lacquer based paint.


The upper wall trim panels got stained using dollar store furniture touch-up markers.


As did the window frames and sill parts.


I used an enamel based stain from Testors for the walkway planking......this is the "black" shade.


And the "natural" shade got used on the other walkway panels. Note how the same stain changes tint from pine to birch plywood.


And that's it for today. I have a hotrod swap meet to attend this Saturday and have to go scope out an old Duster on Sunday. More pics next week once I get back to the bench.

Enjoy!!

Sid
#14
HO / Some updates from my layout.
July 24, 2018, 03:06:17 PM
I'm just going to start out with a cut and paste from a Feb 2014 thread. Hard to believe it's been 4 years looking at this project.

OK...now that that is outta the way....here is the next thingamjigee I've been playing with.

I've had this MiniTrains Plymouth set sitting in a drawer for ages. I also an 18 X 36 inch wooden display case I had built years ago for some project and never used it. I decided to build a Carl Arendt inspired HOe micro-layout that can be incorporated into my main standard gauge layout as a scenery element. The concept is simple.....the little loco hauls ore from the mine to the ore dock.

I first laid out the plan on a computer program......I was able to tweak and shape the flex track down to a loco bending 4.5 inch minimum radius. With a printed copy of the track plan I started laying out buildings and after a few more track plan revisions, I was at last satisfied with the look of things.

I used extruded foam as a base and Woodland Scenics 4 percent incline starter ramps to change levels. The track is code 80 N gauge flex with Peco electro-frog turnouts. I soldered a length of flex to each of the legs of the turnouts, cut them roughly to length and attached it all to the cardstock roadbed with Lepage's Liquid No Nails. Wires have been tunneled into the foam and all connect at the rear of the layout.

The mine is a Grandt line kit. The supply house is an Alexander kit and the shacks are venerable Atlas trackside shanties. I think they will eventually be replaced by those miners shacks. I placed a wood floor in the mine house and added in a Bachmann HO log skidder to work as the steam hoist.

Here's a few pics of the progression of the layout and at the end is a quick vid I posted recently to youtube of the layout finally making laps. The thing is working well on DC now, and as the loco wears in a little, it's performance is smoothing out as well. Speaking of power......my ultimate plan is to be able to control this from my main DCC system once it is in place on the main layout. The loco itself has absolutely zero space for a decoder, nor am I willing to re-engineer the whole shebang to isoate a motor. My plan is to place a large scale decoder between the bus lines of my main layout and the feeder lines of the micro layout. If I connect the input of the decoder to the bus lines and the output to the micro layout's feeder lines it should work. Preliminary testing is proving positive.


And finally the video link.............

https://www.youtube.com/watch?v=BjzxcCJEgJE

Enjoy!!!

Sid


#15
General Discussion / Random steam pics thread
July 01, 2018, 08:58:00 PM
Random pics I find on the net......

Sid


#16
General Discussion / Happy Canada Day.......
July 01, 2018, 10:31:36 AM
......to all my fellow Canadians.

That is all ;D

Sid
#17
.......but not really a railroady kinda subject.

This winter, I needed a break from the train modelling. It was time to get back into my automotive roots and I finally finished this project up.

I started on this 15 years ago, with a basic building and a wooden base, but then quickly realized I had no where near enough stuff to fill a scene.

The past time has been spent collecting kits, robbing kits for parts and collecting objects that would fit in the master plan. This past fall I dug it all out and started in with the goal of finishing this once and for all.

Over the past 7 months I have dedicated over 600 hours into this build. A lot of the detail parts are scratchbuilt items. I think I put every skill and technique I possess into this one.

Here's a few teaser pics, but please visit the link to my Fotki album. Most photos have descriptions, and there are far too many to post up here.


http://public.fotki.com/WoundedBear/scale-automotive-mo/down-at-joes-garage/

I haven't stopped building, I just switched focus for a while.

Enjoy!

Sid


#18
HO / Picture time again.............
July 15, 2017, 12:43:42 PM
I was looking for an old thread to update and couldn't come up with a new enough one to add these to, so here we go anew.

Again, I have spent too much time building, not enough time photographing the build and definitely cut down on my forum time....lol. Now it's time to show off the results........no big descriptions this time.....just photos of a few things I have managed to get accomplished over the past 7 or 8 months.

Enjoy!

Sid


#19
Alberta Railway Museum steam locomotive coming out of retirement for Canada 150......

http://cnews.canoe.com/CNEWS/Canada/2017/06/21/22733100.html

Sid
#20
HO / Possum Hollow....a white metal kit
April 13, 2017, 12:29:35 PM
Hi guys. Been a while since I posted any pics again. I have had time to stop in once in a while, but not posted much at all. Too much talking on here makes for way too little build time......lol.  ::)

It's spring again and time for the track again. I destroyed a motor last year and didn't get a new one until just before the new year. I'm in the process of getting it back in the car now. It's pretty................... ;D 
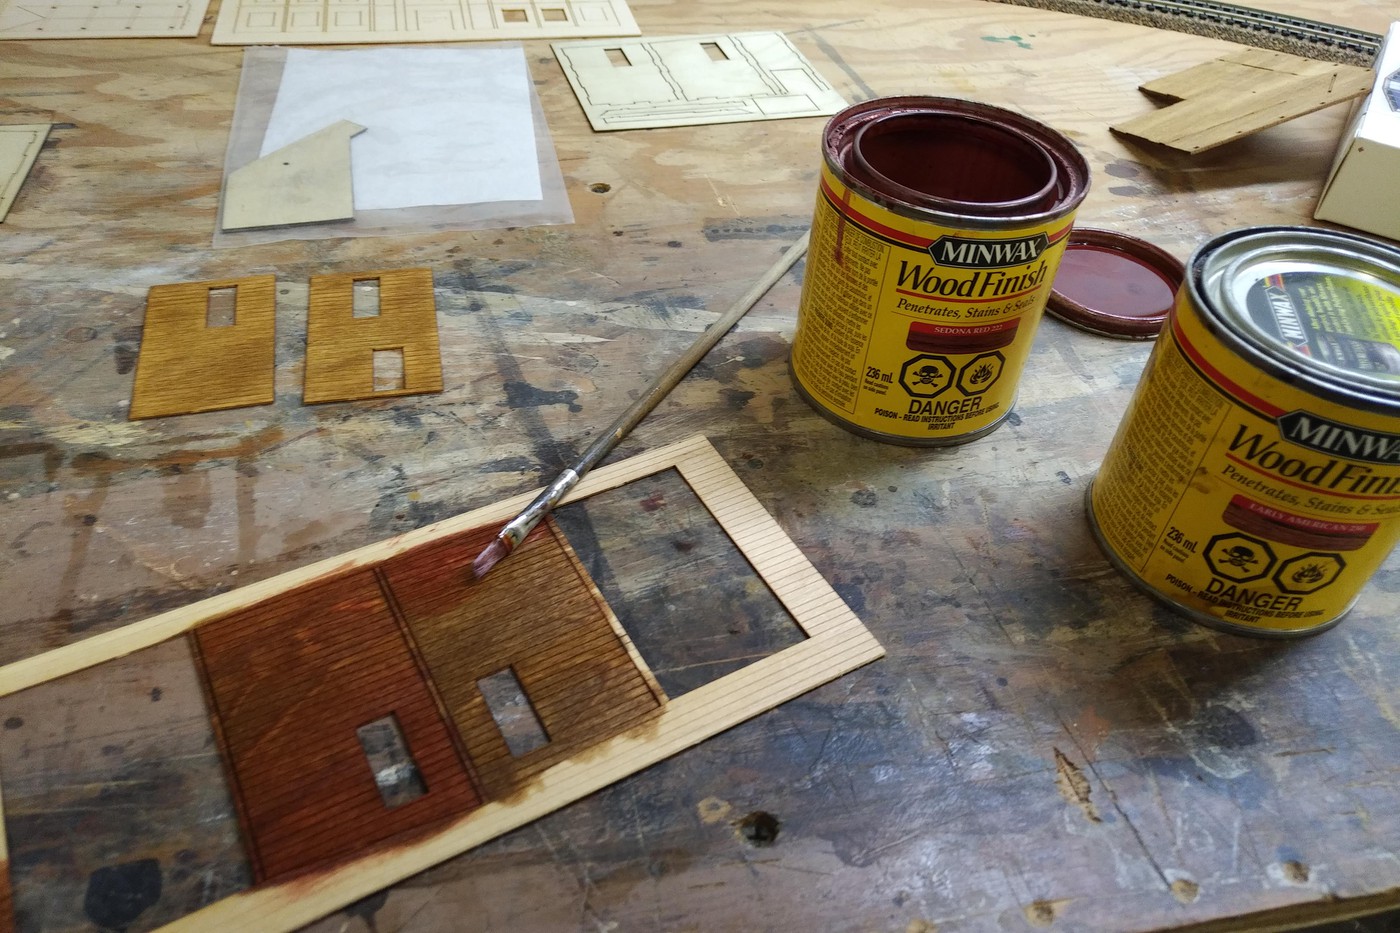
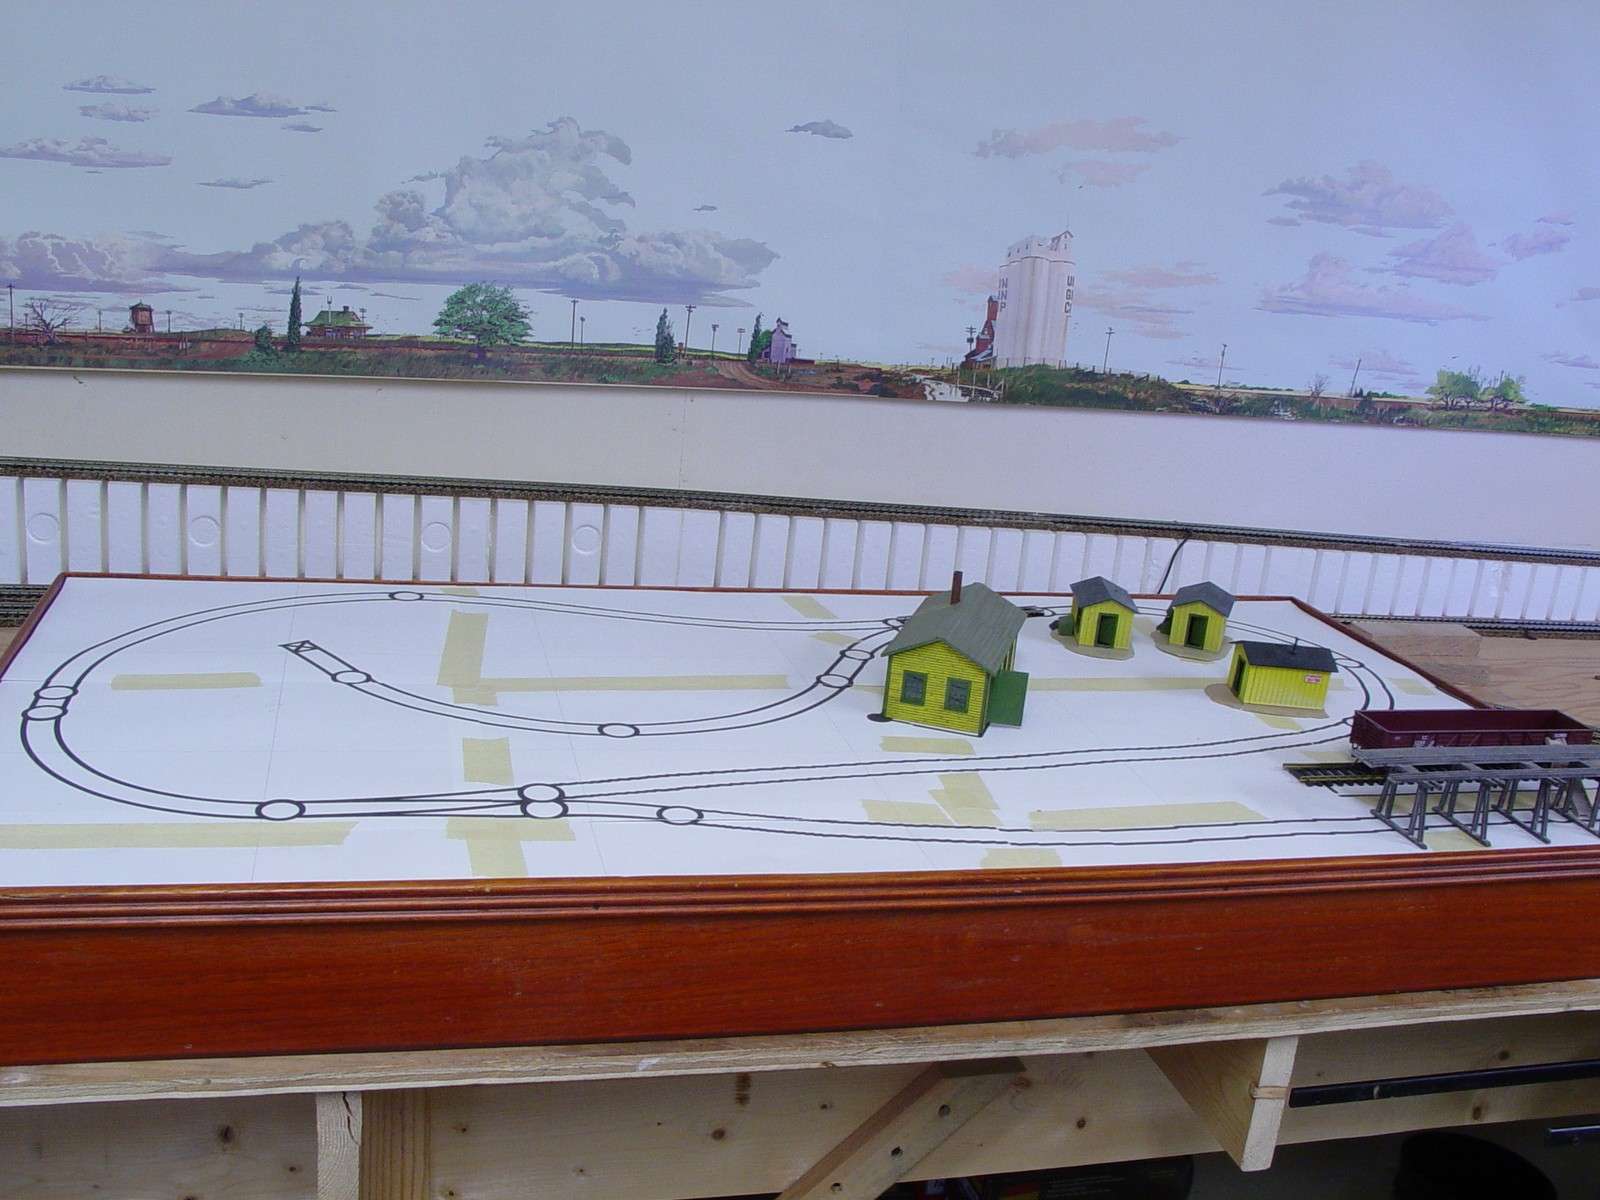
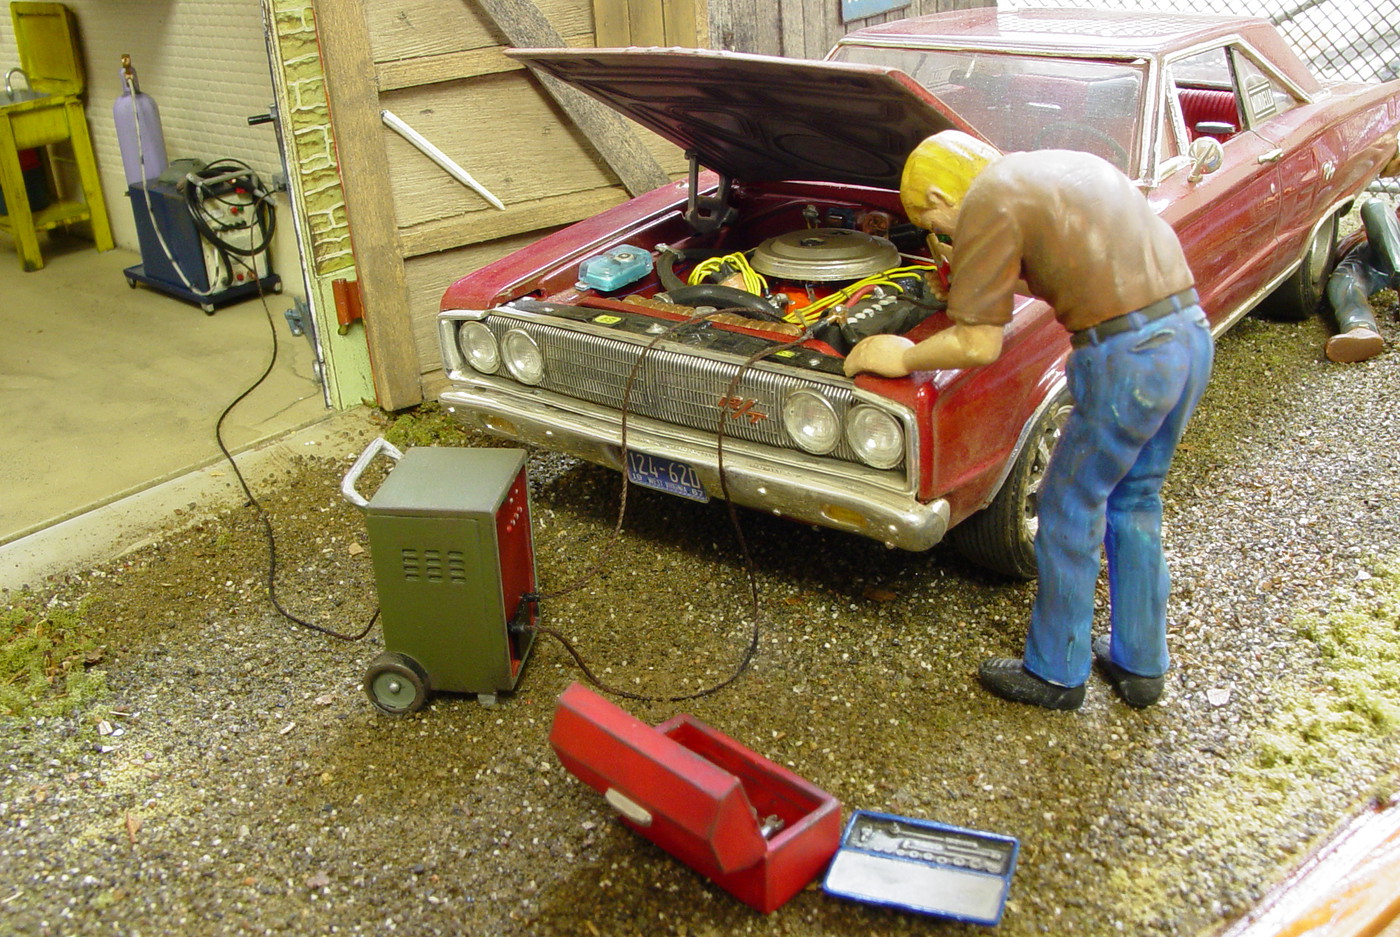
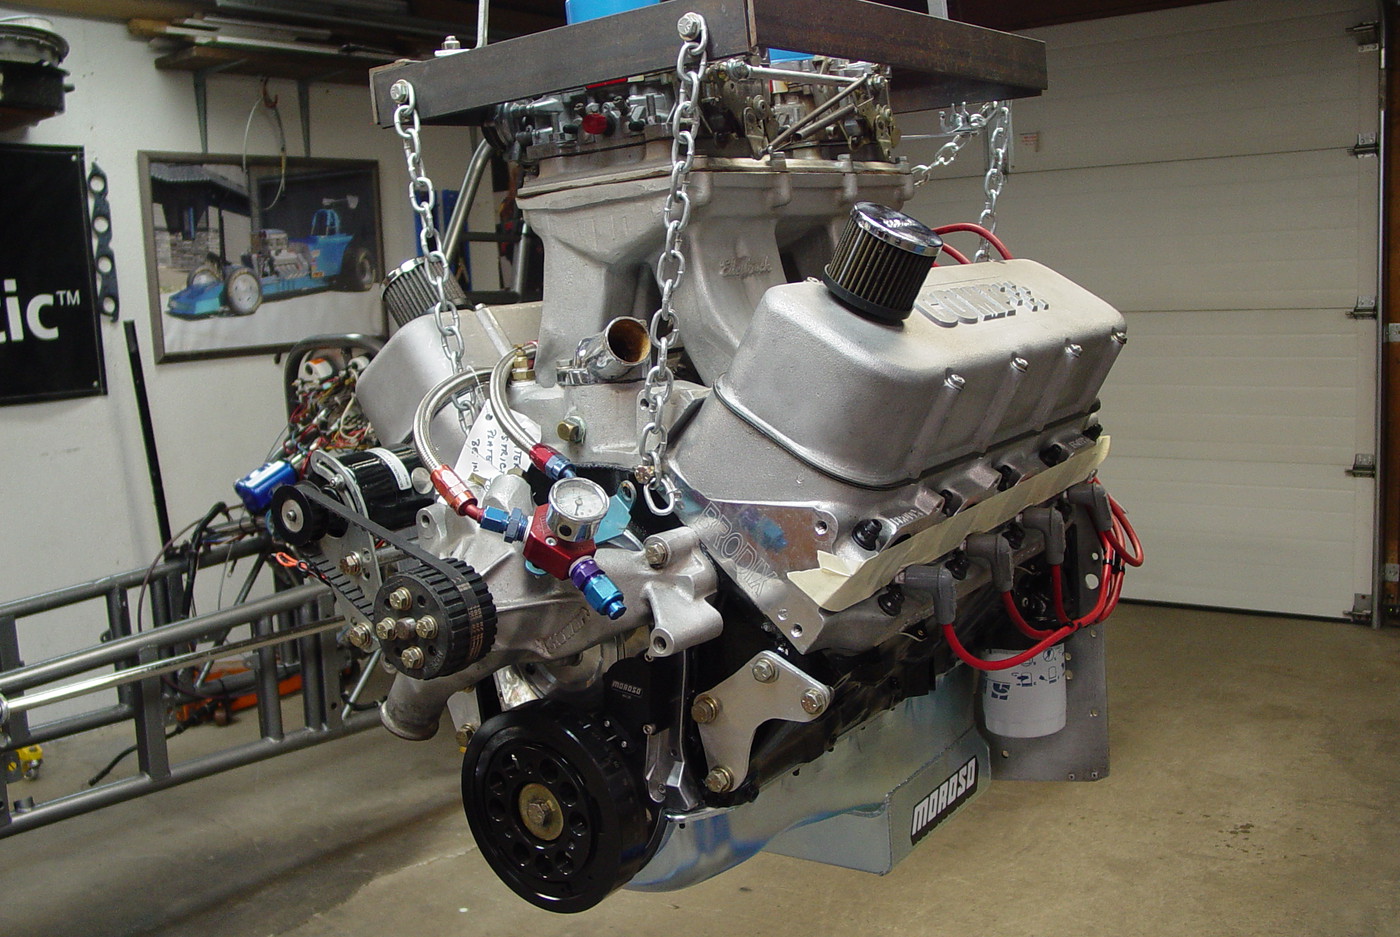
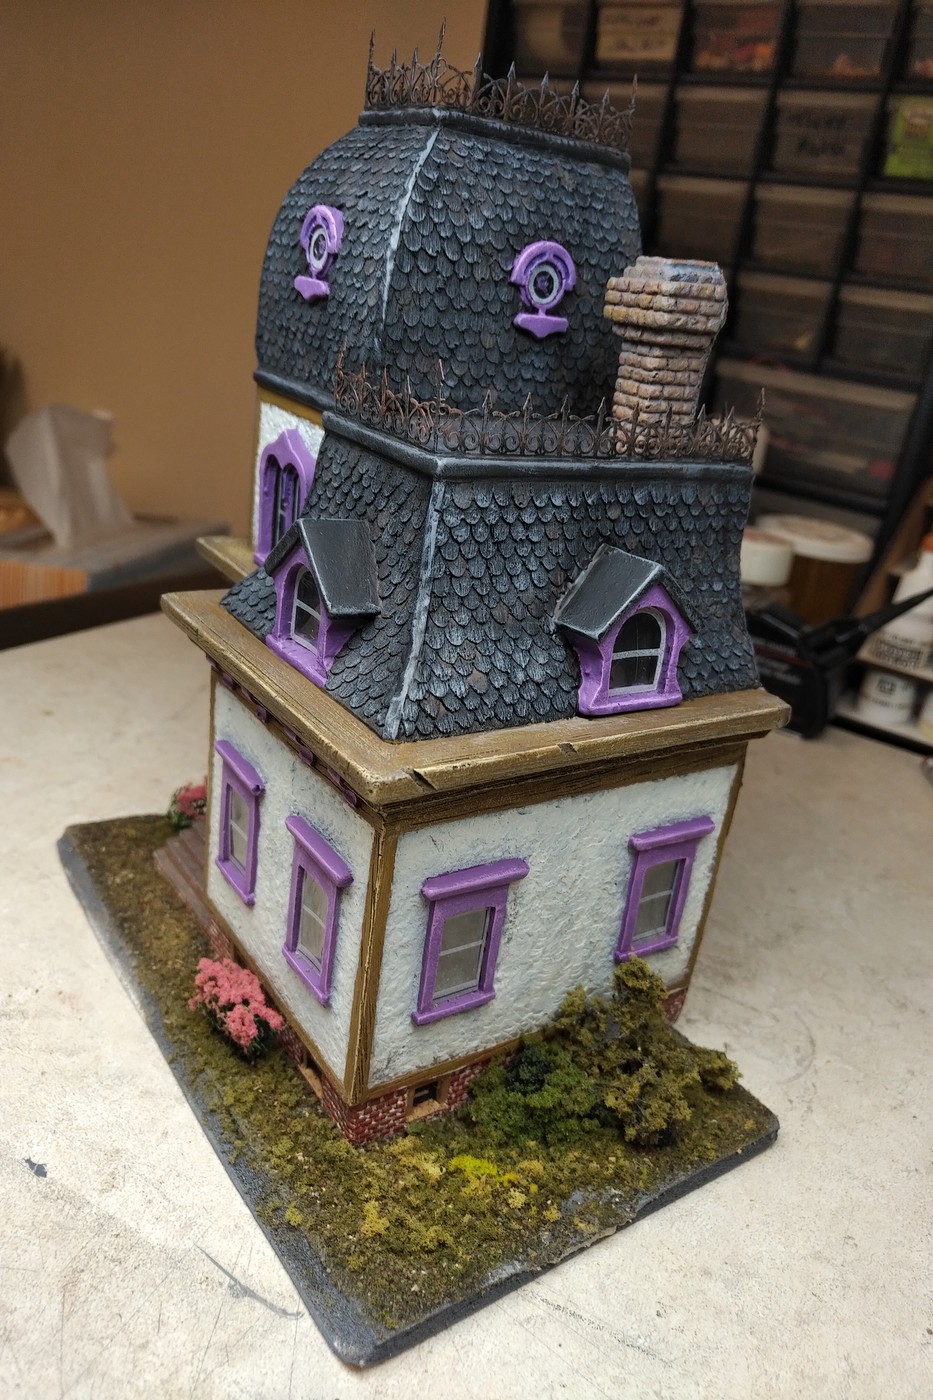
The only thing we managed to save from the old one was the block itself. This new one should be a little kick in the pants.....lol.


After the Mikado weathering I did, I got side tracked with an automotive build. Anyone recognize this? :D