News:

Please read the Forum Code of Conduct   >>Click Here <<

Main Menu
Menu

Show posts

This section allows you to view all posts made by this member. Note that you can only see posts made in areas you currently have access to.

Show posts Menu

Messages - Big Sol

#1
Heh, don't worry, I'll be releasing the program for public use once I've got a stable working version with enough features that I feel it's actually worth using. At this point, it's still pretty slim...

As for unloading variables, adding in each type of loading process for each cargo type would simply take too long and be a huge process at this point. Not saying I couldn't do it, but I think that allowing the user to manually specify the amount of time it'll take for each cargo type would be a little more efficient and open ended.

It shouldn't be too long before I have something ready for release. I just need to learn how to do a few more programming tasks before I can complete the program...maybe in three or four days.
#2
That would explain it. I've never actually seen COWS or anything in the stock cars I've seen...

There are probably a lot of things on the list that don't get transported by railway anymore. I'm not even sure produce is transported by train. Still, though, I'll leave them in. After all, imagination is nice in this business, and you can mix a fair share of realism with a little imagination for cargo consists.

And, speaking of the program, the new one using all of the cargo types listed on this post is coming along beautifully. Even the mishaps work. Every time you load or unload, there's (currently) a 5% chance that a mishap will occur, which doubles the loading/unloading time.

Eventually, I will make mishap chance, revenue amounts, operating costs, loading/unloading speeds, and all the rest of the variables in the program customizable though a configuration menu. That way, if your railroad has some spiffy new (real or fictional) cargo loading system that loads steel girders 50% faster than usual, you can modify the program accordingly.
#3
Implementing those might not be too hard.

I can implement a generic "loading mishap", which you can leave to your imagination depending on the cargo that suffers the mishap, the effect being a random chance that could double loading time.

As for mixed eras, I did that on purpose since I know many model railroaders out there sometimes run their models in earlier eras, while others run later era railroads. And, on that note, I could've sworn that I've very recently seen livestock cars here in California. I may be mistaken...aren't they the boxcars with the thin horizontal slots on the walls?
#4
General Discussion / Simplistic Cargo Loading Program
August 13, 2007, 09:43:13 AM
As an amatuer programmer, I've decided to create a simple cargo loading delay program for use in model railroading. The program is nothing fancy. All it does is provide load/unloading delay timers so that you can simulate the time taken to load each car with cargo. Here's a screenshot:

http://i88.photobucket.com/albums/k193/bigsol81/CargoLoaderBeta.jpg

Basically, you click the "Load This Cargo" button when your train is stopped at a station that supplies this type of cargo. This will then cause the bar below the buttons to slowly fill up, the speed of which varies from one cargo type to the next. Once it fills, the "Current Carloads" for that cargo type increases by 1.

Once you arrive at a station that can accept that cargo, you click the "Unload this Cargo" button, the bar fills up to indicate the unloading process, and once full the number of carloads decreases by 1. Clicking the unload cargo button when the current carloads is 0, obviously, will result in an error message.

The "Track Operating Costs" box is an experimental feature. Every ten seconds, it increases the total operating cost of your railroad. Eventually, I plan to have that operating cost increase depending on the number of locomotives you currently use, as well as other factors. Currently, the cost of operating the railroad increases by 800 to 1500 units every ten seconds. I use ambiguous 'units' of currency, but the final program will allow the user to select whatever symbol for currency that they desire. In addition to maintaining the railroad, each time a carload of cargo is unloaded, the "revenue" box increases. This amount is determined by the cargo, and the price varies from one type of cargo to the next. For example, a carload of mail generates less revenue than a carload of passengers.

Speaking of carloads, I've currently only got the five types you see, and this is how I've broken them down:

Mail - Obviously, this is envelopes, letters, and other small, light packages. Mail, due to its relative low density per square foot of cargo space, is lightweight. Mail loads faster than any other type of cargo, but also provides the lowest amount of revenue. It only takes 10 seconds of real time to load one car full of mail.

Passengers - Again, this is obvious: People. Passengers provide a very large variance in revenue depending on the type, their ticket reservations, etc. Passengers actually take longer to load than Light Freight due to the added time it takes to load on luggage, have baggage checks, make sure everyone is seated and comfortable, and other 'people' concerns. It takes 18 seconds to load one car of passengers.

Light Freight - Now, for the purposes of keeping things simple for this program, "Light Freight" refers to any perishable goods. This includes not only foodstuffs such as grain, beef, and poultry, but also livestock. Essentially, anything that can't be left sitting on a sidetrack or in a yard for very long. Light freight takes 15 seconds to load one car.

Medium Freight - This refers to any freight which is still somewhat important in terms of delivery time, but not something that will die or go bad while sitting on a side track. This generally includes manufactured goods such as computers and other electronics, furniture, home appliances, automobiles, and other larger cargo items such as those things ordered for shipping delivery Medium freight is often bulky and heavy, thus it takes 20 seconds per car of medium freight.

Bulk Freight - By this definition, "bulk freight" covers anything that is, in essence, 'not a big rush' and can be left on side tracks or in train yards for several days or more without a big hit to profits. Usually, this covers industrial goods such as coal and petroleum, as well as construction materials like lumber or steel. Bulk freight, due to its sheer weight and mass, takes 30 seconds per carload, but often provides the largest revenue per carload.

Those are the basics of the program. Now, my primary reason for posting here, aside from announcing the program itself, is that I'd like some ideas on the cargo system. Mine, as I said, is very generalized. However, I've come up with a more complex system using the following cargo types:

Mail & Passengers - Obvious
Grain - Includes cereals, as well as barley, hops, and other brewing materials. Also includes Salt, Sugar, and other bulk foodstuffs.
Produce - Both fruits and vegetables.
Meat - It's all frozen during shipping anyway, so it's grouped into one type.
Livestock - Both small and large.
Bulk Freight - Groups industrial metals (steel, iron, copper) and fuels (coal, petroleum) into a single category.
Textiles - Wool, felt, yarn, cloth, etc.
Automobiles - Also includes other vehicle shipments.

I can't come up with anything else specific, but this should be more than sufficient I should think. Also, I wanted to note that my program is designed to be a utility, and by no means a 'game' of any sort, so anyone hoping for something like that would be disappointed. Think of it as a very specialized calculator.

Opinions? Suggestions? Criticism?

#5
When I saw that it was going to curve, I decided to leave it in. I realized that real life railroads aren't perfectly straight, and the bend in the track is pretty mild, so I ended up leaving it in for added realism.
#6
General Discussion / LEGO Trains
August 11, 2007, 04:30:35 AM
Okay, while LEGOs are definately 'toys' by most standards (who says toys are bad?), I was wondering what most model railroaders thought about their Lego Train line of products. As with all Legos, they're on a set scale (Lego scale?), which seems very close to O-Scale. Here are some images:

http://www.cnettv.com/i/dl/vdl/media/image/25/85/1/18525_320x240.jpg
http://www.geocities.com/Area51/Hollow/2436/mainview.jpg
http://scltc.org/images/galleries/events/2003.11.11.l.01/mic.205.jpg

Now, granted they're not as 'realistic' looking as the things I prefer to work with, but they can clearly be used to create very intricate designs, and there's definately no shortage of scenery pieces what with the various different types of scenery available, including medieval and sci-fi space scenery if you wanted to use those sorts of themes in your construction (Medieval magic-powered engine? haha).

Personally, I think Lego trains qualify as a type of model railroad, myself, having enjoyed legos for many years. Anyone else got an opinion on this?
#7
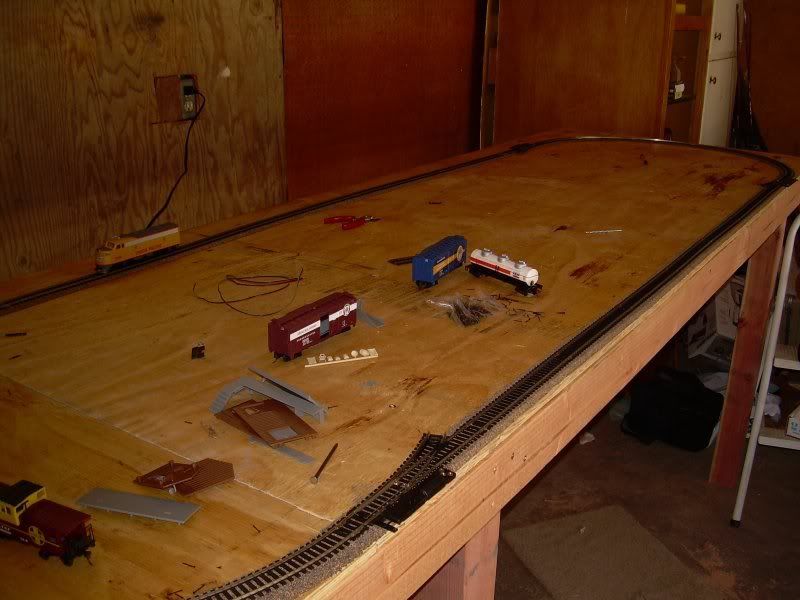
Most of the corking is now complete.


As you can see, the workspace is still quite cluttered, but that will be cleared up once I've finished corking all of the track. For now, the outer oval is finished.

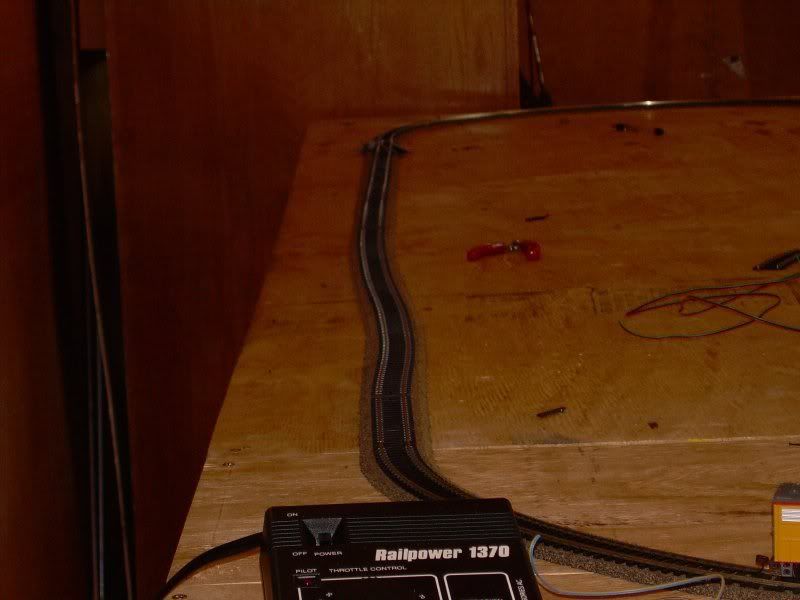
Of course, it didn't turn out 100% perfect. My calculations were a bit off, and I ended up having to used a piece of flex track right here.


Yes, this segment was SUPPOSED to be straight:

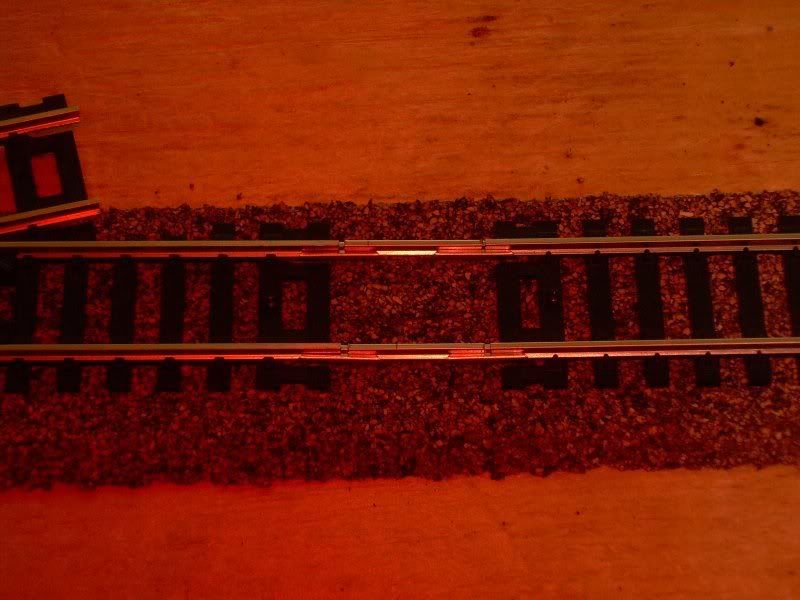
Finally, I was 7/8th of an inch off, so I had to cut rail and patch the remaining segment of track:


Despite the appearance, I can gladly say that the train runs over all of the track silently and flawlessly, so I feel that the overall project was a success. All I have to do now is put the central track in and the track laying will be finished for the time being.
#8
Okay, as mentioned before, I decided I'd dedicate a thread specifically to the first real model railroad project I've ever done. So, let's get started with the table.

I constructed the table myself out of the following materials:
Three 8 ft. 4x4s
Three 10 ft. 2x4s
One 8x4 Plywood panel cut into one 3x8 panel, two 3x1 panels, and some leftover wood for use as filler.
Assorted wood screws

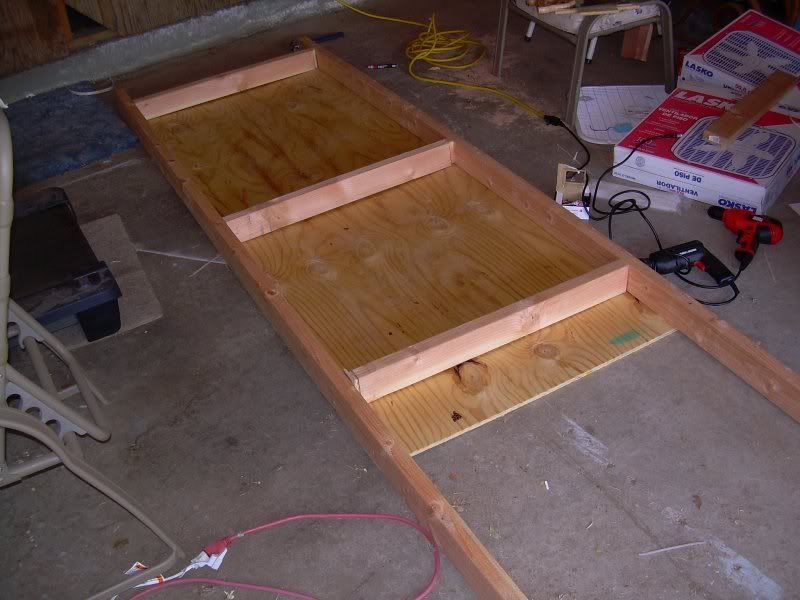
At first, I was going to make the table extremely simple. It was going to simply be a piece of plywood with four legs nailed to it. However, the naivety of my carpentry knowledge quickly became apparent when I noticed how warped this (and every other) piece of plywood was, which was only amplified when I actually tried to drive nails through the plywood at a straight angle. Okay, so taking the simple route wasn't going to work. So, I decided (in a moment of clarity) that building a frame of 2x4s and then attaching the plywood to it using a drill and wood screws would be far better. Needless to say, it was. Exibit 1:


As you can see, the frame worked rather well, as anchoring the plywood to the frame made it nice and flat. However, as you can see, there's a problem:


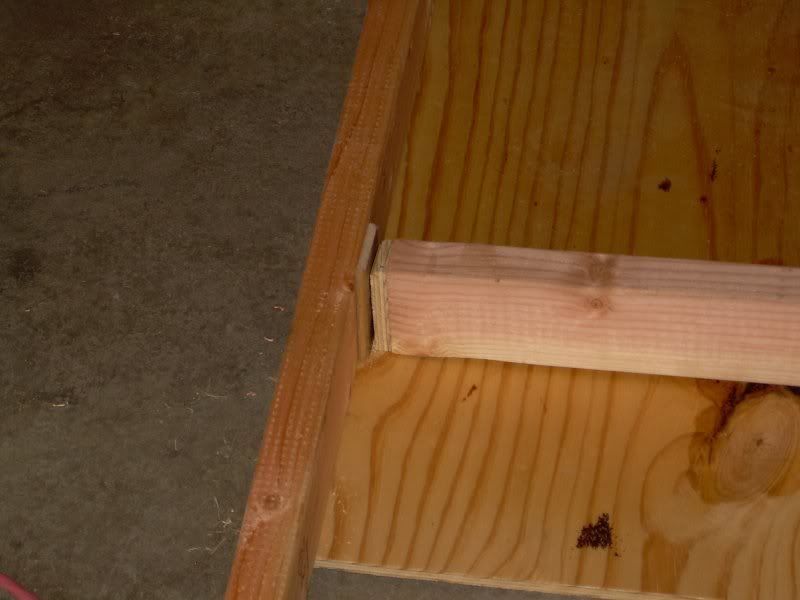
Again, my amatuer carpentry knowledge failed and I didn't realize that a 2x4 isn't REALLY 2x4, but rather 1 1/2" by 3-point-something. As a result, I had gaps where my pre-measured crossbeams (At 32", which is what 3' minus the 2 inches on each side for the "2x4"s) were supposed to go. So, I had to improvise by using some of that leftover plywood sheet as filler material. It worked well enough. You'll notice that the 'frame' is 2 feet longer than the table top. This is because I wanted a 3x10 table, but the hardware store only sells plywood, obviously, in 4x8. Fortunately, the extra 1-foot panel I had them cut off of the original 4x8 could easily be cut into two 3x1 panels, which were then placed onto the remaining framework.

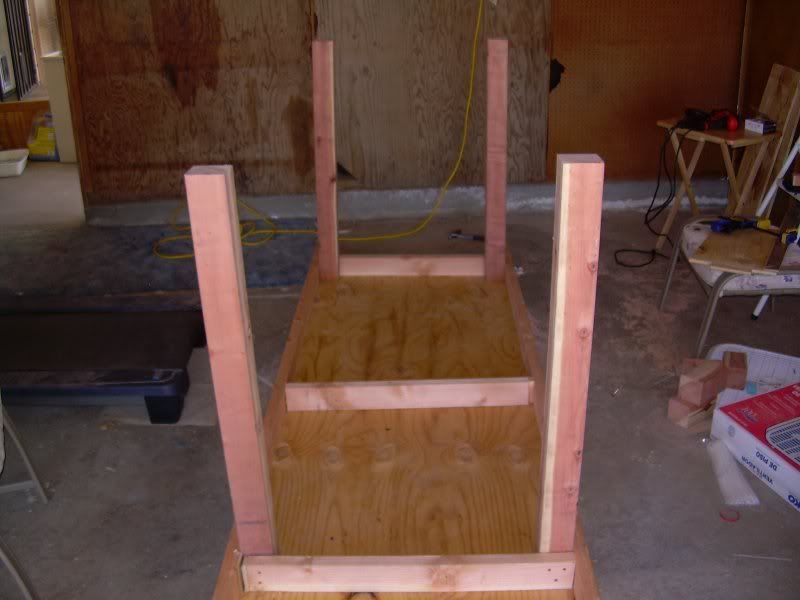
Once that was done, it was time to attach the legs. Compared to the other work, this was a piece of cake:


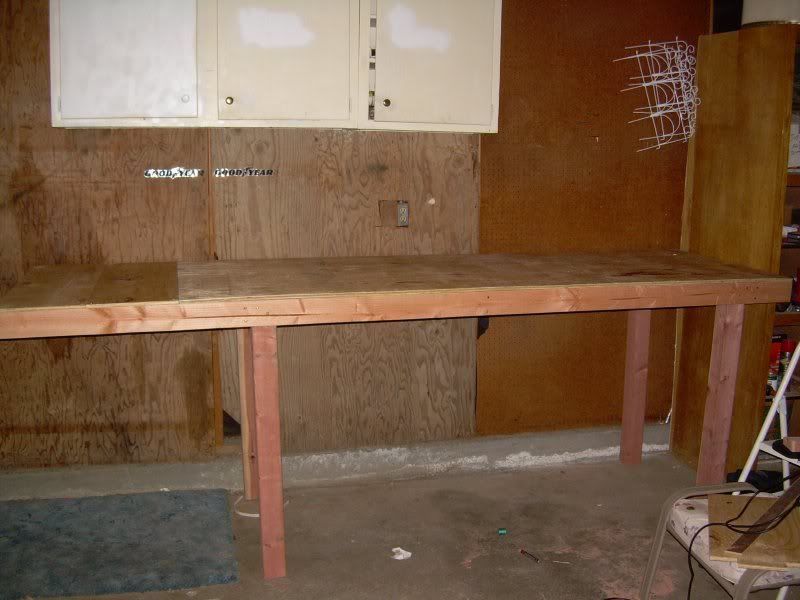
There we go! Legs! 3 1/2 feet long, putting the table at a perfect height for me to use without having to stoop over or stretch to reach across it. The legs are really anchored to the table, too, with 4 wood screws each. Once the legs were on, it was time to flip it over:


As you can see, we got the table turned upright without breaking anything important. Also, you'll notice I attached those two final 3x1 pieces to the end there. The 'overhang' seen at the left of the image is where the controls (power pack, switch controls, etc) will be placed, and where I'll stand most of the time while operating the railroad.

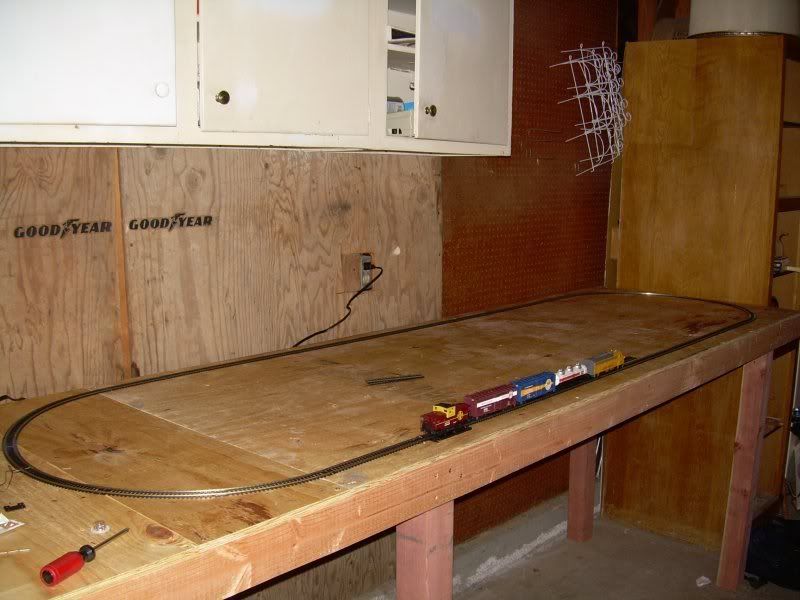
Now, this next step might be out of the ordinary for others here, but this felt like the most comfortable way of doing things. I pulled out my track and started putting it together just as I plan to have it when the track is complete. This gives me an excellent view of just where the track will lie once the cork is down. Here are the results:


Yes, obviously I couldn't resist putting the train on the tracks, connecting the power pack, and running a few circuits on it. It runs well, though this process did indicate a few spots where I failed to properly connect the track together. This has been fixed.

Tomorrow, I need to buy some of the tiny nails used to nail the track to the cork. Then, I'll move the track aside and begin outlining the places where the cork will go, followed by replacing the track once more. Then that should finalize the process and I'll have my first model railroad completed.
#9
General Discussion / Re: Is DCC worth the price/time?
August 09, 2007, 06:14:55 AM
Again, I honestly wish I could go with something wider than 3 feet, but this is an absolute firm restriction at this time that can in no way be modified. While there is 'physical' room for the table to be that wide, it is required to be against a wall, and I can't reach across more than 3 feet of table without leaning on it heavily or lowering it, and since I just spent almost two days and a fair amount of money building a train table, it's going to stay where it's at for now.

I understand the loss, and one day I'll expand my table and have room for larger curves, but for now, this is where it is.
#10
General Discussion / Re: Is DCC worth the price/time?
August 09, 2007, 12:41:20 AM
Easy, guys. Yeah, I had the terms 'radius' and 'diameter' mixed up. 15" radius = 30" diameter, and I've got a 36" wide board, so yeah, I'm stuck with 15" turns for now. Probably for a great while. I wanted to go with a 10x4 table, but A) I don't have the space, and B) It's against a wall, which would make reaching the far end of the table very difficult if it were 4' wide.

I'll compromise for the time being and stick with shorter engines and cars. Also, I'm only going to be running one engine, a standard DC engine, until I can afford DCC. It definately sounds like the way to go, and I'd probably be far more interested in that than standard DC. On a side note....I think I didn't buy enough straight track segments, now that I look at my almost completed table.
#11
General Discussion / Re: Is DCC worth the price/time?
August 08, 2007, 02:05:20 PM
Hopefully, nobody takes this the wrong way.

I know there are a lot of  'old-timers' on this board...as in, those who are significantly older than myself that have been doing this for a long time. I have the advantage of having grown up around electronics and computers, whereas many of the older men grew up tinkering with cars or building things out of wood. As a result, they're a lot better with carpentry and mechanics than I am, and I'm better with electronics and computers.

Now, I don't claim that this makes me an 'expert' on DCC. It does, however, based on what I've read so far on DCC, give me an edge on learning it, as the technology used to communicate with engines over DCC is very similar to that used in Powerline adapters, such as the HDX102 and XE104, which are devices that allow computer networks to communicate through the electrical wiring in a house. I understand networking, I understand digital device communication, so grasping the concept behind DCC isn't that much for me. That being said, I have to say that a lot of Hunt's statements could be said about virtually ANY hobby, but they won't necessarily apply to anyone.

On another note, I'm going to start a separate thread to document the progress of my first REAL model railroad project, complete with pictures...all coming soon.
#12
General Discussion / Re: Is DCC worth the price/time?
August 08, 2007, 10:20:50 AM
Hold on, let me make sure I understand how this works...

A 3' wide board is 36" wide. A 22" radius curve is, unless I'm mistaken, only 22" around...so shouldn't an oval with 22" curves fit onto a 3' wide board? In fact, shouldn't I technically be able to go all the way up to a 26" curve or theoretically higher?
#13
General Discussion / Re: Is DCC worth the price/time?
August 08, 2007, 06:07:03 AM
I'm a bit confused now.

I went to my local hobby shop today to pick up a few more things for my project, and while there the guy working there told me I can expect to fork out over $1,000 to start a DCC setup.

Now, he's been doing it for a while, sure, but that sounds outrageous to me. Can anyone give me an accurate (approximate) price for one DCC locomotive and the bare essentials needed to make it go? Just for starters...
#14
General Discussion / Re: Is DCC worth the price/time?
August 08, 2007, 03:08:48 AM
Well, a design change has been implemented due to a lack of space, so it will now be a single 3'x8' table that I will add an additional 2' to at a later date. I already have the lumber.

Now, my initial table design is very simplistic. I intend to simply nail the plywood directly to three 4x4 'legs' that will support it. I'm using three for additional support, one at each of the outer corners, and a third in the center. The other side of the table will be against a wall, so rather than using 'legs', I intend to anchor the other side of the table directly to the wall it's up against. The wall in question has a protrusion near the floor made of concrete (this is in a garage), so legs would actually force the table to sit about 8 inches away from the wall, wasting what little space I have available to me.

I considered placing a 2x4 'frame' around the underside of the table, but in all honesty, I don't think the extra support is necessary, and since the table will only be four feet off the ground, I want to make sure there's ample room underneath it so I have room to work when drilling holes and running wires for the switches, lights, and other things I eventually intend to incorporate. I may have to, though, because the plywood I got is slightly warped, and I may need a frame just to 'flatten' it out a bit.

Honestly, the idea of incorporating separate sections of current with switches and whatnot is somewhat intimidating. I'm neither a handyman nor an electrician (I'm a computer geek by trade, so building things with my hands, repairing cars, and other sorts of 'handyman' tasks are foreign to me), so the idea of constructing things of that scale are a bit overwhelming at times. However, I like meticulous detail, so building the various scenery and electrical parts should appeal to me quite a bit.

Anyway...just more input on my upcomming project.
#15
General Discussion / Re: Is DCC worth the price/time?
August 07, 2007, 01:35:26 PM
Laying ballast...

Now...just so I'm clear, that's the model equivalent of gravel, right?

That being said, is ballast necessary on a model railroad or is it merely for aesthetic value? Either way, I'll most likely add it anyway. I know I never saw it used on my great grandfather's set, and I never saw any problems occur, but then he never did anything exactly 'by-the-book'. My grandfather had ballast, but then he was going for a very aesthetically pleasing look too, so it's a toss up.