News:

Please read the Forum Code of Conduct   >>Click Here <<

Main Menu
Menu

Show posts

This section allows you to view all posts made by this member. Note that you can only see posts made in areas you currently have access to.

Show posts Menu

Topics - WoundedBear

#21
General Discussion / Before I forget................
December 31, 2016, 04:41:40 PM
Happy New Year  ;D

Sid
#22
HO / Tearing apart to paint....now complete
December 29, 2016, 06:34:14 PM
Here's a little BLI light Mikado that needed gear train repairs. That went easily enough, then the owner asked me to do a weathering job for him. Here's some shots so far.   This one broke apart fairly easily. Had a heck of a time sorting out where the clippy thingys on the cab were. I could see it wiggle, but couldn't figure out where to pry. There is a silly little snap-clip in each corner.

I even went  as far with this one as to paint the underside of the engine and tender. Here's some shots of the disassembly and masking. The electrics on these lift out as a one piece unit once the tender pickups are unsoldered. I will have some up close final shots soon.

Sid


#23
General Discussion / World's Largest.............
November 27, 2016, 08:23:53 PM
Rail Trestle.

http://blog.traingeek.ca/2016/11/lethbridge-high-level-bridge.html

An interesting read. This is in the southern end of the province I live in.

Sid

#24
HO / Another "loco" project....Now Completed!
February 26, 2016, 05:13:45 PM
Me thinks I have too much time on my hands some days.....lol. I have always thought the SP Cab Forwards were some of the coolest looking locomotives ever built, but running an AC-12 or the likes on my little layout is unthinkable. But the more I kept looking at my layouts "big" power, a 2-6-6-2, I couldn't help wondering if I could turn one around and do a freelanced version for my shortline.

I grabbed a tanker and a tenderized version of the Mantua models and started the disassembly. Pretty soon I had a pile of parts to work with. I pulled out all the DCC harnesses and saved those. The model has a nice channel milled along the length of the boiler weight for wiring. I need to find a tender to use, but that shouldn't be too difficult. I stared at parts for a while, test fit some things together, took a few measurements, had some coffee, had some T, looked at some pictures on the net, stared at parts some more, hummed and hawed and scratched my head, had more coffee and T, found my Evergreen styrene box and some fresh blades, took a deep breath and went to town.


The first thing to do was get a front and rear cab wall made with the roof arch defined. I also wanted to be able to use the original Mantua mounting pins/tabs for the new bodywork. I used .040" styrene, and slowly got two walls reasonably square to the chassis and each other.


The builders at Stihl Yard's shops will utilize anything they can get their hands on. They found these doors and windows at Mr. Tichy's junk yard  ;) 
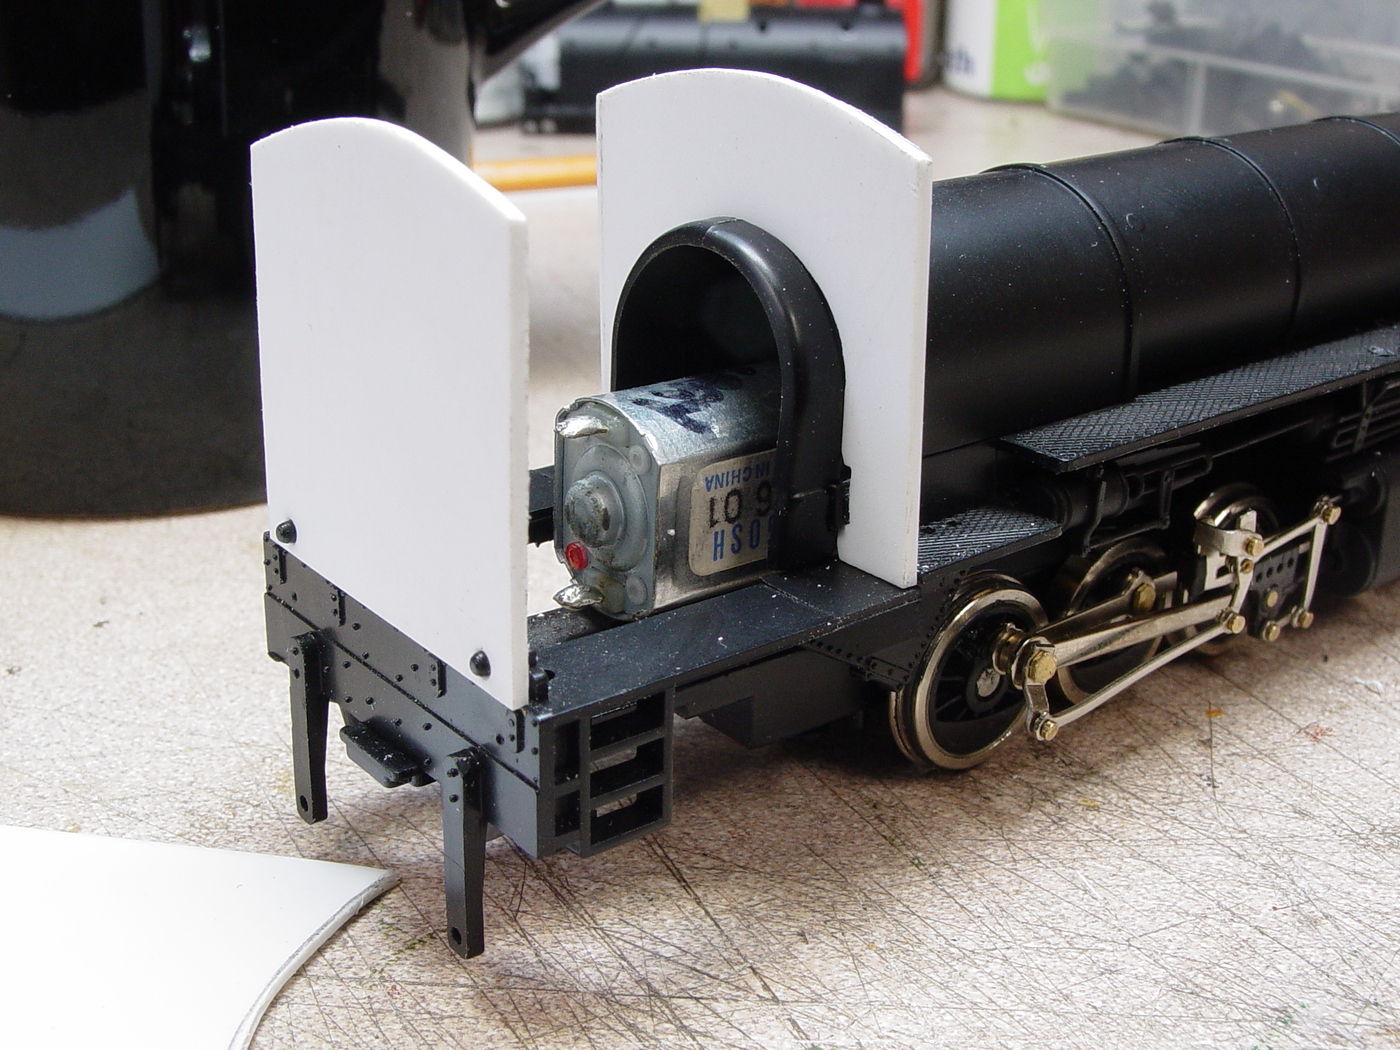
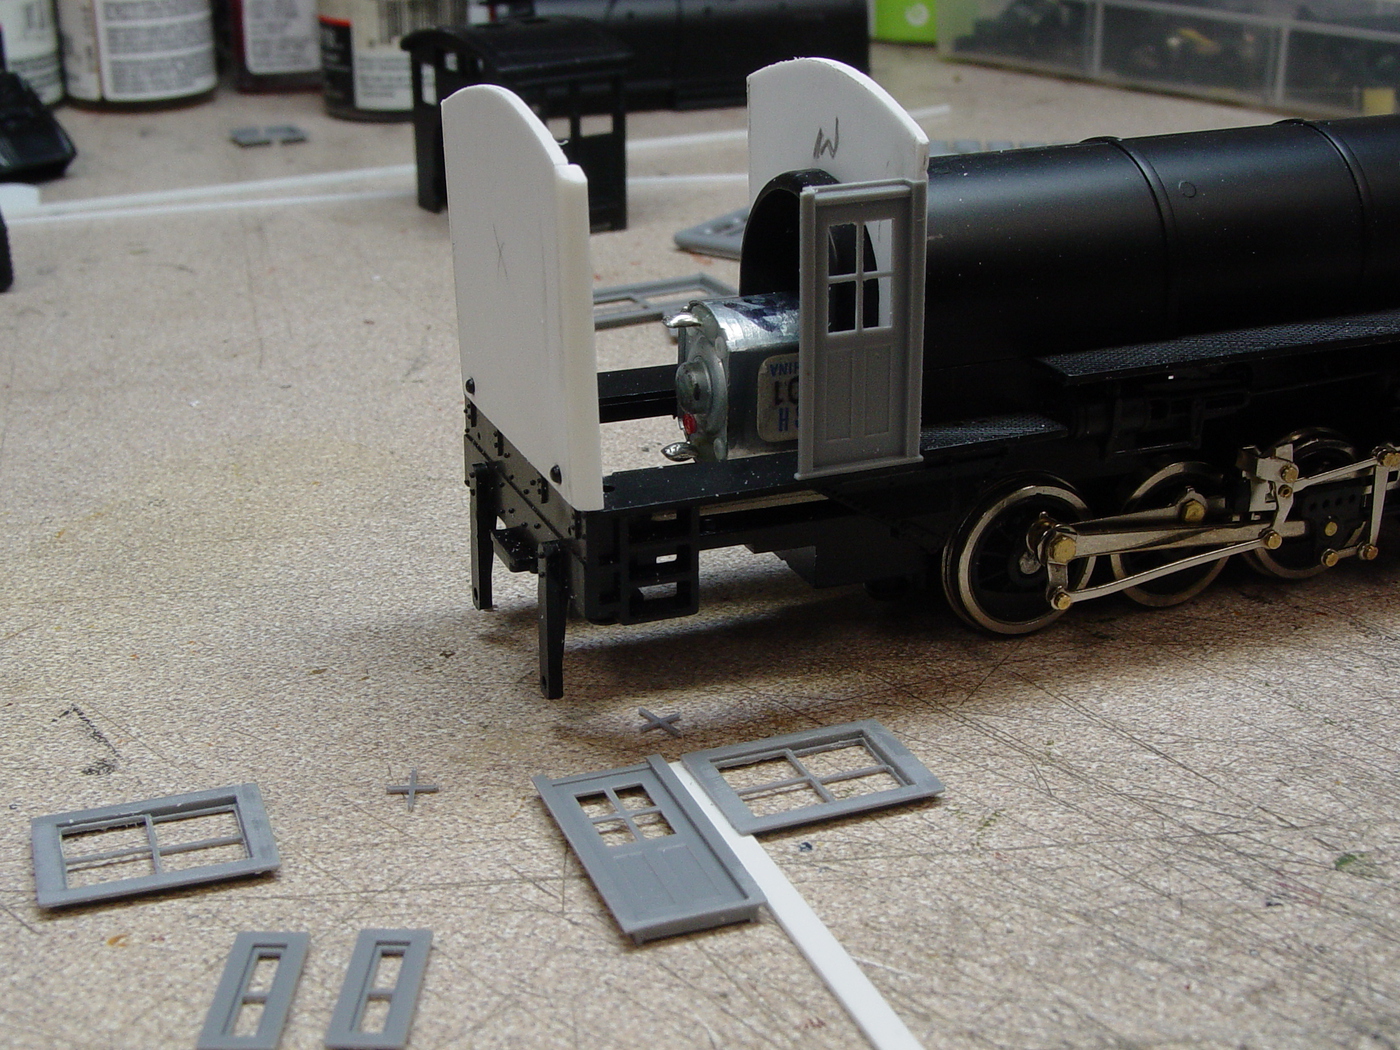
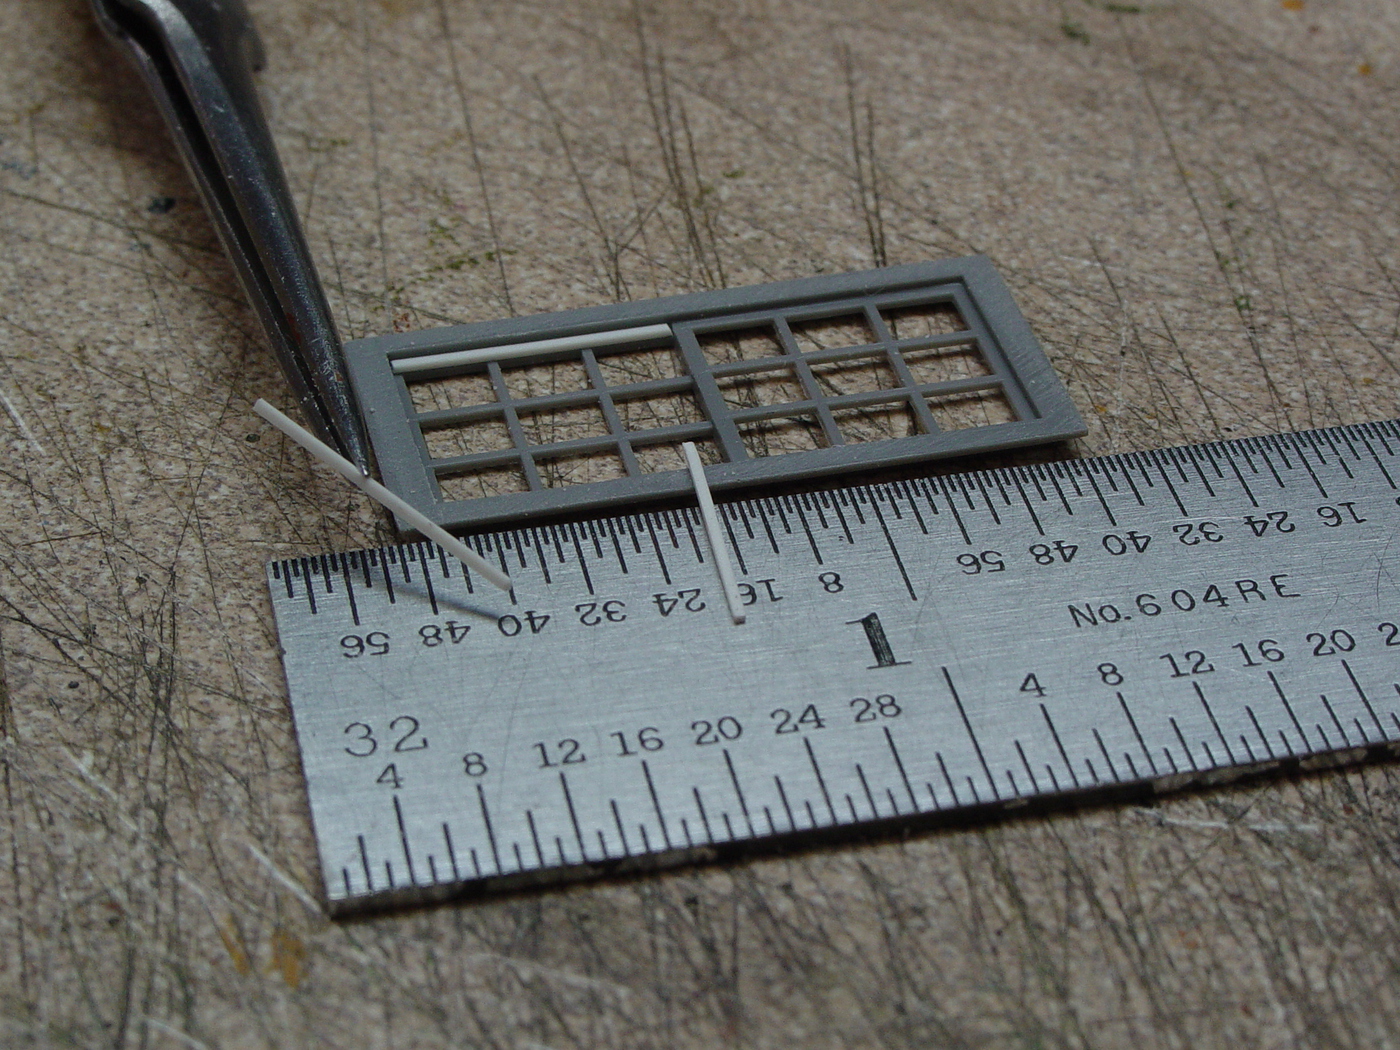
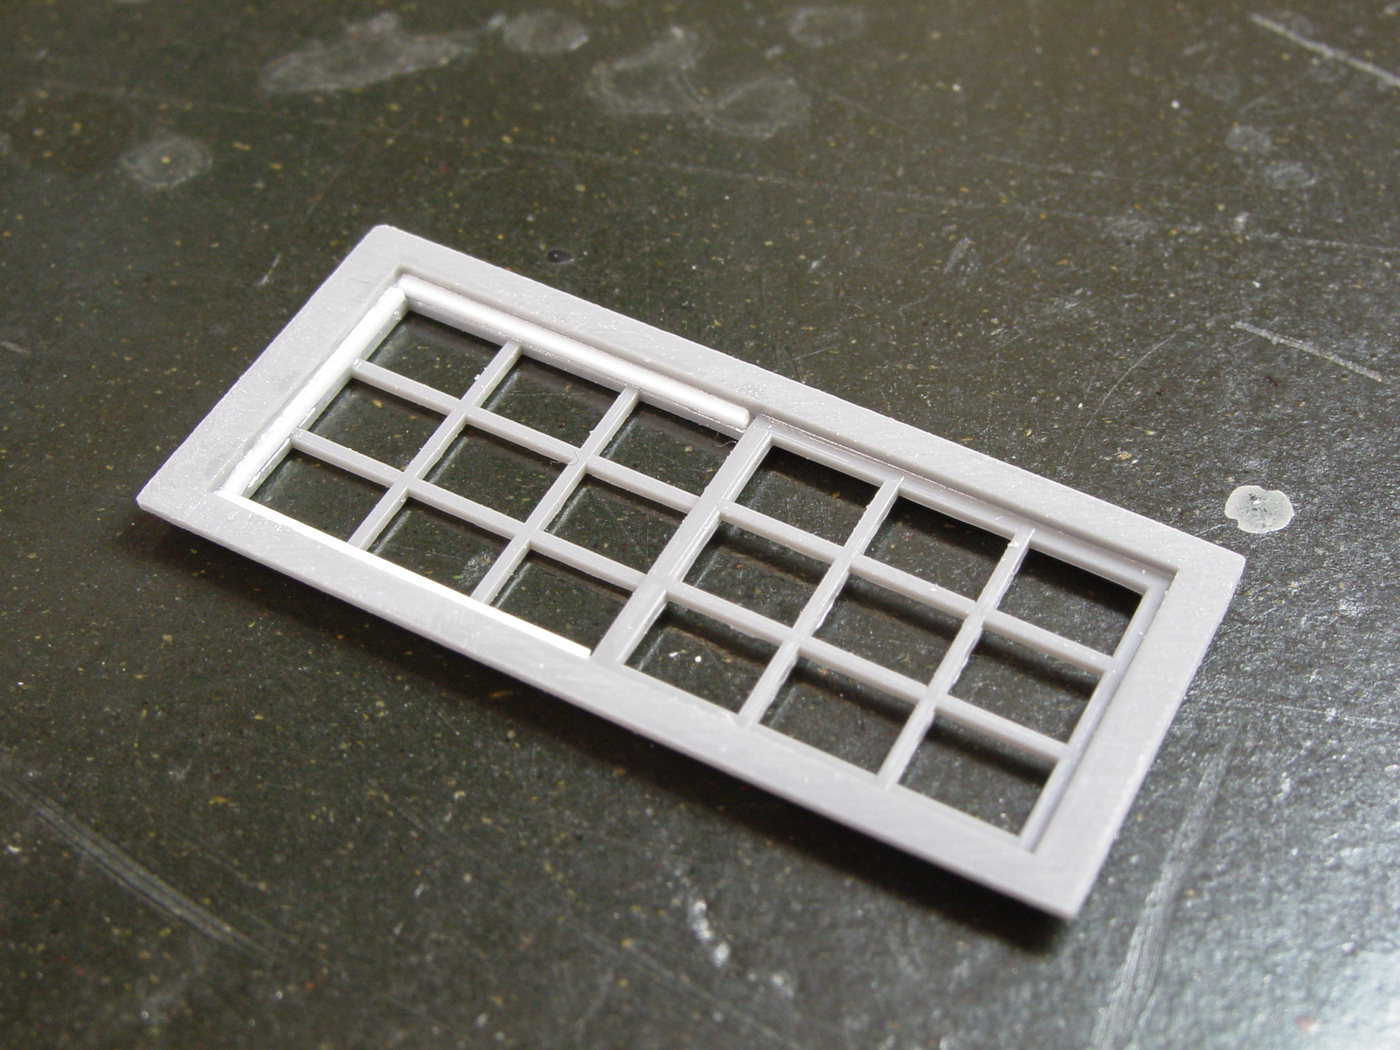
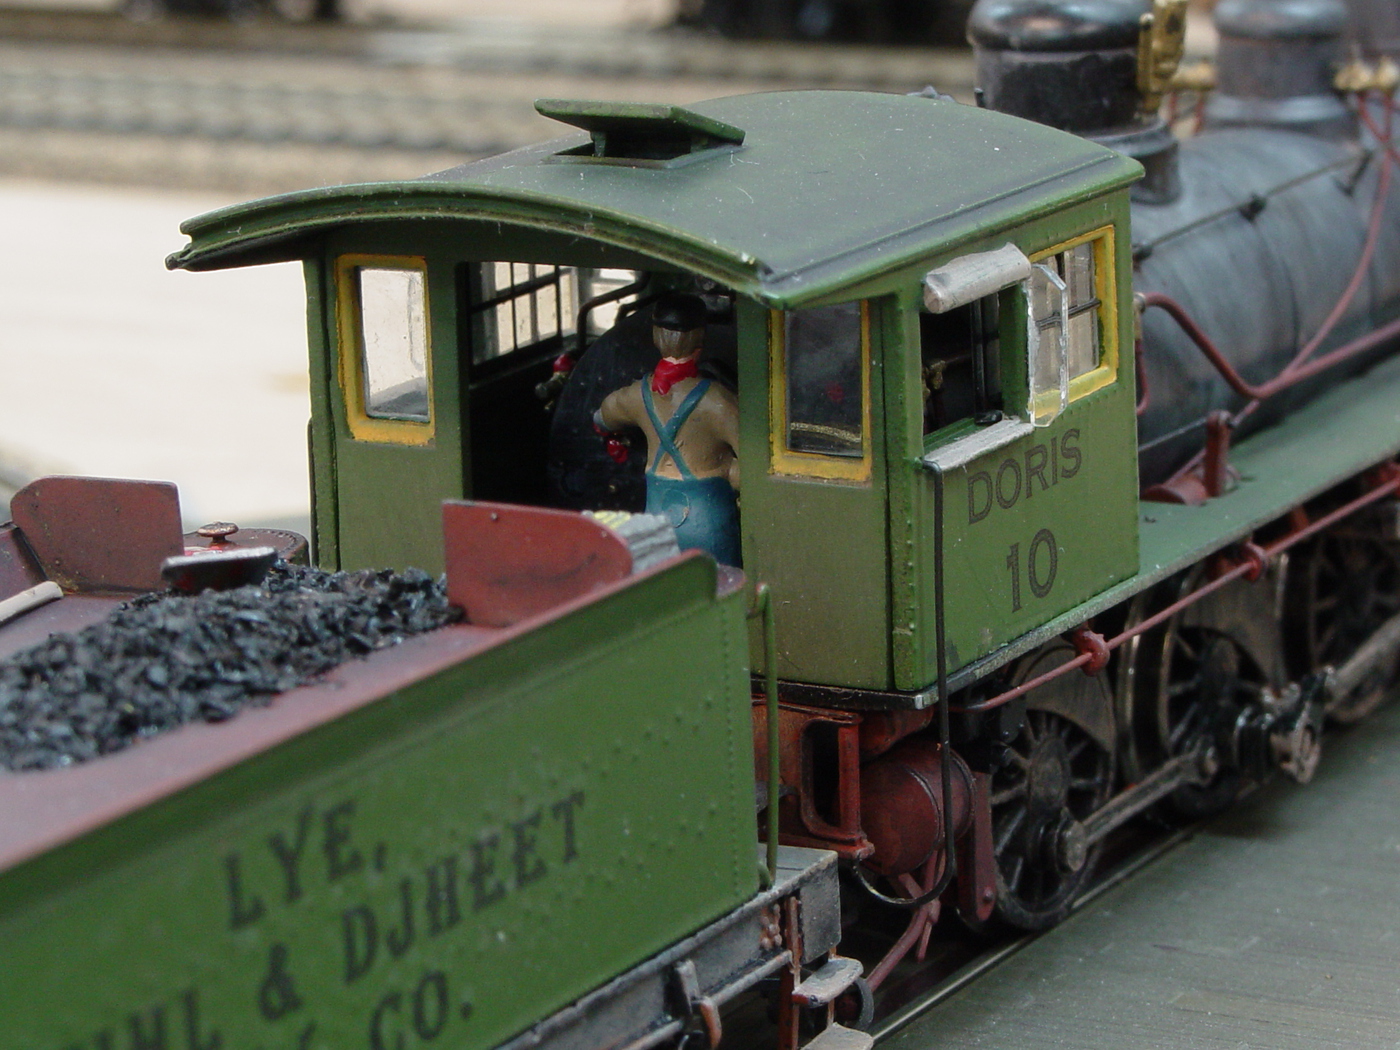
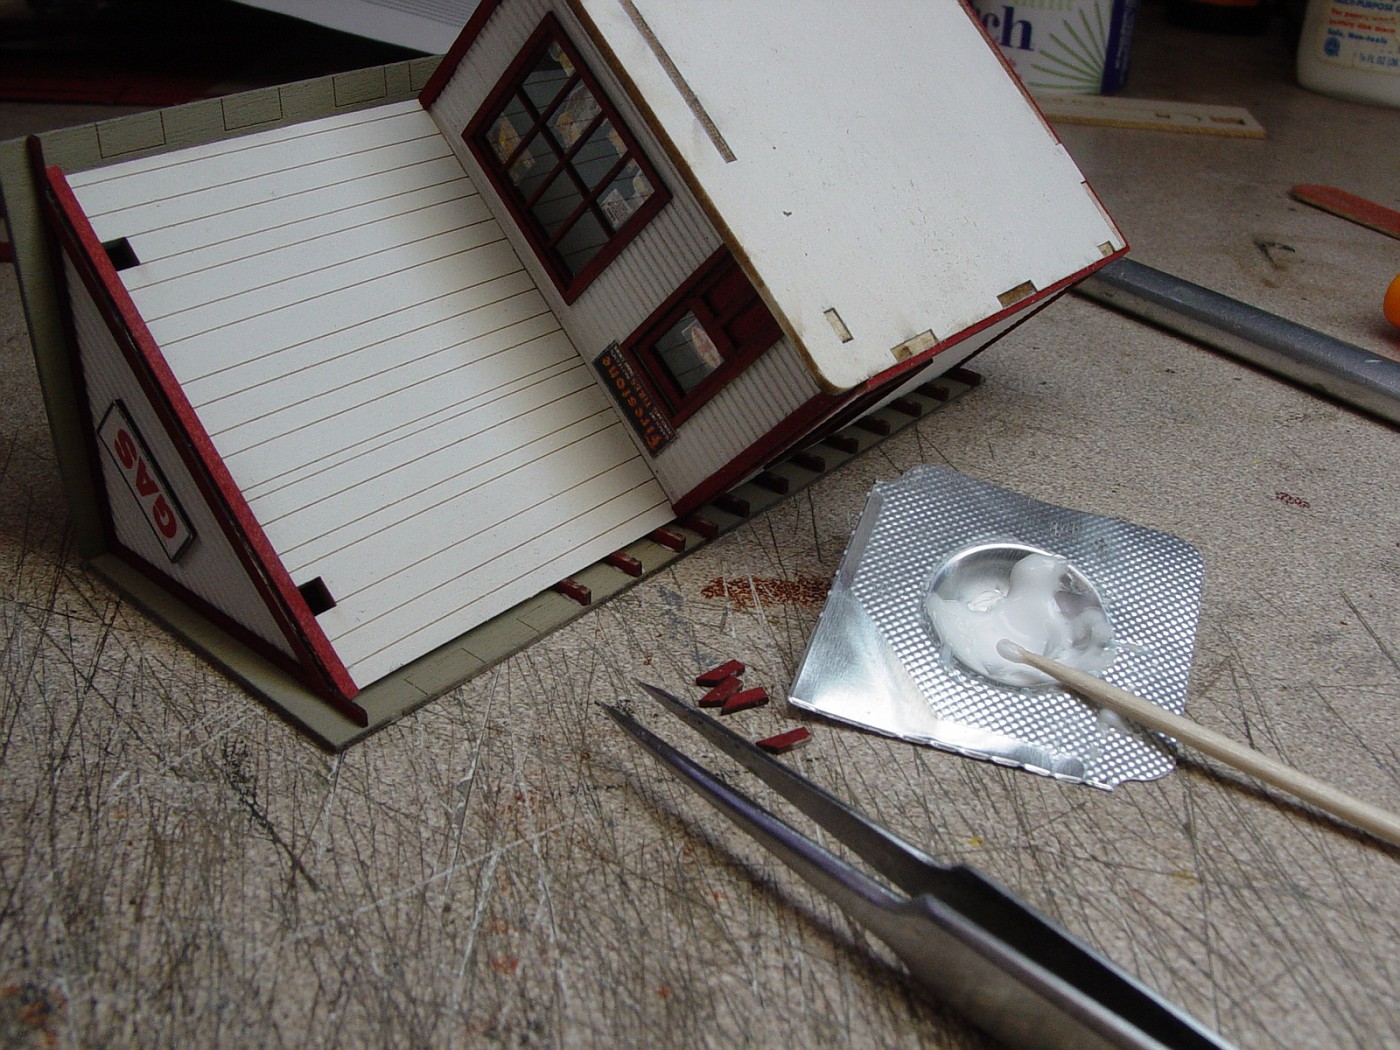
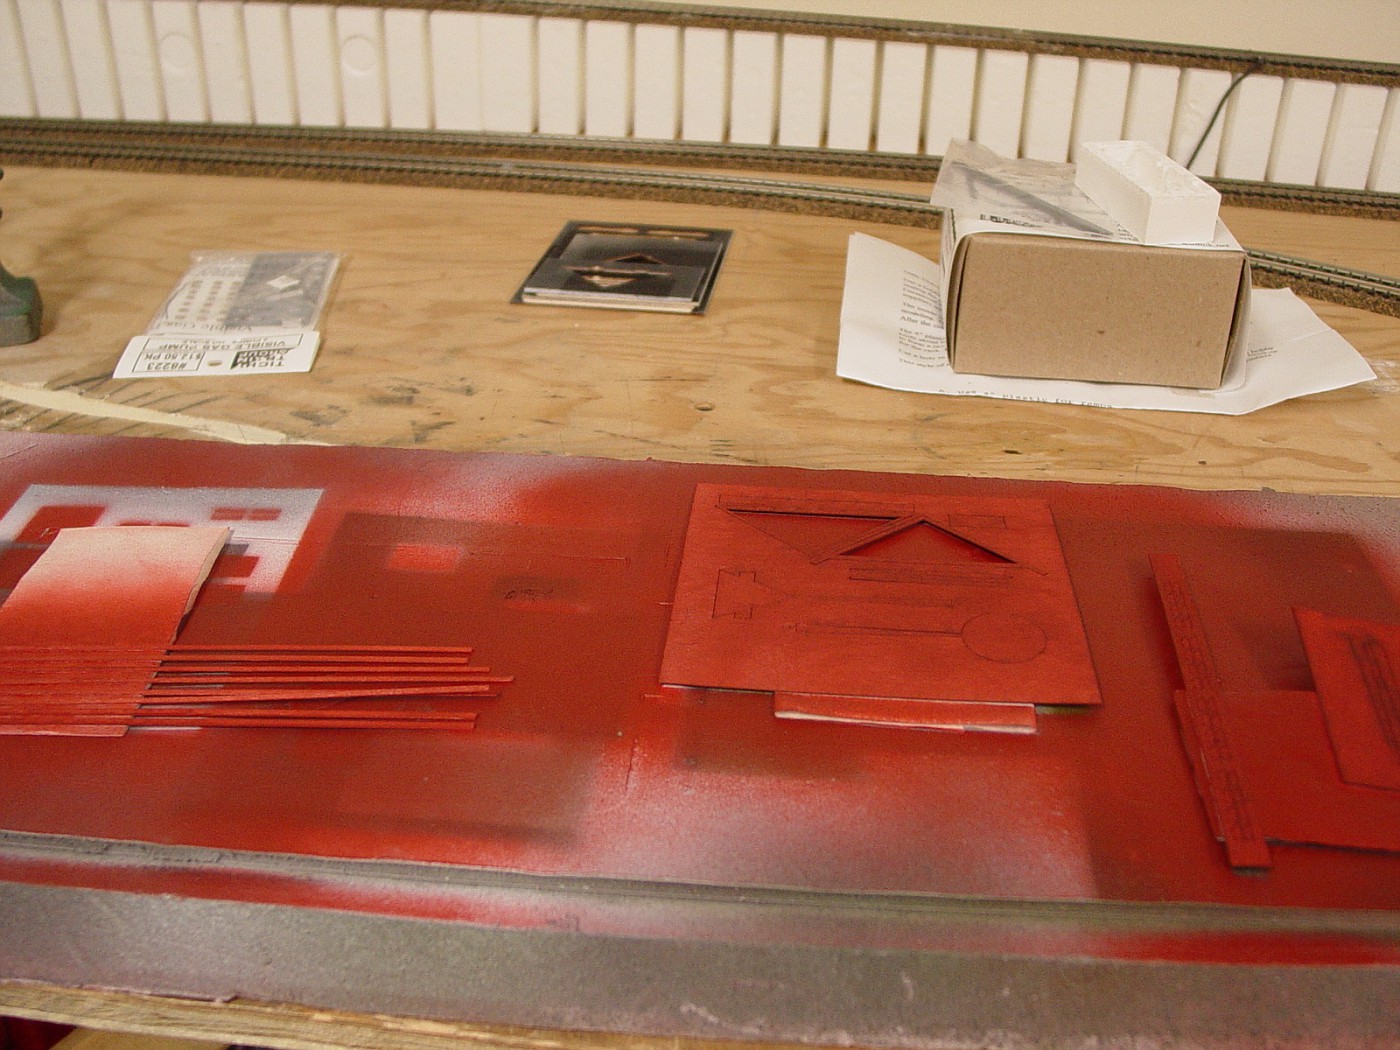
and with some slab steel the boys got to work. A few minor mods were required to the front window, and some of the muntins will be removed eventually. These windows even have laser cut glazing for a finishing touch later. A suitable door was selected, just for the reason that it looks like it could be a sliding door. All frames were modified a bit with a file. I used .080" 1/4 round for the front corners.


To get rid of the sliding window look for the front window, I added a few strips of .015" X .020" strip. I think if I get rid of enough muntins to make a three light window, it should look alright.


#25
HO / Painting and decorating...........
February 19, 2016, 08:30:31 PM
Been at the bench again.....well, still.....got another couple of projects done.

The first is the Spectrum 4-6-0 that I ripped apart in this thread.... http://www.bachmanntrains.com/home-usa/board/index.php/topic,31358.0.html

This one got named after my mother who passed away late last year. Done in my usual corporate paint job for the Lye, Stihl and Djheet.


#26
HO / Picture time
February 08, 2016, 07:06:36 PM
Been busy at the model bench..............not going to go into too much detail, just posting up some pics of recent progress. Some of the scenes are starting to really take shape. Others....not so much....lol.

Enjoy!

Sid


#27
HO / The things we do for fun.........
December 27, 2015, 01:40:29 PM
I tore this Spectrum 4-6-0 apart today. It's the next one in line for a "corporate" paint job on the Lye, Stihl and Djheet Railway. Still have to dismantle the tender. A couple pins broke, but everything important came out of it's mounting hole. Even managed to pop all the glass out without a fracture. I'll post pics when this one is done.

Sid

#28
HO / Weathering a Ready-to-Run reefer model.
December 16, 2015, 12:44:57 PM
Hi guys. I thought today I'd share one of my methods for weathering a Ready-to-Run model and making it look like she's got some miles on her. This started out as a Roundhouse 40 foot wooden reefer model. I'm pretty much going to walk you through the steps, one by one, that I use to age my models. So firstly, here we go with the raw model, fresh outta the box. Shiny, huh? lolol


First step I do is to pick out a few individual boards with three shades of paint. Grays and earth tones work as do browns and reds. You want to pick out a few boards here and there and lightly paint them. The scribe lines help to guide the brush, but don't sweat a few small smears on adjacent boards. I used a Hull Red, Leather and Earth Brown for the three shades.


Then, using a medium dark rust color, I give a hint of color to all the hardware and hinges.


Once that is done, the next step is to add some rust. I used Testor's enamel stain to do this, but you could make your own from thinner and any dull yellow paint you have on hand. Use a wide brush, and lightly flood the area with stain. Do one horizontal surface at a time. To get a proper effect, the washes/stains need to be applied quickly and with as few brush strokes as possible. Once the whole surface is wet, leave it alone to dry for an hour or so. Then stand the car up and do the end panels. The results are bright rust highlights in random areas.


Then run a black wash down the "metal grate" roofwalk to emphasize the grid pattern.


#29
General Discussion / test
November 30, 2015, 02:43:39 PM
Size check


#30
HO / 1930's Gas Station scene
February 10, 2015, 10:25:12 AM
Hi guys.

Up for your perusal this time is a quickee little three week project that used up 3 kits from the stash. We have a Banta Gas Station, a set of Tichy visible gas pumps and an outdoor inspection pit from Guts, Glory and Gravel. The Banta kit itself is a small kit, and I felt the scene needed more than just the one building. Also, Banta does not include any castings or detail parts, so it's up to the builder to supply appropriate era pumps and details. The Tichy ones suit my era. The GGG inspection pit is a plaster casting.


Painting was fairly simple and straight forward. White primer for the walls, Tamiya dull red lacquer sprayed on the windows/doors/trim pieces.


The inspection pit was also a simple paint job. I started with a base coat of acrylic raw umber craft paint from Michaels, I then dry brushed Model Master colors onto the floor and walls to represent aged concrete and stone. I can't recall exact color names, and don't care to. I use earth tones and grays and when it all looks right, I stop. A touch of red made the barrel stand out. Some greige color for the steps and voila. I think my method of painting castings is very similar to how Dave Frary does his rock castings.


Assembly was quick and easy. These kits line up so well that I didn't even use a gluing jig. Did I mention how much I love rafter tails?


Sid
#31
Here's a great video I stumbled across on Youtube.

This is back in the day when men were men and manual labour was common. You British rail fans will like this one.

https://www.youtube.com/watch?feature=player_embedded&v=vx6hmSclbRE

Sid
#32
General Discussion / Fallen Flags
August 07, 2013, 03:51:36 PM
I guess we can add another to the ranks.....I saw on the news today where the MM&A has had to file Chapter 11 bankruptcy after the Lac-Megantic fiasco. Almost 70 jobs gone down the drain. Sounds like the company's assets of 50-100 million aren't going to be enough to payoff the damages. The railroad was failing before the wreck, so the chances of finding a buyer are going to be slim.

So what now? Do the insurance companies get stuck with the bill?

Sid
#33
Balrog.........

You aren't the only one who has had warnings from this site. Admins need to take a closer look.

Here's the link to the AVG page from the other day.

Looks like a problem to me.

http://www.avgthreatlabs.com/sitereports/domain/bachmanntrains.com/linkreport/www.bachmanntrains.com%252Fhome-usa%252Fprod_serv.php/?utm_source=TDPU&utm_medium=OS

It even states which link is infected.


Sid
#34
General Discussion / Bachmann Service
February 15, 2013, 11:57:28 AM
This morning I had cause to speak with the folks at Bachmann's service department. I'm not going to go into the issue, but I will say that Bridgette and Larry handled things very well, and I'm still a happy Bachmann customer.

Thank you.

Sid
#35
HO / Confusing documentation.
April 25, 2012, 05:12:29 PM
I need a little clarification from Bachmann on this one please. I recently purchased an HO 3 truck Climax with sound (Item #82926 http://www.bachmanntrains.com/home-usa/products.php?act=viewProd&productId=3497)

Which CV list from the Soundtraxx site is applicable to this locomotive?

http://www.soundtraxx.com/factory/OEM%20pages/bachmann/ho_70ton_3truck_climax.pdf

or this one?

http://www.soundtraxx.com/factory/OEM%20pages/bachmann/ho_3truck_climax.pdf


I guess I need to know what the difference between a "3 truck HO Climax" and a "70 ton 3 truck HO Climax" is. I thought there was only one version of the 3 truck Climax? Am I missing something?

Thanks in advance....

Sid
#36
HO / My latest project...a Banta Modelworks laser kit.
February 16, 2012, 09:49:59 PM
I always enjoy seeing other people's work here, and folks like Jonathan, Roger and GN2680 can be a true inspiration. I would like to share with you my latest build. I put the last two months into this, and finally got the write up done this afternoon.  My goal is to show people that a craftsman style kit is not all that scary, and with some basic tools and skills, most anyone can pull it off.

I hope you enjoy my efforts.

Click on the link below to view the complete build sequence, as well as shots of the completed model. The page is image intensive, so I apologize to anyone with a slow connection.

http://members.shaw.ca/wbearart/Banta_Everest_Country_Store.html

Here's one teaser pic...........


Sid
#37
General Discussion / Lost in Translation?
May 26, 2011, 12:33:06 PM
I found this rather humorous and thought I'd share with y'all...........

I was at my LHS the other day and picked up a new CPR 'boose for the layout. This is NOT a Bachmann product, and I won't mention the manufacturer's name, but what was printed on the side of the box in the "details" area was quite amusing.

I think this is what happens when French gets translated into Chinese and then back into English  ;D

Quote....."Proportionally ballasted outlay for optimal radii navigation"

Sounds like lawyer speak for "Correctly weighted for good tracking"......lol.

Sid
#38
General Discussion / A Thank You to Board Members
February 24, 2011, 04:57:15 PM
I'd like to say thanks to everyone that contributes to this site. I spend much more time reading than I do posting.....and with everything I read, I learn a little more.

Members such as Hunt, Jim Banner, Richg, & JWard..... to name a few....are a true inspiration and a wealth of knowledge. It is because of the knowledge gained here that I was able to undertake my latest project and have it turn out a success. I remotored and added a decoder and new lighting to a 30 year old Mehano diesel that for sentimental reasons, I can't seem to part with.

Thanks again gents.

Sid
#39
General Discussion / 12 Volt DC power supply
April 11, 2010, 08:42:43 PM
I purchased one of these units a while back to power all of my accessories on the layout. The train-set wall warts just didn't seem to cut the mustard.

This unit delivers 12 volts at almost 6 amps. Thats plenty for all my Micro-Mark Switch Tenders, the turntable drive, my programming booster and any lighted buildings I may add in the future. It has a built in cooling fan and can live in cramped quarters. I just bucked off the cigarette lighter adapter and connected the two wires to my panel.

http://www.princessauto.com/truck-trailer/truck-accessories/automotive-accessories/8260689-ac/dc-power-converter

Sid